Scrapbook Flower From Cupcake Liner

Scrap Booking Using Kitchen Supplies

Simple techniques can add serious “wow” to your scrapbook layouts when you use unusual supplies to create page accents. And cupcake liners, a kitchen staple, are a perfect substitute for patterned paper when you create flowers. The lightweight texture adds an element of surprise to your creation.

Here, we’ll show you two “can’t miss” flower ideas for your cupcake liners: fringed flowers and box flowers.

1. Fold cupcake liner in half. Cut fringe along crimped edge of liner. Unfold.

steps

2. Cut another liner in spiral direction, leaving nickel-sized circle as the base.


steps

3. Adhere spiral to circle base in circular fashion. Top with button or brad.

How to Create a Cupcake Liner Box Flower

macro

steps

1. Fold four cupcake liners in half.


steps

2. Layer folded liners over one another and secure together with adhesive.


steps

3. Fold back each cupcake liner edge to add dimension.

(Originally posted at: http://www.creatingkeepsakes.com/articles/Box_Flower_and_Fringe_Flower_Techniques?bc=c ! Scrap Booking Technique: Using Cupcake Liners to Create Flower Accents by Joannie McBride)

Hatching Deviled Egg

Make your favorite deviled egg recipe – cut deviled egg top off and fill – put “cap” back on and finish with raisins for eyes and a piece of a Cheetos for the beak. Very cool Easter diner surprise!

Decorated Hard Boiled Egg

Decorated Hard Boiled Egg

Easter eggs:
1. Boil eggs.
2. Crack shell by tapping it lightly against hard surface. Make sure you do not crack it too hard as desired effect will not happen.
3. Dip in colored water (food color). Keep submerged for twice the time the instructions say to allow the egg to take coloring inside the egg.
4. Peel shell off and serve or serve as they are and let your guests find the surprise inside.

“Country Victorian” Decorating

Victorian Era style reflects home decor during the reign of Queen Victoria from 1837 – 1910. “Country Victorian” focuses primarily on the feel and look of Victorian countryside summer homes. While this decorating style is very similar to traditional Victorian decor, it incorporates a more airy and relaxing feel.

Colors: “Country Victorian” decor incorporates a variety of colors such as pastel pinks, greens, blues, and peaches. These can be paired with darker hues of mauve and incorporate the occasional navy, indigo, or deep forest green. “Country Victorian” homes often inspire picturesque images of the countryside or seaside. Pick an idyllic image of a rustic vacation spot and use this to influence your color selections. Sea foam green and varying shades of blue with a touch of peach will invoke an image of the seaside while pink, mauve, mint green, and forest green will speak of a countryside filled with flowers growing down a rolling hillside. Rich patterns are common in Victorian home decor on everything from the furniture to the wallpaper.

Materials: “Country Victorian” decor typically uses lots of lush and luxurious fabrics such as silk, velvet and lace. Your “Country Victorian” home should still have an abundant supply of interesting fabrics, but you should not to use those with a light and airy feel such as cottons and chintz. Use lace or gauzy fabrics at the windows to let plenty of sunlight in. Embroidered blankets, rugs, pillows, and throws will lend to the Victorian feel and look of the home. Tassels and ribbons

are also distinctly Victorian. Furniture with a lacquered grained wood finish will give the home a bit of a rustic feel. Wicker is another material frequently associated with “Country Victorian” homes. Couches and chairs should be plump and a bit overstuffed.

Accessories: In a “Country Victorian” style home, it is the little touches that often bring the look together. Victorian decor is often associated with a business and somewhat cluttered look. Placing antique items and Victorian era prints and artwork throughout the home will complete your “Country Victorian” theme. Dried flowers are a popular feature in homes of this style. Nature-inspired knickknacks such as seashells and pebbles work with this theme as well. Opt for pewter and brass light fixtures. Painted plates and porcelain dogs and other small creatures are fine finishing touches for a “Country Victorian” home.

Easter Egg Decorating Ideas and Tips


Picture Perfect: Print one-inch-square versions of your favorite snaps on white water-slide inkjet sheets. Spray with three coats of Krylon Crystal Clear Acrylic to set the pix, apply trimmed images to dyed or spray-painted eggs, and display the results to your favorite little chicks.

Beat the Bunny to the Punch: Use simple-shaped paper punches to cut forms from painter’s masking tape. Smooth tape pieces onto clean, white eggs, and dye the huevos. Let eggs dry completely and remove tape to reveal lovely white patterns.

It’s a Wrap: Wrap blown eggs in spirals of colorful yarn, trim, ribbon, or rickrack held in place with clear-drying glue or paste.

Pop and Hop: Add 1 or 2 drops of food coloring to separate batches of the sugar syrup from your favorite recipe for popcorn balls, add popped corn, and form into colorfully corny eggs.

Go Natural: Toss two handfuls or more of yellow onion skins into a 4-quart pot of cold water and bring to a boil. Simmer until the color of the water is deep brown. Position small fern fronds or leaves on clean white eggs and hold the greens in place with a rectangle of old pantyhose stretched over the egg and fastened at the back with a wire twist tie. Add 1 cup of white vinegar to the pot and gently place as many wrapped eggs into the kettle as will fit without crowding. If using blown eggs, place a lightly weighted, heat-proof plate on top of the submerged eggs to ensure that they’re completely immersed in the dyeing liquid. Continue to very gently simmer the eggs for at least two hours, or for richest results, overnight. Remove eggs from the pot, allow to cool, and remove the stocking and foliage to reveal leafy imprints surrounded by a deep sepia brown.

Stripes: Rubber bands of varying widths, placed tightly around the egg, will leave strips of the under-color after dyeing.

Wax-Resistant Patterns:  Have your kids use a crayon to create desired image on a hard-boiled egg. The wax will repel the dye when you dip it, leaving your design. Mom can then place the dyed, dried eggs on foil-lined, rimmed baking sheet in 250 degree oven for 10 minutes to melt wax. Remove the eggs, then carefully remove residue with paper towels.

Animals: Create a bunny, hen, pig or even the family pet using the egg as the body and adding ears, tail, and so on. Pipe cleaners, yarn, paper cutouts, non-toxic markers and pompons will bring your critters to life.

Stencils: Tape small stencils to the egg and brush or sponge-on some colorful designs.
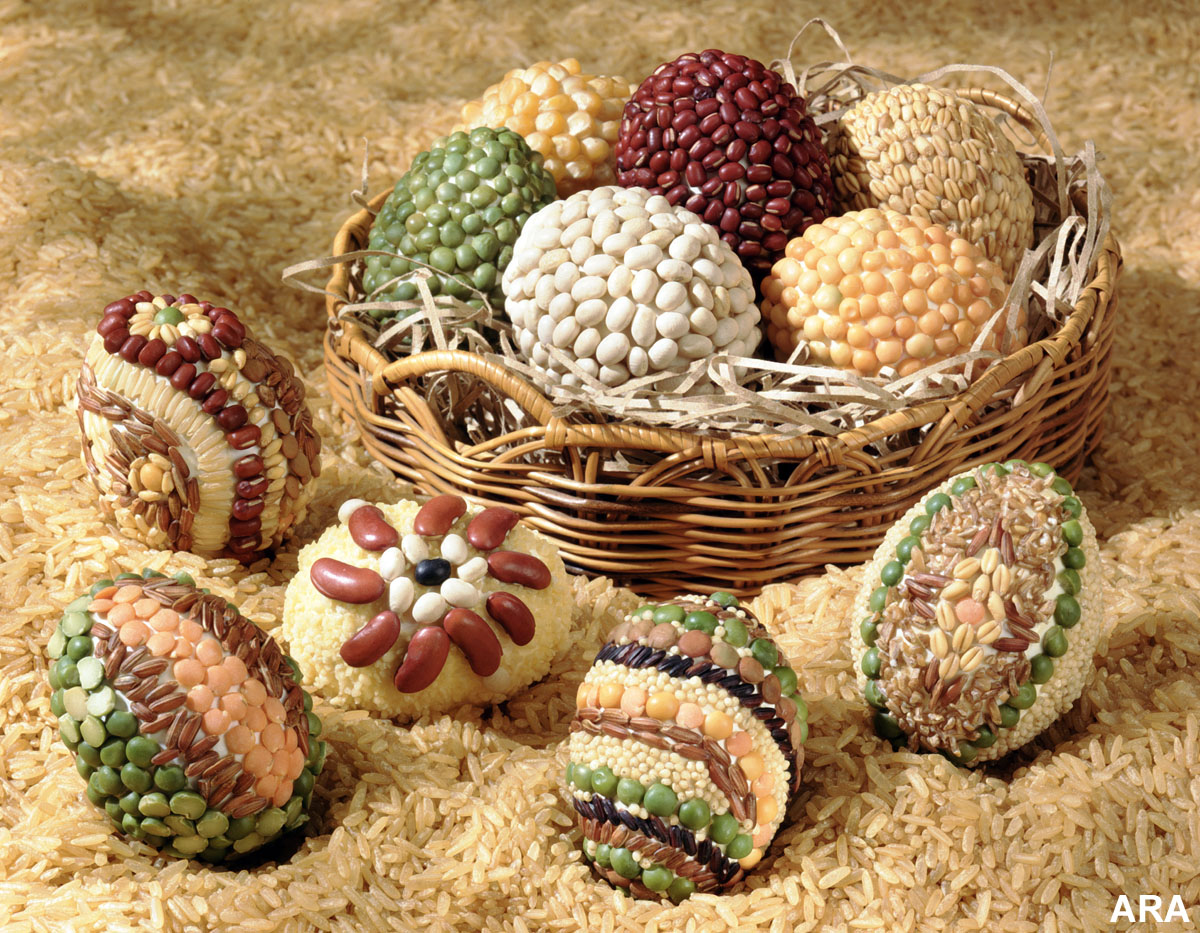
Shell Games: Use hollowed-out eggshells if you’d like to save your decorations for future use. And don’t let the egg insides go to waste. Enjoy them scrambled and topped with Old El Paso® salsa, add to Betty Crocker® Pound Cake Mix, or freeze them for another use.

Centerpieces: For an eye-catching centerpiece, try layering eggs and Easter grass, lasagna-style, in a wide-mouth glass vase (a large tube or cube works beautifully). Eggstraordinary!