
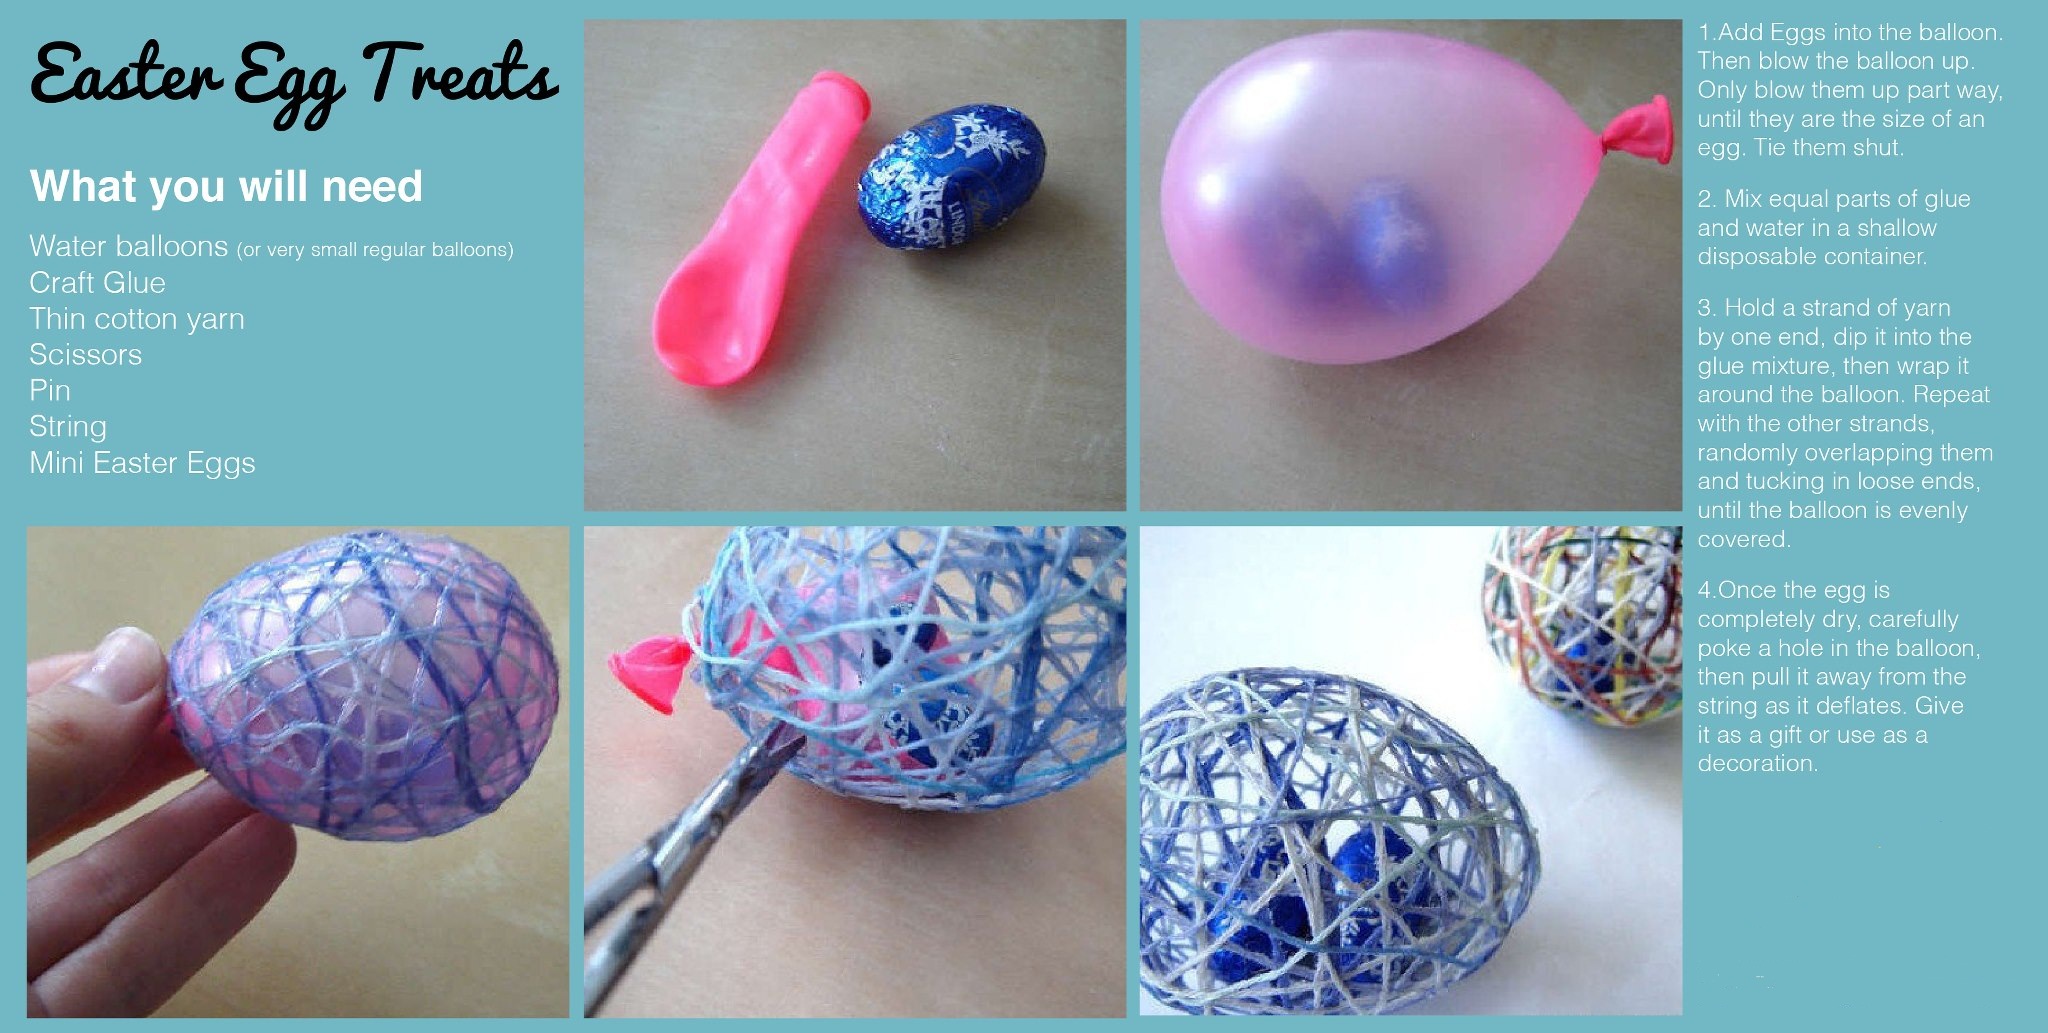
 Sent to us from Cynthia and this originates from FaceBook profile: LittleBirdieInvitationsandDesigns. What a great cheap little egg gift that could be used to put in a basket, to decorate a table, little party gifts for adults, name tags with a tag tied on with a pretty ribbon. You can even used a multitude of different colored yarns that you have as leftovers. I am even thinking red, white and pink for Valentines Day, black and orange for Halloween. Birthdays could be colors to match your theme. Christmas red, green, white with something just very special inside. See where I am going? I even think you could get extra creative and glue or tie little embellishments onto these to make them extra special. You could even get the kids involved to make a bunch for a class party.
Crafty Egg Surprise CHEAP
10
 - Copy")


