How To Turn Your Baby’s Clothes Into A Memory Bear

You can buy this pattern from Funky Friends factory: https://www.funkyfriendsfactory.com/memory-bear-keepsake-toy-sewing-pattern

1: Gather Materials
Purchase a sewing pattern online from and lay out all the materials and fabrics you’re going to use.

2: Prepare Those Pattern Pieces
Trace all the pieces included in the kit and cut around them leaving about 1/8 of an inch around the borders. Then iron the interfacing pieces on the fabric with the sticky part facing the back of the fabric. Once that’s done, cut the pieces out accurately on the tracing lines.

3: Sew Different Parts of The Head Together
Start by sewing the different pieces of the head together like the face and the forehead. Then follow up with the eyes and ears before moving on to the back of the head. Sew the side pieces on the back of the head and when that’s all done, here’s what it should look like.

4: Sew Legs & Body
Now you can move on to the body starting with the tummy and then the inner legs. Then continue by sewing the pieces of the back and outer legs. Your sewing project should look something like this so far.

5: Sew Arms & Feet
Start by sewing on the foot pads and then move on to the inner arms and outer arm pieces as shown in the photo below. Make sure to sew the outer arms closed along the top, from V to a W.

6: Join Head To Body
It’s time to put the two big pieces together. The best way to do this is to turn the head right sides out and position it ‘inside the body’ so you can pin the pieces together at the neck seam, with the fabric right sides together. Sew the head on and turn the bear right sides out through the turning gap. This is what it should look like at this point.

7: Stuff the Bear
Stuff the bear starting with the legs, arms, head, and then the tummy area last. Then stitch the gap closed on the back of the bear. Finally, cut the felt piece for the nose.

There you have it, your own memory bear that you made from scratch with your favorite baby onesie!

Penguin Baby Shower Cake

©Jeffrey Scott Thomas – 2019

First, I must say that I am by no means an expert at making a cake. I am learning and this cake does have errors. I learned by seeing mistakes in the final product.

My son was having a baby, now born and almost a month old name Elizabeth Rose Thomas, and he loves penguins. So by request he wanted a penguin cake. Now, how was I going to do that I wondered? I didn’t want to just go with a sheet cake – this is my grandbaby we are talking about. I had to do something 3-D. So my investigation on how to create it started.

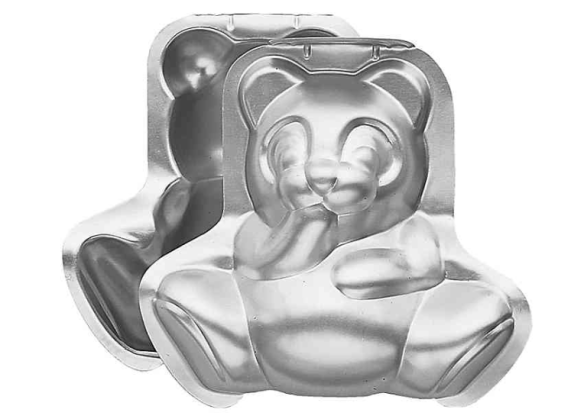
I found a website that shows different cakes made from the Wilton teddy bear stand up pan. I had access to one of these and decided it was going to work. With a little cutting of the cake it could work – I hoped!

I decided to use the cake lying on its back like a baby on an iceberg. So I would have to use Wilton pans that were the circles and ten inches and two inches deep. I would need two of these at two inches high each to give me room to cut the cake to form the iceberg. I would also need to make the teddy bear cake and that would need some cuts as well.

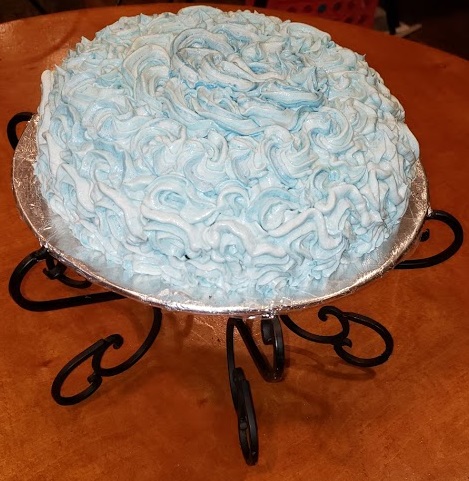
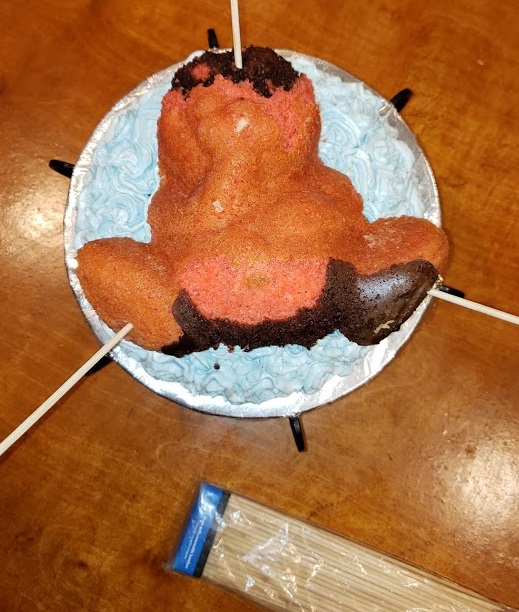
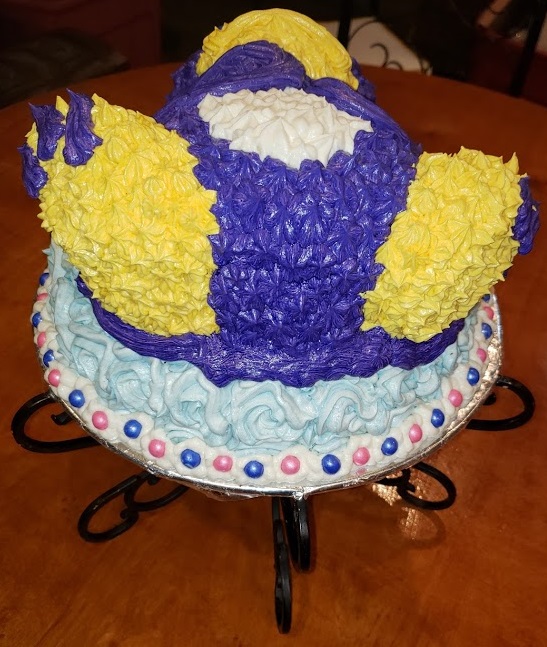
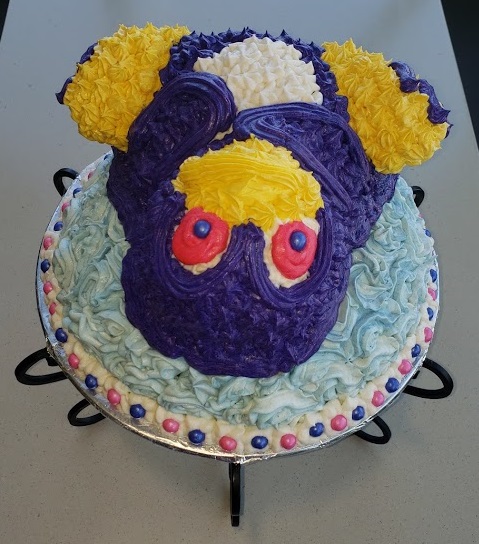
I used a cake stand I had already had and covered it with foil. I added a scoop of icing on top to help the cake not slide. I added the one layer and then covered the top with a thick layer of buttercream icing. I put the other layer on top of that and pushed down slightly. I then carved the cake to be a half dome but with the top having a bit of a more flattened side so the penguin could sit on top. I iced this using white buttercream icing with an icing bag that I wiped several variations of blue onto the inside of the bag so that when the icing came out the white icing has blue hues to it. I didn’t want it to be all white or all blue. Icebergs have a natural blue and sometimes green hue to them. It came out really nice.

©Jeffrey Scott Thomas – 2019

©Jeffrey Scott Thomas – 2019

I then made the teddy bear cake to directions. I carved off the ears and a bit of the snout. I also cut down the back so it had a flat surface so it would rest evenly on top of the iceberg. I placed the penguin cake down on top of the already iced ice berg. I immediately added thin wooden dowels through the feet, arms, head and belly. I pushed them all the way to the cake board. I then trimmed them to the level with the cake.

©Jeffrey Scott Thomas – 2019

©Jeffrey Scott Thomas – 2019

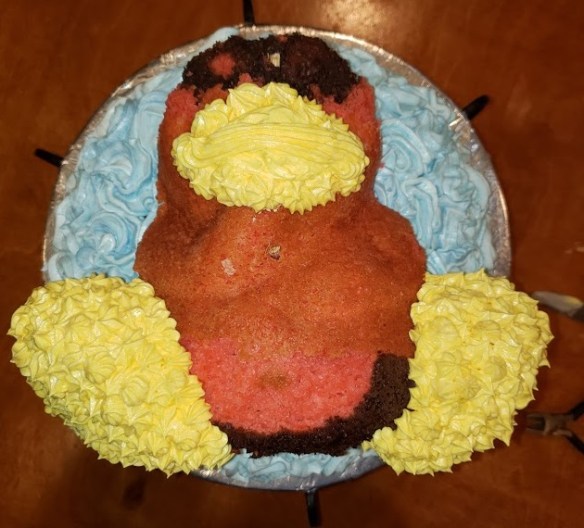
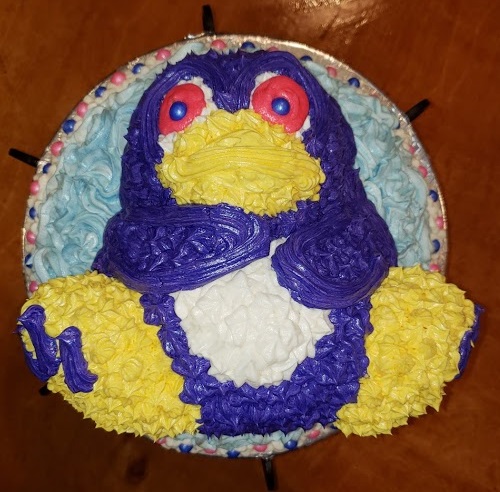
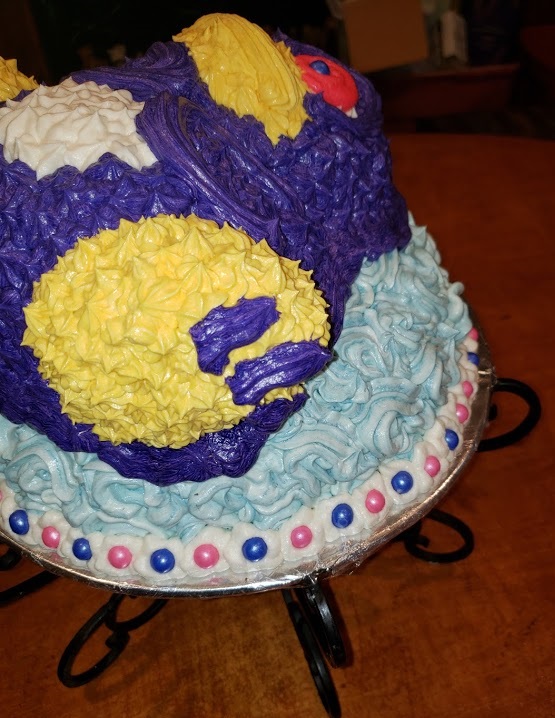
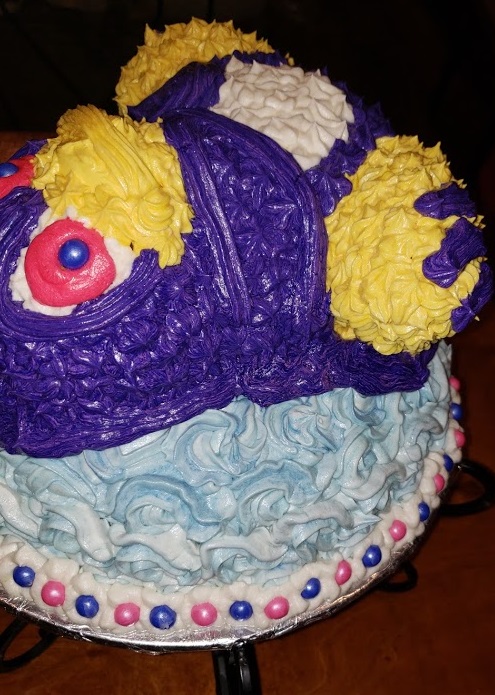
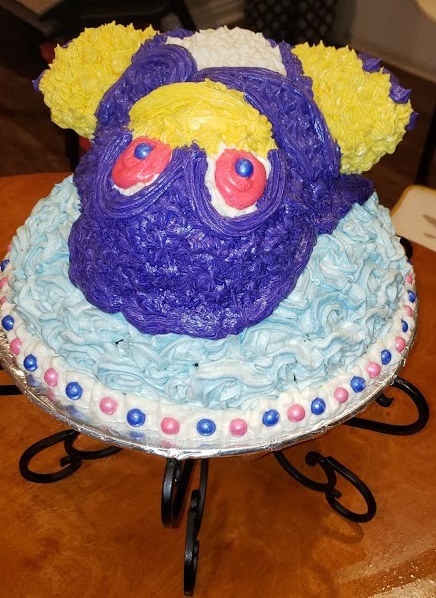
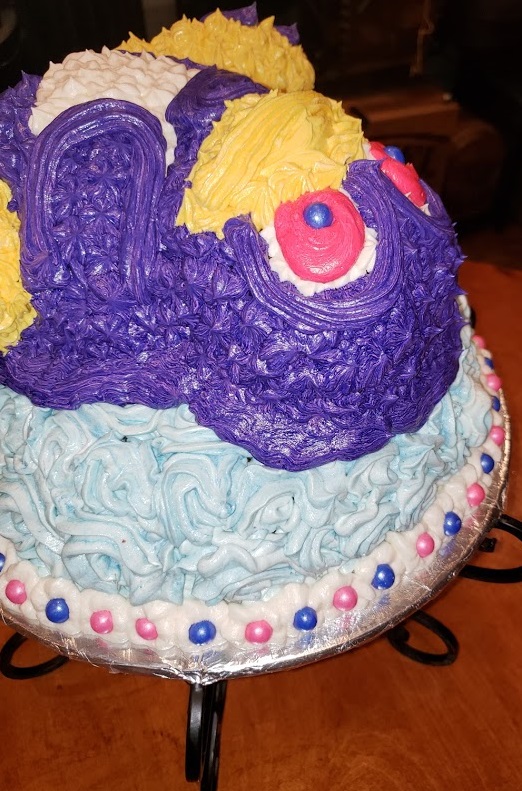
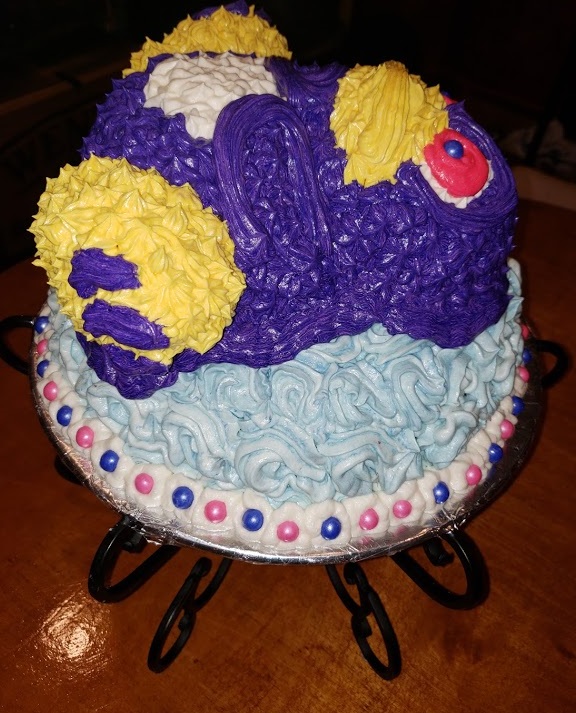
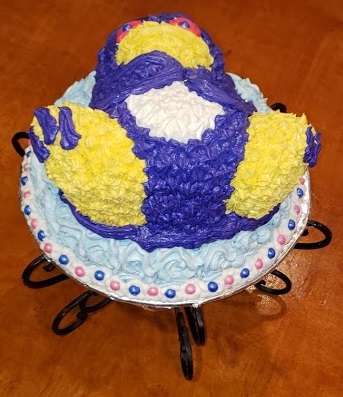
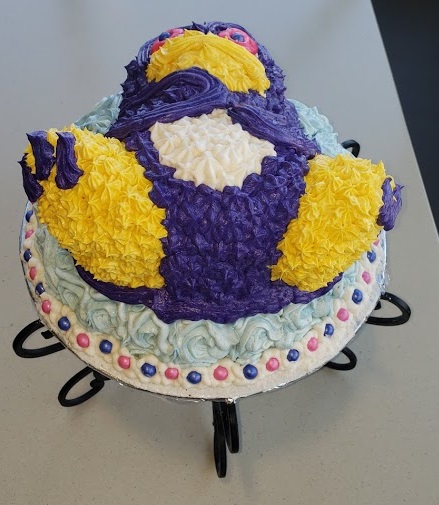
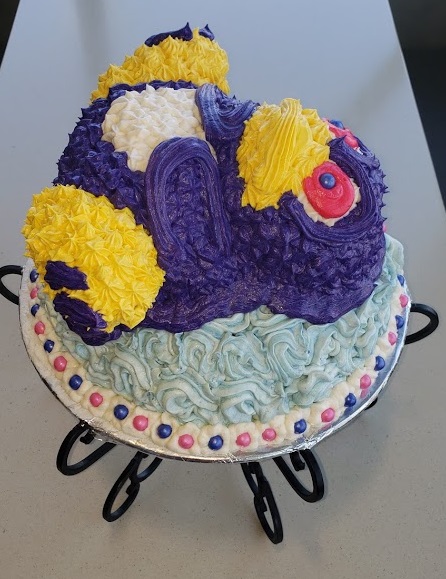
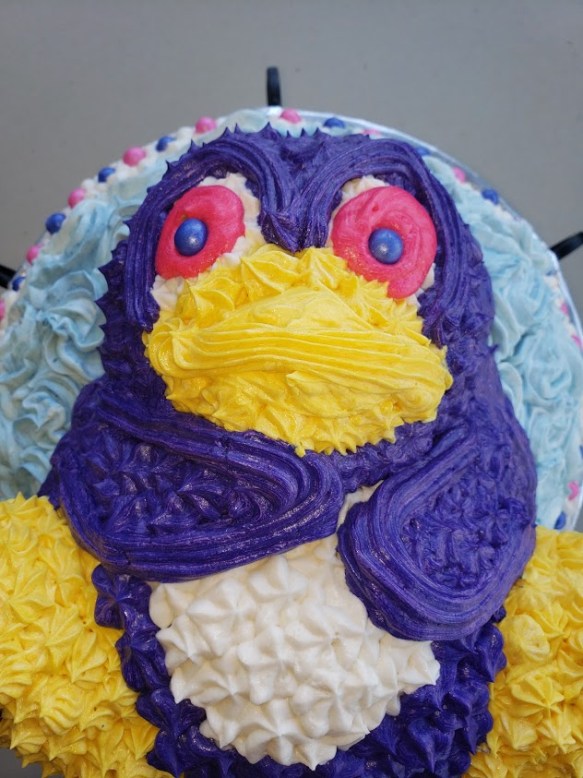
I then used yellow icing and a wide star tip to cover the feet and beak. I mention wide because I would uses a smaller tip next time. I iced the white belly. I iced the purple (which came out really darker then I wanted but made the mistake of tinting too much icing and wasn’t going to remake it). I then added the eyes which again came out darker than planned. I piped a border around the bottom of ice berg and border around the area where the penguin joined the ice berg. I added candies to the bottom border and to the eyes. Used a nice little cake decorating set I found that has bags and tips and everything you need to decorate this cake.

©Jeffrey Scott Thomas – 2019

©Jeffrey Scott Thomas – 2019

©Jeffrey Scott Thomas – 2019

©Jeffrey Scott Thomas – 2019

©Jeffrey Scott Thomas – 2019

©Jeffrey Scott Thomas – 2019

©Jeffrey Scott Thomas – 2019

©Jeffrey Scott Thomas – 2019

©Jeffrey Scott Thomas – 2019

©Jeffrey Scott Thomas – 2019

©Jeffrey Scott Thomas – 2019

©Jeffrey Scott Thomas – 2019

©Jeffrey Scott Thomas – 2019

©Jeffrey Scott Thomas – 2019

©Jeffrey Scott Thomas – 2019

©Jeffrey Scott Thomas – 2019

©Jeffrey Scott Thomas – 2019

©Jeffrey Scott Thomas – 2019

©Jeffrey Scott Thomas – 2019

©Jeffrey Scott Thomas – 2019

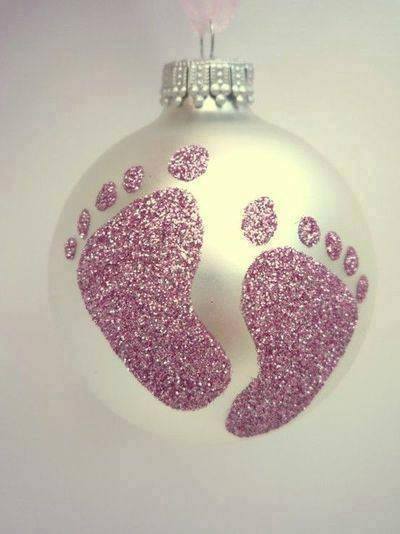
To top it off I used a little pink fabric bow that is just hand made to add to the top to give it a bit more of a girl appearance since the purple icing came out darker than planned and looked more like a boy. I then wish I had sprinkled iridescent edible glitter on top to give a sparkling finish.


*****WHITE CHOCOLATE BUTTERCREAM ICING *****

10 MINS * MAKES 2 3/4 CUPS
Creamy, sweet, and perfect for any treat, you’ll want to make this frosting for all of your favorite cakes.
Ingredients:
2 sticks (1/2 pound) unsalted butter, softened 12 ounces white chocolate, melted and cooled slightly 1 cup confectioners’ sugar 1 teaspoon pure vanilla extract.

In a Kitchenaid mixer (or one like it or a hand mixer can do with a little extra attention to making sure it has no lumps) beat the butter at medium speed until creamy. Beat in the melted white chocolate. Add the confectioners’ sugar and vanilla and beat at low speed, scraping the sides and bottom of the bowl, until light and fluffy.


*****CAKE MIX*****                                                                                                                              I used box Duncan Hines Devil’s Food Cake (Chocolate) and Strawberry and followed directions.

Baby’s First Christmas Ornament

We have all seen Christmas ornaments for Baby’s First Christmas. They all look non-personal. You can make one that is personal and special to your child. You can use a glass bulb or you can use plastic in any color. You could also use the ones from a craft store that is clear and can be opened. If you use one that can be opened you could put a little keepsake inside as well. To make the glitter footprints use white school glue. Spread white school glue across a sheet of wax paper. Take the wax paper and place on the bottom of your child’s foot. If your child’s foot is not being cooperative tickle the top of the foot near the toes. They will extend their toes allowing you to do this part much easier. Now place the foot against the bulb. Having someone help you is very helpful. Roll the foot a little to make sure the glue print is a good impression. Wipe your child’s foot with a wet wipe. Over a bowl pour the glitter onto the bulb. If need be press lightly to make sure it adheres well. Allow to dry overnight. Use a spray polyurethane to spray two to three light coats over the entire bulb to make sure the glitter does not come off. Let dry until no longer tacky. Its now ready to hang on a tree. You could also do this with a hand print.

Top 6 Tips To Provide A Cozy And Protective Environment For Your Newborn

As a parent, you are always concerned about the well-being of your child and try to do your best to ensure the perfect living conditions for him. When we consider the situation of newborns, extra attention needs to be given to every chosen item and way of decorating the living space chosen for the new member of the family.

This is the most sensitive period in their life and they need to feel cozy and protected so that they might grow up healthy, feeling well and comforted all the time as well as receive the proper education. Therefore, let’s analyze together top six tips to consider when this is what you want to provide for your newborn.

Ensure a Proper Sleeping Environment for the Newborn

As parents at the beginning of their experience, you should know that the way in which your newborn manages to sleep through the night is very important for him and yourselves. Moreover, extra care needs to be given to this aspect because, as most of you probably know, during their first months of life, newborns do not perceive any difference between days and nights.

Therefore, you need to create the perfect environment in which they might start learning the difference in this case by creating their own sleeping schedule to cover their needs and requirements from this perspective.

decor

Make Sure Your Newborn Feels Safe

Given the fact that everything is new in their life now, newborns need always to feel safe in the new environment they live. Simply making sure they have their favorite toys with them can mean a lot. Also, making sure they have everything they need in their space and that they can reach everything easily is also important to consider for the development of a protective space for the baby.

Use Small Tricks for Fast Comforting

Creating the proper atmosphere in their living space means establishing a good sleep cycle early in their life. You may want to consider dimming the lights at night, teach the newborn to sleep in his / her own bed and sing lullabies to calm the baby down whenever this is necessary.

Be there whenever your newborn wakes up and handle him / her the baby bottle or breastfeed to give them the impression that you are never away from reach. This will make them feel comfortable in their personal space.

decor1

Cover their Needs in the Comfort of Their Own Room

Babies cry for various reasons: they may be hungry, too tired to sleep or simply need to attract attention. Comforting the baby is a must in these situations. However, all this can be done in the comfort of their own room to make them get used to this idea. Not every baby responds to the same stimulants the same way, but you will find a repertoire of personal techniques to might be perfect for your newborn as long as you keep the whole action taking place in their own personal space.

Wrap Things Up to Recreate the Womb Atmosphere

Newborns need to adapt to the changes that have occurred in their life since they were last in your womb. Recreating that atmosphere can be achieved by wrapping the baby in lightweight blankets, snuggling up or simply strapping on a sling. The warm, cozy comfort of this item soothes the living environment of the newborn.

decor2

Break the Silence When Necessary

Newborns are not always fans of silence. When you decorate their room make sure to include some noisy items in there as well. You will need those when you need to calm him down. This will also help you never let the baby get bored and start crying for no apparent reason.

Finally, with proper furnishing items, a perfect baby mattress, the favorite toys and baby bottles around as well as the parents there to comfort him whenever this is necessary, the baby room will become his new favorite living space.

Foot Print Trucks & Cars

13124721_1193167650714046_1782349112918706708_nThese are so cool. So simple to make. Make the footprint like shown above and use construction paper, sharpie markers and paint to finish. These would make great gifts for the grandparents or extended families or decoration in a nursery. I really love the hand print and footprint creations so many come up with.