Paint Glass Different Colors
Reply

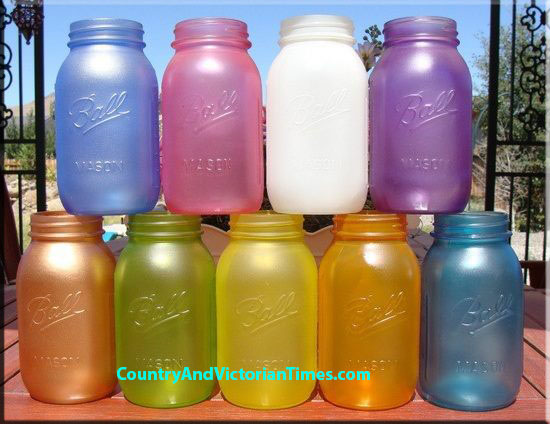 Mix a clear white paint with fabric dye/food coloring until you get desired color. Paint the outside of the glass and let dry. You should have a nice color and you can seal that with varnish or polyurethane to prevent it from peeling. Use to store food products (stored in zip lock bags) in the kitchen, craft items, office supplies in the office, seeds for your garden etc. Do not use these by directly putting food inside of them for your protection. You could paint the bottoms one color and when dry paint the tops another color letting them drip down. I think this being done to a larger size container could be used as a centerpiece for a wedding since you could color co-ordinate them with different color schemes. You can do this with recycled items or it would really bring a dollar store vase up a notch… and don’t stop at glass – you can do this same process with plastic.
 I think this idea for a floor covering is fantastic. Pennies are placed heads up with a ‘goop’ glue to the floor. When all placed and ‘goop’ is completely dry a varnish was poured onto the pennies in several small layers until the varnish was a layer above the pennies and you can not feel the edges of the pennies. This took a lot of time to do and the installation artists did a great job. I do think it is illegal to destroy or otherwise make currency useless so before using any type of cash in your craft/art project please look into the legality of it. I really like how they used old and new. Don’t think because they used pennies that this was cheap. This floor costs hundreds of dollars by the time they were through. Looks amazing – but I would hate to see anyone in the future want to reno it and do something different. It would be a lot of work.
 What a clever way to update an old lampshade (one you already have or one you get second hand). Spray lampshade white and glue/sew old buttons on to create random or specific patterns. Use various shapes and color to create a hodge podge design or go for color specific and/or shape specific depending upon your desired outcome. Goop would be a great (more permanent) glue for this application. This has me thinking about what else could go onto a lampshade to update a room: bottle caps, hat pins, patches, scrap fabrics – it seems end less when you start and think about it.
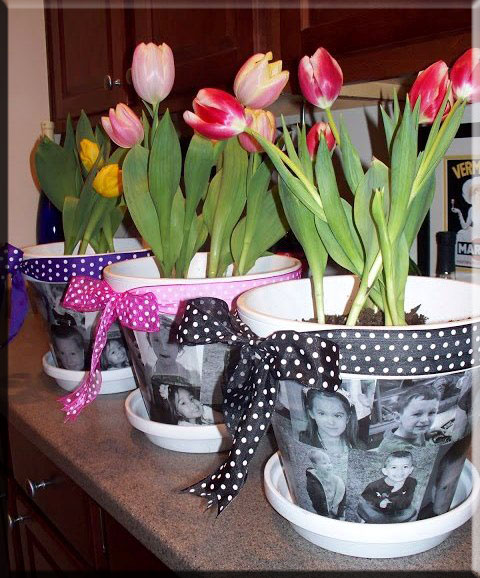 This is a great idea for Mother’s Day – Wedding Centerpieces=
Print on plain paper a series of photos of the Mother’s children or Grandmother’s Grandchildren is sizes ranging from 3×5 to 4×6. You must use regular paper for this project as photos or photo paper won’t mold well to the contour of the pot. Use Mod Podge and brush a coat over the area where your picture is to go and press firmly onto the pot. Use a dry brush to work any wrinkles out that form and then continue until pot is covered. When pot has been given ample time to dry, brush a thin layer of Mod Podge over all the photos getting it into the crevices made from the over lapped photos. Let dry. You can then seal the entire pot with a coat of acrylic spray. Also, think about painting your pot first to give it a new clean appearance. I still recommend using a liner inside the pot – or you could use a thick plastic in the pot before planting. You wouldn’t want such a special gift to be ruined over time would you? You could print the photos as black and white or you could just use color. But test Mod Podge on the color to see if bleeding will occur. If it does spray a coat of fixative or acrylic spray on photos before attaching to your pot. Would be great also as centerpieces for a wedding on each table with pictures of the couple during their relationship.
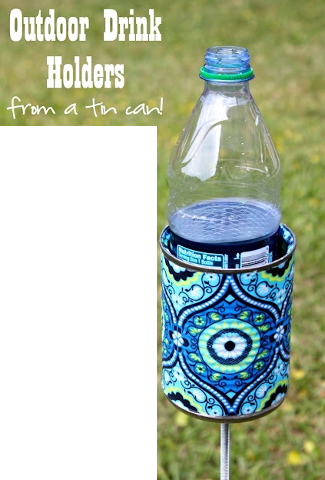 Thoroughly clean can and dry — Paint or decoupage the outside of can with a unique design — Seal with polyurethane — You will need a (minimum size of) 18 inch galvanized bolt (about 2.50 at a hardware store) with a washer and nut. Puncture hole in bottom of can and push the bolt through from the inside of can until head in at the bottom. Under the can on the bolt add a washer and then secure the nut tightly. The longer bolt you use the better. You can also polyurethane the entire can, nut, washer and bolt once done to give a nice shiny presentation and to help prevent rust.
