Outdoor Elegance: How to Create a Tranquil Garden Retreat with Classic Elements

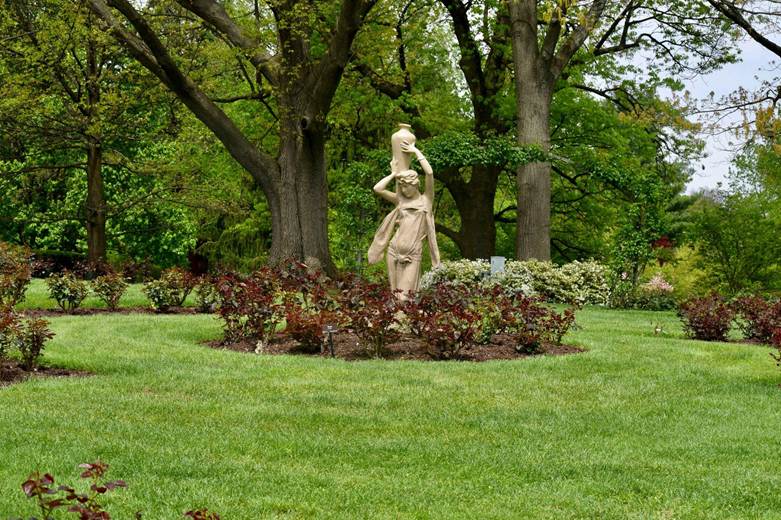
Image: https://unsplash.com/photos/a-statue-of-a-woman-in-a-garden-o61TbwSW2m0

Classic gardens have always been the epitome of elegance and timeless charm. Rooted in European traditions, particularly the French formal gardens, this style is all about symmetry, order, and balance.

Classical architectural elements often feature prominently in American homes, so it makes sense to extend that elegance into outdoor spaces. And while you might picture sprawling estates with expansive lawns and shimmering ponds, classic garden design elements can be scaled down for small gardens and even beautifully integrated with contemporary styles.

Here are the key elements you can use to bring the elegance and tranquility of a classic garden to your own outdoor space.

1. Simple Geometry and Symmetry

At the heart of classic garden design is the principle of imposing order on nature, which is achieved through simple geometry and symmetry. Think straight lines, clean right angles, and circles to form a well-organized layout.

Instead of being randomly scattered, your plant and flower beds should be deliberately demarcated by paving, creating clear paths that guide visitors through your garden. This structured approach also creates a sense of harmony and balance.

A key aspect of the classic garden is bilateral symmetry. To achieve this, imagine dividing your garden down the middle with the shapes and forms on one side mirrored on the other.

This mirroring creates the pleasing and calming effect that’s the hallmark of classic garden tranquility.

2. Lush Greenery

Plants play a supporting role in a classic garden, enhancing the overall structure and symmetry rather than taking center stage with a riot of colors or varying heights and sizes.

The key here is restraint. Stick to a foundation of lush greens, with one or two carefully chosen flowering colors for each season. This will make your garden feel elegant and timeless rather than busy or chaotic.

To achieve the classic, sculpted look, choose plants suited for topiary like boxwood, privet, or yew—their bushes can be shaped into clean, geometric forms like spheres and cones. You can even do playful animal designs if you’d like to add a little whimsy to your garden.

Evergreens are another essential. Varieties like junipers, olives, or holly not only thrive in dry or coastal climates but also retain their structure year-round. These will help maintain your garden’s refined aesthetic in any season.

3. Well-Defined Edges

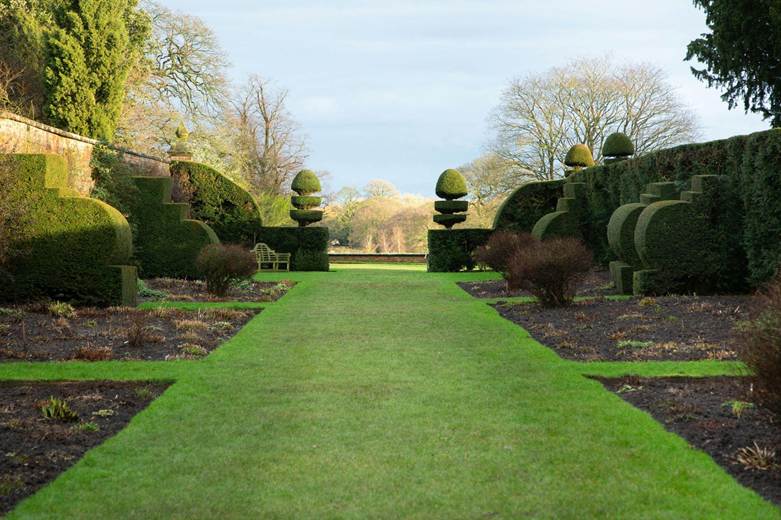
Image: https://unsplash.com/photos/a-long-green-lawn-lined-with-trees-and-bushes-JMWqAmRnXUg

By now you can probably tell that clean lines are a non-negotiable in the classic garden aesthetic. They provide the frame that holds the entire design together and keep your garden looking polished and intentional. Even the most carefully curated plants and pathways will feel untamed without them.

Start by defining your garden’s boundaries, using thick, neatly trimmed hedges to enclose spaces or frame sections. Boxwood hedges are a timeless favorite for classic gardens, but other dense, evergreen shrubs work beautifully, too. Remember, regular trimming is key to maintaining that crisp, tailored look.

Stone or brick edging is another elegant option you can use to mark pathways, flower beds, or lawns. What’s more, it makes maintenance easier by keeping grass and gravel where it belongs.

Natural materials like red brick add a subtle traditional feel and are extremely durable. But if you’re going for a more contemporary look, try concrete or metal edging, just don’t overdo it otherwise you’ll lose the classic vibe.

Decking is another aesthetic, yet practical, way to define edges. For example, a raised wooden deck pairs beautifully with manicured lawns and sculpted shrubs.

4. Ornaments and Formal Features

No classic garden is complete without these timeless elements. They act as a focal point, which is necessary for giving the space structure while also adding a touch of sophistication.

Start with a centerpiece. Consider a classic fountain, a sculpted statue, or a birdbath—anything that can act as the visual anchor of your garden. A key principle here is placement: position it along the axis of bilateral symmetry you’ve established or at the “crossroads” of your paths where the eye is naturally drawn.

Ornaments can also function as “punctuation marks” throughout the garden. Some good examples are large planters, urns, or topiary trees flanking pathways, your garden’s entrance, or the seating area. Use identical pairs to enhance the symmetry and order of your design.

Finally, don’t overlook the importance of furniture. Elegant outdoor lounge chairs that complement the classic aesthetic will give you and your visitors an inviting space to relax and enjoy your tranquil surroundings.

5. Water

In traditional European gardens, grand fountains, reflecting pools, and serene ponds were the stars of the landscape. While your garden may not have the space for sweeping water features, smaller options can still make a big impact.

A classic fountain is a popular and easy-to-incorporate choice. It’s an elegant focal point and adds movement and calming sounds to your space.

But don’t feel limited to just fountains. Other water elements like a swimming pool or even a small, decorative pond can also work beautifully. A pool spa, for example, adds a contemporary element while still complementing the classic garden aesthetic.

Align your water feature with your garden’s symmetry—this could be at the center of a pathway, at the end of your visual axis, or surrounded by manicured hedges.

Bringing It All Together

Image: https://www.pexels.com/photo/grey-mountain-bike-leaning-on-brown-wall-brick-in-garden-163647/

The true beauty of the classic garden style is its versatility. The above principles can be adapted to fit a modest courtyard just as well as a sprawling backyard.

Remember, symmetry, clean lines, and keen attention to detail are what bring the charm and serenity of a classic garden oasis to life. Plan your classic garden on paper first to ensure you have the right symmetry, and then get to work!

Changing Home Designs According to Seasons by Guest Writer Ella Andrews

Many people view their homes as refuges from the outside world, a chance to escape it. However, there is nothing better than having a home that does reflect some of the weather changes and the natural world. It’s quite soothing to feel spring-y at home, or winter-cozy. These little tricks can be done with proper home design improvements and some creative thought. Here are several ways to reflect the seasons in a natural and tasteful way at home, ensuring a different feel in each season.

Changing home designs according to seasonsAdd natural displays to capture each season. Place flowers, plants and other nature-related objects in the different rooms. For example, arrange a vase with daffodils and tulips in spring, blooming roses in summer, pine cones and berries in autumn and mistletoe and Christmas plants in winter. These flowers will definitely bring a whole new atmosphere in your home.

Adapt the color scheme accordingly to make each room much more beautiful. One of the easiest ways to reflect the seasons at home is to use the right colors and color combinations. Instead of shutting out the outside world when it’s cold and snowy in winter, reflect these natural changes with white candles and silver ornaments. It’s quite challenging to change the colors in your home with every season, but this doesn’t mean that it’s impossible. Of course you don’t have to repaint the walls, you could simply have some specific items that suit the season. In spring and summer you can achieve that with sheer drapes and lighter furnishing. Focus on the living room and the bedrooms – these areas are usually the easiest to decorate and change. In summer, take down all the heavy curtains and use plenty of bright colors – for cushions, rugs, paintings. In winter, aim at pale and neutral colors. In spring choose lime, green, orange, peach, pink and yellow.Changing home designs according to seasons2

Nature has a big influence on interior design. One pretty way to integrate the nature elements in your home design is by choosing different prints – for curtains, rugs, cushions and even posters and stickers. Trees, leaves, lilies, butterflies, birds – use these symbols to bring a beautiful atmosphere to your home.

Fill a bowl with yellow and brown leaves and pine cones in autumn and place it in the living room. Use wood to decorate the rooms – it’s the most natural and prettiest nature element you could make use of.

Arrange rocks and some sand in a plate, in summer, and place it at the living room’s focal point.

Invest in some rugs in different colors, one for each season – red or white for winter, pink or light green for spring, yellow for summer and orange or brown for autumn. Experiment with light and mirrors in the rooms with the most traffic.

Bio: This article has been created by Ella Andrews- dedicated writer, blogger and housewife. Ella likes sharing with her readers valuable advices from personal experience. In order to obtain more of them, visit: http://www.removalshouse.com/removal-companies/WC1-removals-st-pancras.html

Easter Egg Art

250840_320452681377490_1342109119_nThis has always fascinated me and I have tried to do it myself personally but the tediousness makes it so very difficult. I guess for now I will have to do with adoring these creations from afar. These are created by blowing out a contents of an eggshell by drilling a hole at the end of the egg at each of its tips. The egg must then be dried. A variety of eggshells can be used: ostrich, emu, rhea, goose, chicken, and a variety of others. These can even be purchased dried and ready to use from some internet outlets. The usage of a Dremel (or preferably a high speed drill such as a dentist tool) . You must also use a face mask and a ventilating system to avoid getting eggshell dust up into your respiratory system which can make you very ill. The stands that they use are just as intricately created by making something from scratch, using antique candle holders, and other unique holders. I have only tried using a Dremel but would love to get my hands on a high speed drill it would be great to create something so special.

The Three Sisters – Corn, Beans and Squash

Editor’s Note: Copied from: http://www.threes.com/index.php?option=com_content&view=article&id=2335:three-sisters-corn-beans-squash&catid=79:food-nutrition&Itemid=57 – Please check out this great website for more great information like is found in this article. I read this and thought about how great a story this is and wanted to share with my readers. Hope you enjoy and please check The Book Of Three’s.

_____________________________________________________________________________________________________________________________

Three SistersThe ancient Native American technique of growing Corn, Beans, and Squash together in an arrangement called the Three Sisters is the ultimate in companion planting and helps increase harvests, naturally!

Corn acts as a support for climbing bean vines, the beans fix nitrogen in the soil for the high feeding requirements of corn and squash, and the squash provides mulch and root protection for the corn and beans! After cooperating beautifully in the garden, corn and beans form a complete protein when eaten together! How’s that for a mutually beneficial relationship?

The Three Sisters are all easy to direct sow in the garden and are a great project for children, teaching them about the beauty of natural harmony while providing a fast-growing reward for their efforts.

Make the best possible use of your garden space this season, and try growing the Three Sisters! Just follow the easy steps listed below, fertilize well, plant other companions like herbs to assist with pest control, and you’ll be harvesting your best crop in no time!

The Iroquois believe corn, beans and squash are precious gifts from the Great Spirit, each watched over by one of three sisters spirits, called the De-o-ha-ko, or “Our Sustainers”. The planting season is marked by ceremonies to honor them, and a festival commemorates the first harvest of “green” corn on the cob. By retelling the stories and performing annual rituals, Native Americans passed down the knowledge of growing, using and preserving the Three Sisters through generations.

Planting instructions

In May or June when soil has warmed:

Shape a flat-topped circular mound of soil about a foot high and 2 feet across at the top, sloping outward toward the base. Plant a circle of Corn seeds on top, about 5 or 6, and water them in well, tamping down your soil mound firmly so it doesn’t wash away in the first rain. Space the mounds 3 or 4 feet apart in the garden.

Since all corn grows on sturdy, dependable stalks, the variety you choose depends on the flavor, disease resistance, and holding ability you want. Sugar Buns is a Sugar Enhanced (SE) yellow hybrid with absolutely scrumptious golden kernels and is positively scrumptious. For SE whites, you can’t beat Silver Princess, with extra-long ears bursting with flavor. And for the sweetest ears yet, you absolutely must try new Corn Mirai™, available in Yellow, White, Bicolor, and even a Mini!

About two weeks later:

When your corn reaches about 5 or 6 inches high, plant Bean seeds (6 to 8 of them) around the edges of the flat top or about halfway down the sloping sides of the circular mound. Push the seeds down deep into the soil and, if you’re planting on the slope, make sure the soil is nice and firm. Add a bit of Nature’s Aid at planting time to help the Beans fix nitrogen.

To get your Beans to climb up the cornstalks, choose Pole rather than Bush varieties. Smeraldo is far and away the best-tasting Pole Bean, with flat pods up to 10 inches long on vigorous 4- to 6-foot vines. Park gardeners rave about Kwintus, a super-early performer with succulent pods on stringless 8- to 10-inch pods. And Blue Lake is the classic name in Beans, with top-quality dark green pods that are both stringless and fiberless, even if you pick them a bit late. We even have Blue Lake available in organic seed!

One week or so after that:

Plant Squash seeds around the base of the mound, on flat ground. You can make them radiate around the mound, or just go in the direction you have available space! 6 to 8 seeds in a ring around the base of the mound is usually plenty.

The traditional Squash family member for this Sister is Pumpkin, with its all-American flavor and long growing season. Rumbo is a unique Korean variety that looks like an heirloom Pumpkin but tastes sweeter and more succulent than a Butternut Squash! For a quicker harvest, grow Summer Squash varieties such as organic Park’s Early Summer Crookneck or Zucchini such as space-saving One Ball Hybrid.

When everything begins growing . . .

Thin the plantings to 2 or 3 Corn stalks, each with no more than 2 Bean plants winding around it. (You’ll need to help the Beans get started growing up the stalks). The Squash is going to vine along the ground, so the number of plants you need depends on how far apart your mounds of corn and beans are, how long the vines get, and how much walking space you need in the garden.