Perfect French Fries – EVERYTIME

Choose low-moisture, high-starch potatoes such as russet or Idaho. For crisp fries, wash the cut, uncooked strips in several batches of cold water until the water is clear. However, for the crispiest fries, we found the double-fry method hard to beat. Frying strips twice in the same oil at different temperatures gives you fries like no others. This recipe, using the double-fry method, received our highest rating.

FRENCH FRIES
MAKES 4 TO 6 SERVINGS
PREP: 30 MIN., FRY: 7 MIN. PER BATCH

Potatoes cut into strips are the crispiest of the potato shapes.

4 pounds russet or Idaho potatoes, peeled

Vegetable oil Salt to taste

CUT potatoes into 1/2-inch-wide strips.

POUR vegetable oil to a depth of 4 inches in a Dutch oven, and heat to 325°. Fry potato strips, in batches, until lightly golden, but not brown, 4 to 5 minutes per batch. Drain strips on paper towels. HEAT oil to 375°. Fry strips, in small batches, until golden brown and crisp, 1 to 2 minutes per batch. Drain on clean paper towels. Sprinkle with salt, and serve immediately.

CRINKLE-CUT FRIES: Cut potatoes into 1/2-inch-wide strips with a waffle cutter. Fry as directed.

WAFFLE CHIPS: Cut potatoes into 1/2-inch-thick slices with a waffle cutter. Fry as directed.

Child Safety On The Way To School

On any given day students board school buses to travel to schools. Statistically, school buses are the safest way for students to travel to school — even safer than riding in the family car.
Many students walk to school or to bus stops.
In either case, parents can help to make the trip to school as safe and easy as possible for their children just by discussing a few basic rules:

Walking or riding a bike to school or to a school bus stop:

– Parents should show their children the safe walk path to use and encourage them to fol
low that path.
– Obey all traffic signals, signs, and/or crossing guards. Use crosswalks where available. H Walk bikes through intersec­tions
ffl Walk with a buddy, if pos­sible, and be aware of the sur­roundings.
– Never talk to or respond to strangers. If a stranger ap­proaches or tries to get a child to come to him/her, the child should run home, to a neigh­bor’s house, or another safe place such as a business, and ask an adult for help.
–  Reflective material makes walkers and bicyclists more vis­ible to street traffic. B Always wear a helmet when riding a bike (grownups too).

At the bus stop:

– Know your school bus number.
– Get to the bus stop at least five minutes before the bus is scheduled to arrive. Running to catch the bus is dangerous and can lead to injuries.
– While waiting for the bus, stand at least five giant steps (10 feet) away from the curb and line up away from the street.
– Wait until the bus stops, the door opens, and the driver says it is OK to board before getting onto the bus.
– Students crossing the street in front of the bus should walk on the sidewalk or along the road to a point at least 10 giant steps ahead of the bus before crossing. (Better yet, cross at an intersection and use the cross­walk if one is available.) Be sure that the bus driver can see you and that you can see the driver when crossing the street, and watch for traffic com­ing both ways.
– When you are dropped off at school or at the bus stop, walk 10 giant steps away from the bus. If you need to cross the street, wait until the driver tells you its okay and cross in front of the bus. NEVER walk behind a bus.
– Use the handrail to enter and exit the bus.
– If you drop something near or under the bus, tell the bus driver. DO NOT ATTEMPT TO PICK IT UP because the driver may not be able to see you.
– School buses are loaded or unloaded at established school bus stops only, unless an emergency dictates otherwise.

Gardening Tips

•Most perennials stay in bloom for about three to six weeks. So, the secret to enjoying them to their fullest is to select plants with staggered bloom times for a bed full of color throughout the season.
•Carefully choose your color scheme. Red makes a flowerbed seem larger and closer, while blues will make it appear smaller and more distant. Pinks combine well with purple, and red with violet. White is a good complement for any color.
•Prepare planting beds by digging the soil to a depth of 12-18″. Work in plenty of peat moss, leaf mulch or compost to ensure good drainage. Space plants properly, as crowded plants grow less vigorously.
•Get your perennials off to a good start by fertilizing lightly when planting.
• Some easy-to-grow perennials for any area of the South include: phlox, candytuft, dianthus, daylily, rudbeckia, salvia, hosta, purple coneflower and verbena.
•Now is also a good time for harvesting a variety of vegetables. For that “homegrown” quality and taste, be sure to harvest at the best stage of maturity and carefully handle vegetables that will be eaten at any time later than the same day harvested.
•  Weeds—Pull as many invaders out of your flower and shrub beds as you can before they produce seeds (and therefore more weeds). You’ll find that they are easier to pull after a rain. If your forecast is dry, use a sprinkler the day before you plan to work in the garden. If you have a lot of weeds to pull, try using a long-handled scuffle or stirrup hoe to save your back and knees.
•  Slugs—These pests can be especially dam­aging to hosta foliage, leaving it marred for the entire growing season. To be sure the prob­lem is slugs, look for the dried slime trail on the leaves. Slugs feed at night, so you rarely see them during the day. Although effective, slug bait pellets can be poisonous to children, pets, and birds. You might find a saucer of beer or a sprinkling of fireplace ashes in the mulch around the plants just as effective, cheaper, and safer than commercial baits.
•  Water—As the weather gets hot, remember that new additions to your garden will need watering more often than established plants.
•  Lawns—This is a good time to patch warm-season lawns such as Zoysia, St. Augustine, improved Bermuda, and centipede with sod of the same type grass. You can also sow seeds of turf-type fescues or cool-season blends to thicken bare or thin areas of your lawn.
•  Shade—Protect new transplants from direct sun for about a week until the roots get
settled in their new location. A light lay­er of pine needles or hay will help, or you can construct a small shelter from a mesh plant tray sup­ported by sticks or dowels.
•  Petunias—Pinch back plants several inches to prevent long, stringy stems and to encourage repeated bloom through the summer. You may need to pinch a couple more times during the season. Fertilize with timed-release granules, such as 17-17-17, or water with liquid 20-20-20 every other week.

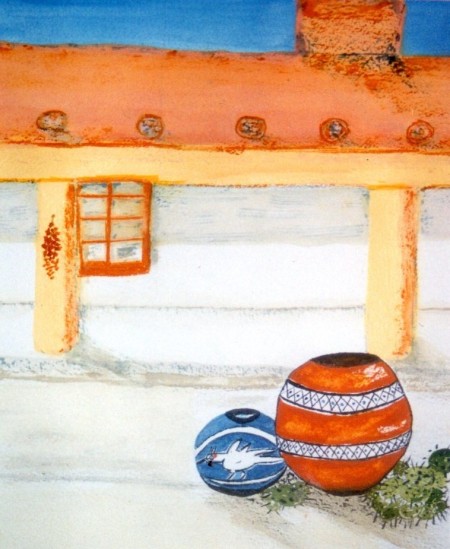
September 2010 Cover Artwork

By: Frances Marie Harburn Trippensee

History Of The Boot

THESE BOOTS ARE MADE NOT ONLY FOR WALKING but for working in all kinds of weather—and looking smart, too. They were introduced in 1817 by Hoby of St. James’s Street, London, the personal shoemaker of Arthur Wellesley, the first Duke of Wellington, famous for defeating Napoleon at Waterloo. Wellingtons were initially designed to look good with the newfangled men’s fashion of wearing long trousers instead of knee breeches.

The boot’s predecessor, the Hessian, had a curvy folded-down top and heavy braid.The duke wanted something simpler, made from soft calfskin and cut closer to the leg. Sturdy enough to be battle-hardy yet stylish enough to be worn in the evening, the Wellington allowed the British gentry to look like their favorite war hero while standing tall in polished boots.
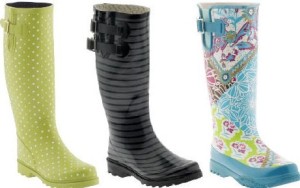
However, it was an American named Henry Lee Norris who came up with the idea of producing the Wellington in rubber. (Charles Goodyear had recently patented the process of vulcanizing.) The British Isles had a wet, muddy climate, so Norris headed to Scotland and, in 1856, founded the North British Rubber Company to produce the weather-resistant boots that were to become famous.

The Wellington has gone through many changes since its schizoid days as a foppish combat boot. In the 1860s, it was worn by soldiers in the American Civil War. And the cowboy boot was modeled after the full V- Wellington, so called because the whole front and whole Q£ back are each made from a single piece.

Production took off during both World Wars, when the military requested sturdy rubber footwear that would keep soldiers’ feet dry in the flooded trenches and provide civilians with long-lasting boots during wartime rationing. Introduced to Wellingtons in a time of great hardship, British men, women, and children have never given them up, and their appeal has spread far beyond the home turf.

In New Zealand,Wellies—or gumboots, as they’re known Down Under—come in white for doctors and nurses in rural hospitals. Green is a favorite with the Brits (Lady Diana Spencer was a green girl long before she married her prince), while black ones with brick-red soles can often be seen on fishermen up and down the U.S. East Coast and into Canada’s Maritime Provinces.

Today, children the world over splash through puddles in Wellies styled to look like ladybugs, ducks, and frogs. And, thanks to designers such as Paul Smith and Karl Lagerfeld, the streets of many a rainy fashion capital are a riot of Wellies decorated in candy colors, wild stripes, and funky prints.