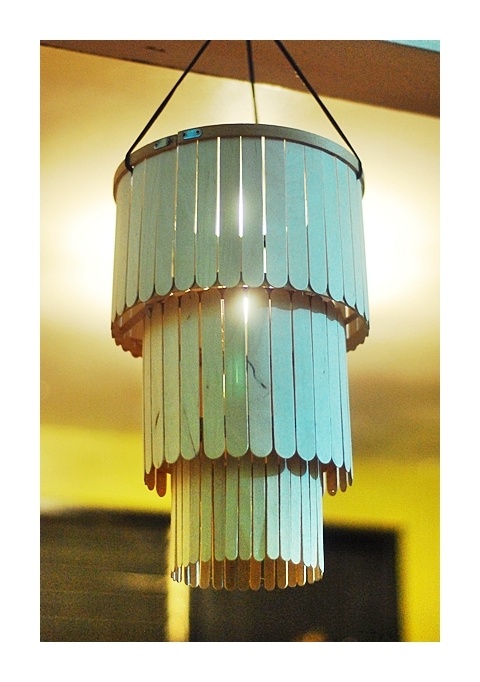
What a great inexpensive way to build an awesome chandelier.
You will need:
Popsicle, craft sticks (a lot)
Hot glue gun
Hot glue gun sticks
3 round loops (large, medium, small) (think embroidery circles)
Light kit
Light bulb
String
What to do:
With your largest loop you will need to tie three strings equally spaced apart. Join those three strings together above the top loop. This will tie to the electrical cord for the light fixture. The medium loop will need to be attached similarly to the largest and the smallest to the medium. Hot glue Popsicle sticks that have been died or painted a color of your choosing. We choose a nice blue dye that the sticks were soaked in for about ten minutes. The alternative is painting each stick (and each row could be a complimentary color or after you are completely done you can spray paint the whole thing in several very light coatings. You will need to assemble the light fixture as per its instructions. Do not use more than a 40 watt bulb. If the light fixture comes with a chain it makes this process easier to attach the light shade to the light fixture. if it doesn’t have a chain your tying skills be what makes the shade stay where you want it. Hang from ceiling.
Alternative: This could be made to fit a standing lamp that you could get from a thrift store/yard sale. The top of your new creation will start with the part of your lampshade that attaches to your lamp. The whole lamp could be spray painted to match, or use a complimentary color.
If you like this post and want to share it then click the service!

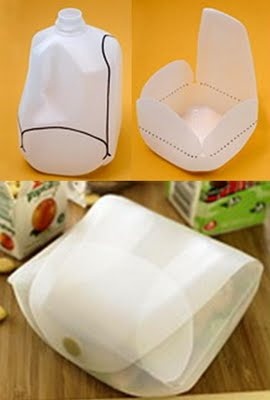 I have always tried my best to recycle/up-cycle in my families lives. I have always felt bad throwing these container from milk/juice out. (If you do please cut them down and recycle them). I came across this idea and wanted to share it with you. Follow the diagram above and cut with an exact o knife – and please be careful.If the knife slips (which it will want to do) there could be a nasty cut. Fold over and attack a velcro dot as shown. Makes a nice little snack/sandwich container.