

Such a simple little thing to do with the kids on a boring summer afternoon. Rocks should be cleaned with an old scrubber and dried overnight. Use acrylic paints and start with covering the rock with black paint. You may want to make two coats allowing to dry completely in between. Follow the simple design from the picture and paint the areas red where indicated and dry. Top with a clean black line down the middle of the back and add black dots on the back also. Add a black dot in the center just after where the red starts on the back. Add two white dots on the face for the eyes. Let dry. When it is all dry coat with two coats of polyurethane to seal. Would make a great gift for the wee ones to give to parents and grandparents, aunts and uncles. Can be placed back in a garden or used as a creative paperweight.
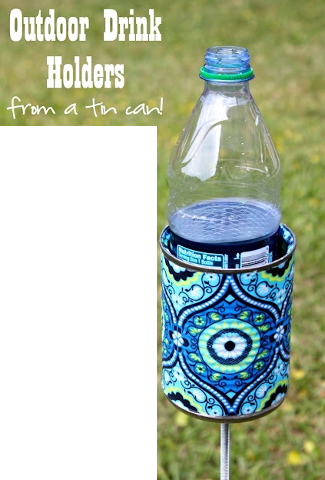 Thoroughly clean can and dry — Paint or decoupage the outside of can with a unique design — Seal with polyurethane — You will need a (minimum size of) 18 inch galvanized bolt (about 2.50 at a hardware store) with a washer and nut. Puncture hole in bottom of can and push the bolt through from the inside of can until head in at the bottom. Under the can on the bolt add a washer and then secure the nut tightly. The longer bolt you use the better. You can also polyurethane the entire can, nut, washer and bolt once done to give a nice shiny presentation and to help prevent rust.
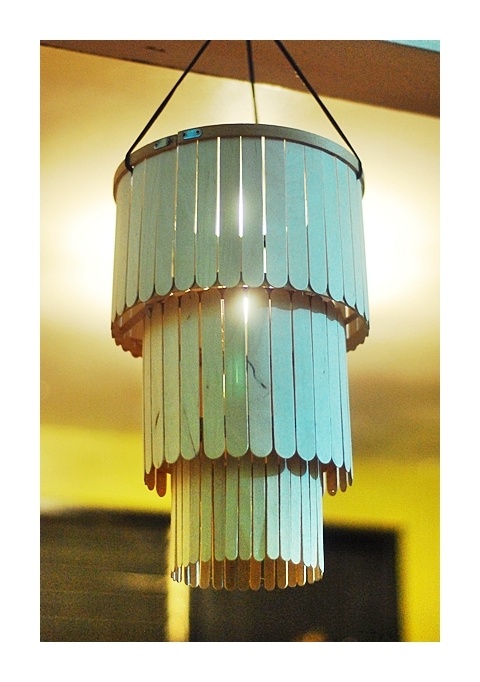 What a great inexpensive way to build an awesome chandelier.
You will need:
Popsicle, craft sticks (a lot)
Hot glue gun
Hot glue gun sticks
3 round loops (large, medium, small) (think embroidery circles)
Light kit
Light bulb
String
What to do:
With your largest loop you will need to tie three strings equally spaced apart. Join those three strings together above the top loop. This will tie to the electrical cord for the light fixture. The medium loop will need to be attached similarly to the largest and the smallest to the medium. Hot glue Popsicle sticks that have been died or painted a color of your choosing. We choose a nice blue dye that the sticks were soaked in for about ten minutes. The alternative is painting each stick (and each row could be a complimentary color or after you are completely done you can spray paint the whole thing in several very light coatings. You will need to assemble the light fixture as per its instructions. Do not use more than a 40 watt bulb. If the light fixture comes with a chain it makes this process easier to attach the light shade to the light fixture. if it doesn’t have a chain your tying skills be what makes the shade stay where you want it. Hang from ceiling.
Alternative: This could be made to fit a standing lamp that you could get from a thrift store/yard sale. The top of your new creation will start with the part of your lampshade that attaches to your lamp. The whole lamp could be spray painted to match, or use a complimentary color.
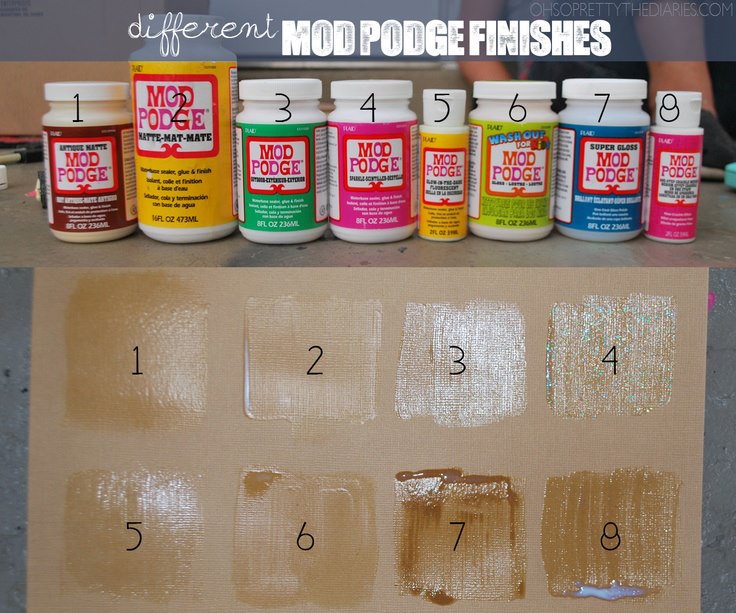 1.Antique Matte
2.Matte
3.Outdoor
4.Sparkle
5.Glow in the Dark
6.For Kids-Gloss
7.Super Gloss
8.Crackle
