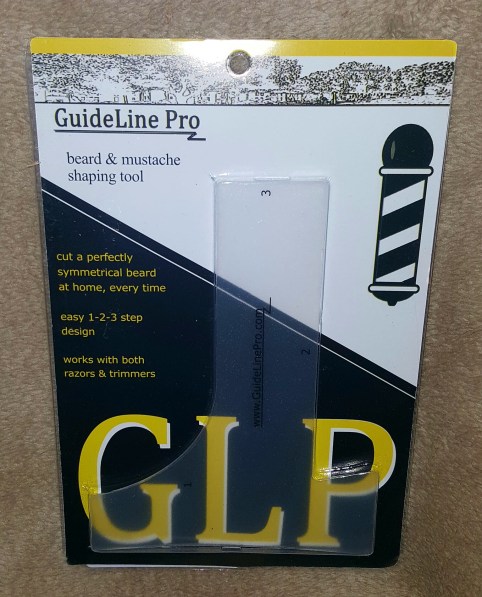
My Share: Guideline Pro – Beard Mustache And Facial Hair Guide For Men

20161123_131849

Upon opening the package that arrived from Amazon I was impressed. I was intrigued by this when I first saw it online. I have always had a very sensitive face to shaving. It has made me almost always have to have facial hair because the burn I get when shaving. I thought this would be great to make the cuts even and symmetrical from one side to the other. I was right.

51xbgmirzil

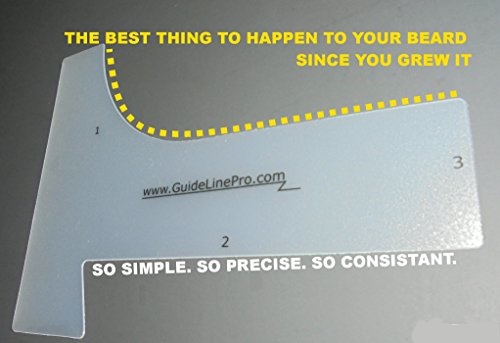
This facial hair trimming guide will provide your guy with a professional-level accurate trim. You would use this guide with your preferred razor, electric trimmer or clipper. It allowed the symmetrical shave for my face with little effort – just hold this guide on your face and trim what is on top of it. It helped me shave just right for my cheek bone, neck line, jaw line, mustache, goatee and sideburns.

One feature I really liked about Guideline Pro is that it is transparent so I knew just where it was which made the end cut perfect. This really is a great idea for the guy in your life. I certainly love it – its simple in design and simple to use and left me with a good cut I did myself but others would think I had done professionally. I highly recommend it.

41xfh07bcl
Compensated Post

How To Guide: Building Your Personal Wood Bar By Diana Smith

What’s a better way to complete your man cave than to add a fully functional bar to it? Better yet, expand your horizons and create a barrier between the kitchen and the living room by placing the bar between the two areas. The possibilities are endless. And in order to get the whole experience, it’s only fair to build the bar using your own two hands and a set of proper tools. You don’t need to be an experienced carpenter to build a bar; all you need is some time, materials and this simple tutorial to guide you through the steps:image-1

Gather the Tools and Materials

Before you officially start with the project you’re going to need to do some shopping. The first thing you should do is measure the space you have available and decide on the size of the bar. Depending on the said measurements, you should equip yourself with screws, a saw, glue and a drill bit. Once you gather the tools, you’ll need 6 pieces of 2×4 lumber, a trim to cover the whole framework and an MDF board for the bar top.

image-2

Create the Framework

Use the saw to create the bottom and top plates for the framework. It’s crucial for the plates to be exactly the same size, so it’s smart to use a miter saw for this job. Make lines along the plates where you wish to place the wedges and screw them between the top and bottom plates.image-3

Support Is Crucial

One of the most important parts of building a bar is making sure that it’s supported properly. Depending on the length of the bar, you might need to fasten it to the wall or the flooring, but if your bar follows the whole length of the room, this step might not be necessary. The second step is building additional support in a form of two rectangular blocks that you’ll attach to the wedges. You can add an additional block of support if you wish to add shelving to your bar. Cover the wedges with several 2x4s to make support for the bar top.image-4

Install the Shelving

This step is quite optional, but if you decide to add shelving to your bar, all you’ll need to do is to secure the shelf boards with screws to the support. The most important step when choosing shelves is deciding on their optimal height, but if you’re indecisive, it’s a good idea to place multiple shelf units. This way you can use the bottom shelves as storage for drinks and ingredients and the top one as a working area.

Place the Bar Top

Attaching the bar top is one of the final steps of the project, so it’s important to conduct it properly. The length of the bar top should be equivalent to the length of the bottom plate of the framework, while the width should be the size of the stabilizers you used for the support of the bar top. It’s best to use a hand saw for this job and then to screw the board from underneath to adjust it properly.

image-5

Finish with A Bang

Once you’ve finished with the technical aspect of building a bar, it’s time to add the finesse. This includes applying a specific material or cladding for the front of your bar; adding bar stools and even installing foot railing or adding LED bulbs for the ultimate effect.

While a project of this extent might seem a bit daunting, it’s important to realize that you don’t need professional assistance if you only learn how to master a few basic steps and follow a simple tutorial. With just a bit of effort and patience, you can have your own personal bar in no time.


My Share: Pokemon Go Aim Assist Plate Outdoor Pokeball Aimer

pokemon-go-plate-3The fad of Pokemon has yet again invaded America and many are happy – I am too. That’s why when I found out about this cool little gadget that attaches to your phone that help you catch the pesky Pokemon, I had to get my hands on one.

After I received this in the mail, taking just three days from Amazon, it was very easy to attach to my phone and within minutes I was playing Pokemon Go, using this aimer, and was having a lot more success. It is a very simple design, but gives such an impact on how you play the game. It does not cover the whole screen, letting you see the areas most important to catching Pokemon. It allows you to throw straighter and get more HP with each and every throw.pokemon-go-plate

This cool gadget also has small distance indicators to help you determine how to throw the pokeball to catch different Pokemon. This item allows you to slip it on or off with little ease which allows you to quickly go from phone to master Pokemon collector quickly. I also like how the item carries a slim profile and is not bulky so you can easily handle the aimer when attached to your phone and play this addictive game. I also noticed when I opened the package there was no nasty odors like some plastic items come smelling like – yuck!
pokemon-go-plate-2

I couldn’t believe how easy it was to get going and to start using this so quickly right out of the box. Really no instructions were needed. I was playing like a real hot shot catching Pokemon fairly quickly. I highly recommend this really must-have gadget to Pokemon Go players (young or old) – and it would make an awesome gift.

CLICK HERE to go to Amazon and buy one now!

#PokemonGoPokemonGoAimAssistPokemonGamesAccessories

COMPENSATED POST

How To Eliminate Air Quality Problems That Plague Older Homes? – Zoe Clark

1Older homes are special places brimming with character and charm of the bygone. They have a distinctive atmosphere, magnificent architectural elements, and attention-grabbing design features. The only problem is that these are not the easiest environments to maintain and one of the common issues is air quality.  On the brighter note, there are some measures and steps you can take to immerse in your striking space while at the same limiting the exposure to risk.

Dust in the wind
2

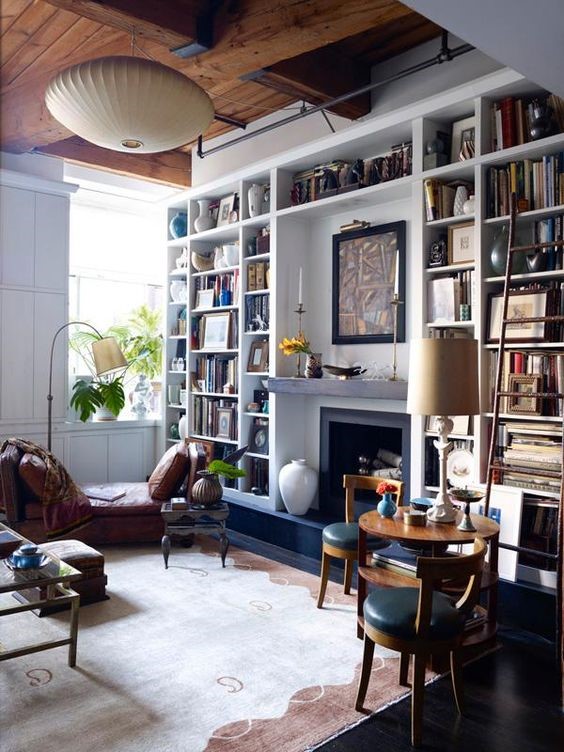
Interior air is bustling with life. Most of it is harmless, but there are also little bits of substances that can impede your health and wellbeing. Nuisances like allergens usually call for some cleaning and maintenance. So, keep the dust at bay and you will deal a serious blow to allergens. Furthermore, dust is also a base of operations for other uninvited guests such as mildew, mold, pet hair and dander. See to it that horizontal surfaces are cleaned on a regular basis.

Pay special attention to wall-to-wall rugs and carpets since they are the Promised Land for animal allergens and dust. One other thing you can do is purchase an air purifier. Personally, I am quite satisfied with air purifiers from Oransi. Of course, do not forget to ventilate your living space as well, and let the rejuvenating fresh air in. This decreases the level of allergens, as well as odor and moisture.  A relative humidity level should be between 30 and 50 percent, and both humidifiers and dehumidifiers serve as a means of monitoring it.

A clean slate
3

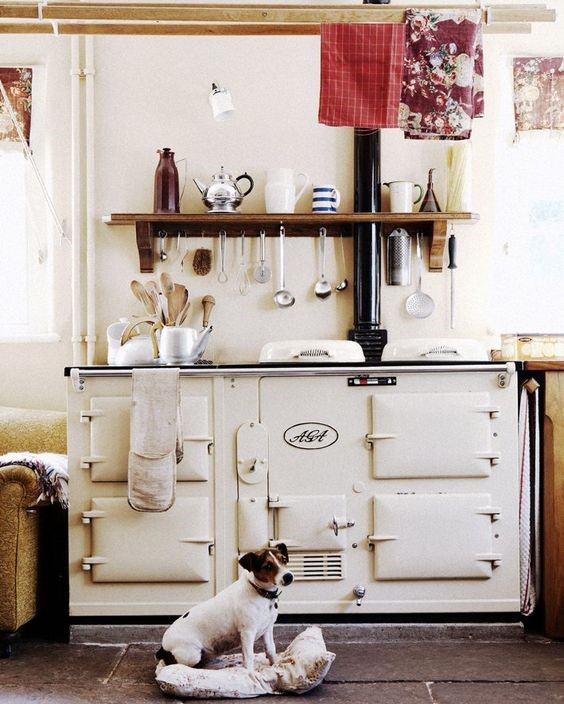
An older insulation can contain asbestos, a mineral fiber which was used to provide heat insulation as well as fire resistance. However, breathing airborne asbestos puts you at an increased risk of lung cancer, mesothelioma and other conditions. It is precisely the poor condition of asbestos products that launch this menace into the air, which is to say that a professional inspection, removal, or repair is required. Likewise, bear in mind that the products like cleaners, pesticides and garden supplies can also emit fumes and odors, so keep them in sealed containers.

The next crucial element is plumbing. Installations made prior to 1940s often used lead, a notoriously toxic material. Even if the pipes were made of galvanized steel, another popular solution, they are still prone to corrosion and leaks. One signal that the detrimental process has begun is low hot water pressure. Homeowners who fail to anticipate this are faced with potential damage to structural elements. Even worse, this nurtures a fertile environment for mold and mildew to take hold. While this usually gives rise to allergic reactions, some molds are even toxic.

The only remedy against this is regular inspection and maintenance, and in many instances, the replacement of aged pipes. Finally, do not overlook masonry chimneys and fireplaces that reveal their more fragile nature over time. Namely, cracks can occur, and once that happens, gas leakage is soon to follow. Carbon monoxide is something you do not want in your home, so before the disaster strikes, muse on relining the chimney with clay tiles, cement or metal. To minimize the risk, it is also advisable to make good use of smoke and carbon monoxide detectors.

A breath of fresh air

The indoor air quality is of the utmost importance for your and your family’s health. There are various sources of pollution you need to keep an eye on, so do not let them offset the allure of an old home.  Control the interior climate, increase the ventilation, conduct regular maintenance, and keep track of elements that spoil it. Take action promptly and address the root of the problem: That way, you can breathe more easily, and do away with a wide range of dangers that lurk in the shadow of the antique.


How To Change Living Room Decor Without Causing A Mess By Edward Barber

There are many effective and easy ways to change the decor in your living room without causing a mess. Here you will learn how to do this and if you apply some of these ideas your living room may become improved and refreshed the way you imagined it. Use them to make this room look the way you want. The tips presented here will give you some clues what you can do to make small changes with great and visible effect.

dwdw

You can think about the walls in the room. What do you have on them? Are they bare, have too much items, inappropriate pieces of art or pictures. You can display vintage art, tapestries, paintings, letters and numbers which provoke the visitor. Depending on the whole style of the room or the design you want it to have buy suitable things. You can find such in hardware stores, antique shops and outlets for home interior. Before doing so picture the way you imagine your living room. If you can draw make a sketch with indications where what to put.

Replace existing pieces of furniture and decorating items you don’t like or don’t match the interior. If you prefer you can paint your armchairs and sofa or pieces of furniture in another colour. Buy paint which is designated for the type of furniture you have. Put nylon coverings over the carpet and around the pieces of furniture you want to paint. Wear old clothes which you don’t need during the painting. Prepare the area and aerate it during and after the work. If you take the necessary measures before painting you won’t leave a mess and will only have to remove the nylon coverings and old clothes after finishing work.

If you can do something yourself well you can create an art project which to display on the wall or somewhere else in your living room. You can use the walls for displaying art pieces you like that belong to your family members, relatives, friends, you have bought or received as presents. You can replace the cushions covers with new, mount new shelves and cabinets.

Move some pieces of furniture and items in this room to make it look more spacious and functional. Experiment by moving one item at a time and see the results. You can accomplish a lot with small changes. All you have to do is act step by step and check the results. Be brave and don’t be afraid to involve bigger changes if they make your room look better.

You can use vintage, self-made items, art installations and provoking writings to make your living room extravagant, luxurious and inspiring. Don’t use decorating items which only have sentimental value, but you don’t like. You and your family members should feel comfortable and at home in the living room. This is the place where you invite guests so renovation team in Ealing recommends to design it accordingly.

Display a board pinned with photos with the member of your family if you like. You can use your favorite pictures to create it an use it as the focal place in this room. Make sure everyone in your family agrees to use these photos and likes the created photo display. You can add at least a few plants in pot to refresh your living room. If you can knit or sew make something you can use for decorating.

After making the changes you have planned provide thorough cleaning of the room. Hoover and mop carpeted and hard floors, upholstery, wipe the dust from all pieces of furniture, TV sets and appliances. Use microfiber cloths for cleaning the screens of laptops, and TV sets, dust the light fittings, pictures and all items. Wash the windows and sills, provide cleaning of the radiators and fireplace.