Rubber Stamping Terms & Techniques

Angel Company Is a term common in the rubber stamp industry.  This term identifies a company that allows the consumer to use their stamps to create products for resale.  Each company has a different policy so it is wise to contact each stamp manufacturer for information on their respective copyright policies.  Common restrictions may include: limiting the amount of hand stamped sample for resale, making sure that products are had stamped and not electronically reproduced, and restriction from using licensed properties such as Warner Bros.™, Suzy Zoo™ and Cynthia Hart™.

Dye Based Ink A quick drying water based ink.  Colors are most vibrant on white, glossy coated papers and card stock.  Not recommended for use with embossing powder.  Ink fades with time and when exposed to light.

Pigment Ink Thick, slow-drying ink.  Colors are rich and vibrant even on colored papers and cards.  The ink will not dry on glossy coated papers unless embossed.

Crafters Ink Multi-purpose, permanent ink with a longer drying time than acrylic paint.  It is highly pigmented and the colors are mixable.  It works on a variety of surfaces and is great for numerous craft applications such as fabric, wood, paper and painted surfaces.  It must be heat set on fabric.

Embossing (or Thermal Embossing) A technique using stamps with embossing or pigment ink, embossing powder and a heat source to create raised images.  Stamp image with ink and immediately sprinkle with embossing powder over stamped image.  Tap excess powder and reserve for future use.  Heat image with embossing tool until powder melts.

Embossing Ink Slow drying ink used for Thermal Embossing.  See Embossing above.

Inking a Stamp There are several ways to ink a stamp:

1.Using Felt Ink Pads – Tap stamp firmly onto ink pad until stamp is evenly inked.  Raised felt ink pads can also be picked up and patted on stamp to apply color.

2.Using Foam Ink Pads – tap stamp gently onto ink pad until stamp is evenly inked.  Raised foam ink pads can also be picked up and patted onto stamp to apply color.

3.Using Brush Markers – Use only water based brush tip markers as solvent or alcohol type inks will stain and dry rubber out.  Brush markers are used by applying the brush tip marker directly onto the stamp.  Multicolor impressions are achieved by using additional colors on various areas of the stamp.  Remoisten inks prior to stamping by breathing on the inked stamp or huffing.

4.Using Wedge Sponges – Use the flat edge of this sponge to apply inks or paints to the stamp in a patting motion.

5.Using Stamp Cleaner – Used to clean ink from stamps.  Use applicator top to apply cleaner to stamp, them pat stamp dry on paper towels.

6.Using A Stamping Mat – A durable foam mat used as a work surface for stamping.  The mat gives slightly allowing the best ink impressions.  Particularly useful for oversized stamps.

7.Using A Stamping Paint – A highly pigmented, acrylic paint specially formulated to be permanent on a variety of surfaces.  This paint has a slower drying time than acrylic paint to allow the user to apply different colors to a stamp for multi-color impressions.  Fabric must be heat set on reverse side to make permanent.

8.Using A Wedge Sponge – Used to apply paint to stamps.  Load paint or ink on flat edge of sponge.  Pat paint or ink onto surface of stamp.  Also used as a tool to sponge color onto a variety of surfaces such as paper, fabric and wood.

Masking A technique of covering a stamped image to protect it from subsequent applications of color.  A method used to create foregrounds and backgrounds.

Instructions:

1.Stamp foreground image onto surface first.
2.Re-stamp image on a second piece of paper or Post it Note™.
3.Cut the second image out.
4.Align cut out image (or mask it) over the first image or foreground image.
5.Stamp second image overlapping the mask
6.Remove the mask.
7.The second stamped image appears to be in the background.

Mirror Image Stamp A flat rubber stamp used as a tool to create a reverse or mirror image of a rubber stamp.

Instructions:

1.Ink a rubber stamp design.
2.Stamp on Mirror Image Stamp
3.The use the Mirror Image to stamp the image onto paper.
4.Image will be reversed.
5.This imprint will be light because it is a second generation print.  Image can be touched up with markers if desired.

Distressing Techniques

Distress Inks have been specially formulated to produce an aged look on papers, photos, fibers and more. These inks are not “better” than other inks; they just work completely “different” for the purpose of creating an aged look.

Here are some key points that make Distress Inks different:

STAYS WET LONGER ; the Distress Ink formulation allows blending and shading on photos and paper, as well as embossing! Other dye inks dry too fast, especially on photos which would result in lines and marks for direct to paper techniques.  Not with Distress Inks!

COLOR WICKS OR SPREADS OUT – these inks will travel across the surface of your paper when spritzed with water; other dyes do not travel as much although they might bleed a little when wet, the Distress Inks actually “wick” or spread out much further creating several tone on tones.

COLOR STABILITY – the colors of the Distress Inks will not break down when wet or heated allowing you to have more color control for the finished look;  other “brown colored” dyes will break down when water is added leaving a pink & green hue.

COLOR PALETTE – Well these are unlike ANY other colors of inks you’ve seen!

*Antique Linen: the color of aged lace or linens found in the cherished heirlooms of grandmother’s trunk.

*Tea Dye: the orange hue of saturated tea bags with the results of dying in a tea bath for days.

*Vintage Photo: this color is captured right out of the photographs from times gone by.

*Walnut Stain: a rich, dark stain of an old walnut tree perfect to create a dark wash of color

* Fired Brick: the look of charred cinders from an old camp fire

* Weathered Wood: the patina on a dairy barn’s window frame

TO DISTRESS: I like to use water when I am distressing.  I think it gives the papers more of a weathered texture, so here’s how I start.

Working on any type of paper (manila, card stock, or text weight), crumple the paper up – always press in the center of any heavyweight card stock or manila stock – this will break the surface tension of the paper and allow you to crumple up the paper easier without tearing it.

Next rub the Distress pads over the surface – you can work with several different colors or just one – WALNUT STAIN IS IDEAL FOR THIS.

Then spray the inked surface with water (you will immediately notice the ink “travels” outward when water is applied as these inks are designed to react with water).

Heat the surface to dry – and here’s why…  Although you don’t have to Heat Set these inks for any reason, I like to dry the water using either my Heat Tool or a craft iron.  This will allow for more tone control and keep areas dark and others light.  Ironing the paper will also give you a much smoother surface to stamp on without compromising the aged finish.

Note: If you allow the surface to air-dry most of your color will end up on the edges only because the paper will bend and buckle when wet, forcing the ink and water to the edges.  Notice that these Distress Inks retain their color value even when wet and dried.  Other brown dyes will break down in color (sometimes leaving a pink and green hue).

FOR STAMPING:  What can I say about the many stamping applications these inks can achieve.  Once again the special formulation on these Distress Inks provides a versatile finish on papers yet still allow for “normal” stamping applications.  I like to stamp on uncoated (matte) papers and immediately rub the image with a cloth – this will soften or shadow your image WITHOUT smudging any detail, VINTAGE PHOTO, WALNUT STAIN and TEA DYE are wonderful for this one!  Another surface is glossy card stock – keep in mind this is a different type of dye ink so when you stamp on glossy, certain areas of your image will “bead” up, once again providing a Distressed look without you doing a thing (this is probably one of my most favorite looks) – some areas of the image appear “pitted”.  Brayering on glossy cardstock is also wonderful because you can still manipulate the inks with different tools, brushes, fingers, whatever.  Even after the ink is applied you can achieve amazing texture and color shading.

ON PHOTOS:  Finally an ink formulated for photos!  Whether you’re a scrapbooker or not you can use all types of photos (vintage or new ones) on your cards and pages.  Distress Inks work on MOST types of black and white photos – inkjet, laser, toner copies, and regular photos. Always test the type of photo paper and printer first!!!

Tinting Photos:

*Tint your photos using your choice of Distress Ink colors and the Cut n’ Dry Nibs.

* Drag the nib across the Distress pad to pick up ink and color directly on to your photo using the nib ; the inks blend without leaving any lines.

* For larger background areas, tint the photo using a cosmetic make up sponge or craft sponge.

* Tap the foam on to the Distress pad and wipe inks on to your photo.  Repeat for desired look.

Distressing Photos:

* To Distress, begin with the lightest colors ANTIQUE LINEN only (direct to photo).  Cover the photo in the lighter color. ; THIS WILL NOT SMEAR ANY OF THE DISTRESS INKS COLORS YOU TINTED WITH!

*Blend the photo with a clean piece of foam or cosmetic make up sponge immediately after applying ink.

*Next, age the edges with VINTAGE PHOTO or WALNUT STAIN by applying the ink with foam or cosmetic make up sponge.

A Visit To: Ancient Volcanoes (Albuquerque, New Mexico)

We drove a little ways outside of Albuquerque and found the volcanoes in clear view in the distance. It was a long drive but we could always see these in the horizon anywhere you are in Albuquerque or Rio Rancho areas and really wanted to see them.

We parked our car on a paved parking lot and found the hike to the volcanoes was going to take some time. The dirt path leads to the first one and then forks off to the distance to the others. We could see that the trail was suitable for dirt bikes and horses as tracks from both were visable.

The walk back to the first volcano I would say is about two miles and then goes quickly up the side of the first. Don’t expect to see a pit at the top of it though as these haven’t erupted in thousands of years and really look more like hills.

We chose to view the rest from where we were at the first, gazing over the valley of Albuquerque and seeing the rest of the volcanoes was a real treat.

We received a cell phone call while there about a house we were trying to get and so we had to cut this trip short but it was fun and enjoyable and the scenery was beautiful.

DSC04905
DSC04907
DSC04906


A Visit To: Petroglpys National Monument (Albuquerque, New Mexico)

We recently went for a trip to Petroglpys National Monument in Albuquerque, New Mexico and really enjoyed ourselves. We first went and stopped in to visit the visitors center and got our map and got more directions to where the petroglpys are actually located. The visitors center is located on one road and you have to go off this road back onto the main road to go to where the petroglys are actually located. The visitors center has some native plantings with name plaques along the way as well as examples of outside ovens used to make breads and cook foods.

When we got to the turnoff for the petroglpys you can see the mountains and we now knew this was an uphill clinb. We had only been there a week and coming from West Virginia it was a bit of a struggle since we were in such a different climate.

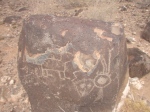
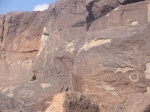
I pulled the car up into a parking space after giving a dollar for the fee. We decided might as well start off with trail one since their are so many. The trail is not for the week… there are boulders and large steep steps to climb. The petroglphs were everywhere and some were in very good shape.

We got to the top and saw rabbits and a squirrel and then made our way down. We had originally thought we were going to do the three trails but after that decided the one was enough and since we were moving there we could do the others at another time.

Our boys decided though that they wanted to go running around and while my wife and I relaxed thats what they did…. teenagers.

We left and made note to make sure we came back here again…. and bring plenty of water.

DSC04897
DSC04901
DSC04904
DSC04896
DSC04903

A Visit To: The Owl Cafe (Albuqerque, New Mexico)

Upon entering The Owl Cafe located at 800 Eubank Boulevard Northeast, Albuquerque, NM 87123-1200  (and their phone is (505) 291-4900‎) I found I like the environment of the fifties diner very well. In the entrance I found magazine and newspaper clippings of reviews and stories about The Owl Cafe. I then went to the front counter and was promptly seated in one of the many comfortable booths that surround the restaurant.

The waitress was speedy to get our drink orders and bring them back with a small plate of green chili, beans and cracker which are on the house. This was my first taste of actual chili and I can tell my move here will be good because they are very addictive.

She came back repetitively and asked if we were ready to order because we couldn’t make our minds up from all the fabulous foods. My wife and oldest son had their famous original green chili cheeseburger, my other son had a large order of fries with chili and cheese (the portion was huge) and I had chili rellenoes (which was all vegeterian but I happened to love it and was very filled). Food was served hot and portions were very large leaving all of us enough to take home and eat a snack later.

My wife and I also had the Hershey chocolate shake to take home and it was clearly one of the best shakes I have ever had and well worth the $4.99.

Overall, I would highly recommend this restaurant to anyone and especially a family as the food is diverse and adults as well as kids will have a perfect find on their menu.