Christmas Candy Cane Wreath

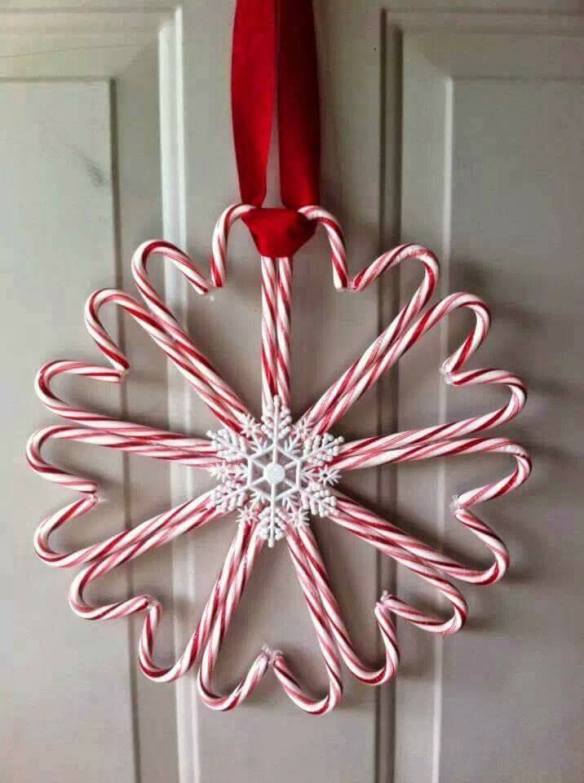
14925260_673532276143865_8704779479642941148_nHow cool – but even better – how simple it is to make these. We like simple and great crafts – and this one is edible too. Yumm. You could use any regular sized candy canes to do this so color combinations are endless. These would work great as gifts as well.

The middle uses a cap from a two liter bottle to provide support while making this wreath. Use hot glue and attach 9 sets of candy canes back to back. Attach these to the cap first and then to the next set of candy canes as you make your way around. Hot glue the tilps of the ‘hook’ together from one to another and secure well to cap. It i important to provide a good strength so it does not come apart. This is topped with a snowflake flat ornament but any ornament that is flat would work.

Some different options for you is to back each candy cane with lace ribbon that comes out on both sides so it can be scene from the top side. Also, it the pictured wreath you could add snowflakes that are much smaller at each joined pair of candy canes.

Pallet Christmas Tree

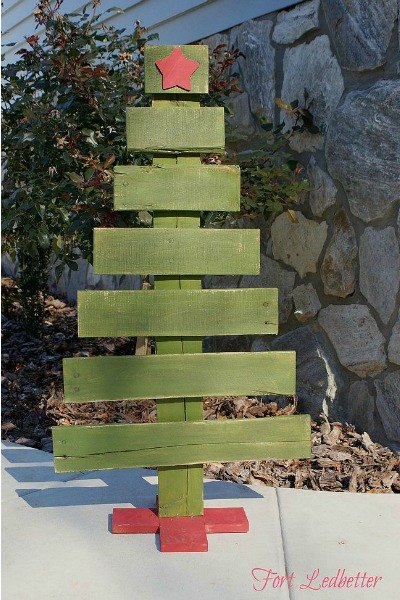
trttryrtI always love to recycle and pallets are so cool to use right now because of their country rustic charm they give to your creations. The base is made from a 1.5′ and 2 6″ x 5″ cut pallet boards. These pallets lengths are 5″ wide so you will need to adjust your cuts to work with the width of boards you have. The tall board making the trunk is 4.58′ by 5′ board. The branches are made from 3.5′ – 3′ – 2.5′ – 2′ – 1.5′ – 1′  – 8″ x 5′ planks. All are fastened with wood glue and srcews to ensure it being secured. You will not be spray painting this unless you want a solid coverage. The tree pictured is meant to be rustic so use poster paint (to keep it cheap) and rub it on with a paper towel that has been dipped into the paont and then brushed off on newspaper. This ensures it has no dark and light spots but more uniform. This will allow the wood roughness to come through. You can sand paper the edges if you want to give a more rustic charm. You can also use a very light stain over the entire project to provide age. Just make sure to wipe a section of stain on and wipe it off. You only want the appearance of aging not a heavy coating of stain.

Make A Christmas Wreath Made From Paper Towel Tube

12111974_865135706939527_4898330760317110605_nDesigning with tubing from paper towels of toilet paper rolls can be never ending.  This design is very simple (and cheap YEAH) and can be made by children or adults. The tube was cut in 1.5″ increments – measured with a ruler then cut. If you just haphazardly go cutting it will show in the end product. After the tube is cut use spray paint to cover five all red and 33 green. Spray two coats and flip to other side and spray a coat to ensure a good covering. fold the tube to make a leaf design like in the picture. Assemble as shown using hot glue or Elmers glue. If you use Elmers glue use paper clips to hold together as you go and until dried! You can skip the poinsettia if you wish and glue on a large ribbon or silk poinsettia flower. Hang by using a ribbon tied to top.

My Share: Silk Plants Direct – Bonsai

I found these great Bonsai that are from a company I have never heard from called Silk Plants Direct. I have always loved bonsai but know I don’t have a green thumb so investing in a couple wouldn’t do any good. They are expensive and I would probably kill them. None the less, I really wanted bonsai trees for our living room.

I am an old timer (at least to electronics and the internet) but I happened to find these and fell in love and knew I wanted them. But I had never heard of the company so did a little research and found positive responses to the quality of the product and service so my temptation finally got the better of me and I took a chance.

Let me tell you – I am so glad I did. When the package arrived it was well packed to ensure no damage came to the product during shipment. Thats important, who wants to open an anticipated package and find it damaged or crushed because of poor packing right? Here is a picture of them just mere moments after I opened still shrink wrapped so the pots didn’t get damaged.

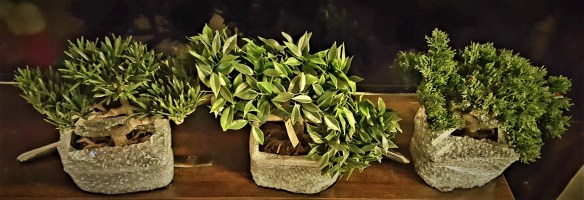
11111I took the shrink wrapping off of the pots and here is a picture of all three of them.

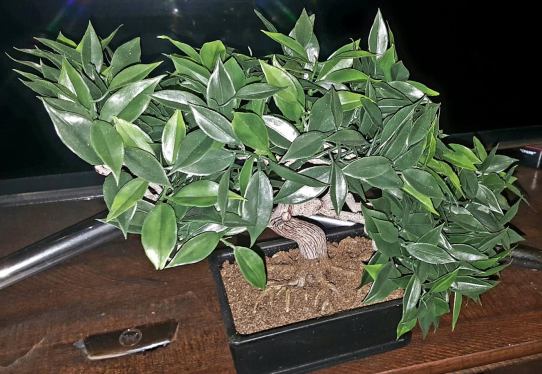
22222I was very impressed with the quality and reality of the bonsai I received. Bonus: I can’t kill them – Ha!  All parts of the bonsai trees are very realistic from the roots exposed at the top of the pot (like real bonsai are) to the wooden trunk of the tree and the leaves are thick and very realistic.  Here are the three bonsai trees in a closeup – notice the great detail!

Click any of the photos below to be taken directly to the page to order these terrific bonsai trees:

333334444466666I was happy to see the realism of these bonsai, I was afraid I would receive bonsai trees that were plasticy – looking like little care was given to the design and detail and quality. These are a great deal as well, in a three item purchase they came out to just $30.00 and some change each. Considering a real bonsai this size starts at $125.00 for just one and that’s just to start so this is an awesome deal.

While browsing their website I found several other great products like cactus, long twigs and branches that twist and sparkle, shrubs, trees, and small and large varieties of so many unique specialty plants. I noticed these and got them because of my desire to have bonsai but the other selections have made me want other items too – many I didn’t even know were available to buy. But Silk Plants Direct have such a variety you can go and spend a couple hours easily browsing their great products.

Shop Silk Plants Direct today and find a great present for that special someone that was not blessed with a green thumb or buy for yourself – I won’t tell!

Baby – Room Design Tips: Color Schemes To Murals And Beddings

When it comes to the baby room, the way in which you plan to decorate the space is very important. You need to give proper attention to all the details or factors that influence the comfort of your baby in this space. The colors play an important role in this game and can totally change the overall effect of the living space in which you accommodate the new member of your family. Proper selection of colors for all the furnishing items as well as the room accessories ranging from murals to bedding items can positively influence the overall finish and comfort ensured in this room.
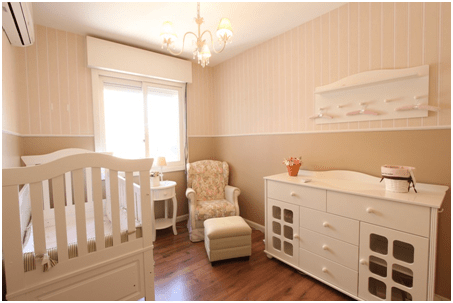
room

How Many Colors to Use and How Bright Should the Room Be?

When it comes to babies, the main tendency seems to be that of creating a playful and colorful environment for them to live in. However, no matter how much you think colors can give the perfect impression of a well-designed nursery, you should also know what boundaries not to overcome at this stage. You need joyful colors in this space but you must also consider the perfect way of combining the chosen shades so that the end-results might be pleasant and not annoying for the baby or yourself and the house guests.

Use Colors in a Smart Manner to Achieve Friendly Results

Moreover, focus on choosing smart colors that stimulate the baby yet do not make him / her feel tired with a combination of the most powerful shades that you could find. For example, red, a popular color for interior design is the one that best symbolizes feelings or emotions like excitement and passion.

It is a bold choice of color that usually manages to attract a lot of attention. It can be successfully used in a nursery yet should never be considered for every wall in the room because it will be too aggressively used this way. The best idea would be to use it on a single, representative wall for emphasized effects that will perfectly be balanced by the other walls in the case of which you could use white or bright brown shades to mix things up.
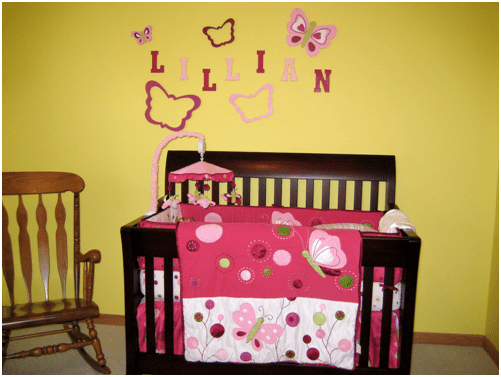
room1

Orange and Yellow: Perfect Choices for Proper Comfort

Furthermore, orange is another color that parents consider when they start redecorating the space that will become their baby room. This is a comfortable color and promotes a relaxing and welcoming atmosphere. This friendly color can be used more than red because it puts reservation at proper ease. Moreover, you can even dare to use darker shades or orange in the nursery to create a super-cozy type of atmosphere or combine these with bright orange shades that will bring modern trends into the equation.

In addition, yellow is also a good choice for being sunny and bringing the right level of brightness to the surface when used with caution. Never go over the limits with it because you might easily go from perfect to kitschy. Also, too much yellow could agitate the baby and this is not the intended purpose. However, when the proper shades of yellow are used in a proper amount, the effects will be amazing both in terms of style and practicality.
room2

Green and Blue: Calming Yet Pretentious Colors for the Nursery

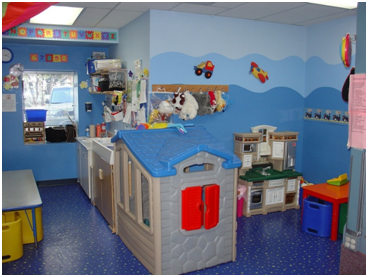
Other colors that parents consider when it comes to the redecoration process of the nursery are green and blue. These two are calming colors in general but should be used carefully in terms of quality, location and shade so that they might create a welcoming atmosphere in the baby room.

Actually, green is the perfect color for a learning environment. Therefore, it can bring you the best advantages in the long run. Moreover, blue is known to help increase productivity in any space where it is used effectively Bright blue shades are recommended to achieve this purpose.

All in all, there are no strict rules to follow when you decorate your baby room but you should always focus on making the right choices in terms of colors and chosen items like the baby mattress for his / her comfort so that you might create a welcoming, relaxing atmosphere for the baby to enjoy.