I mentioned to my family that I’m collecting toilet paper tubes for use on some projects that were bouncing around in my head. And an odd thing happened. At every family function, every dinner party, every chance meeting since then, I have been inundated with toilet paper tubes. They hand them to me when I least expect them, neatly packaged in Kroger bags, fully confident that whatever I have in mind for them is worth the extra effort. At Christmas, I was given a bag of them along with my Christmas present. Kinda nice, but apparently when folks look at me right now, they think of toilet paper tubes. Not sure if that is a good thing or not.
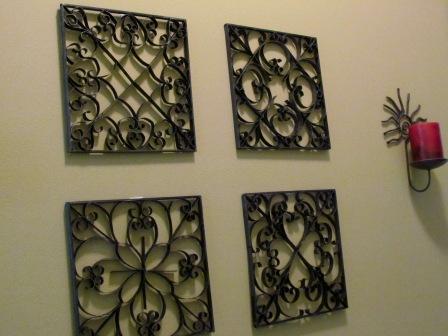
Anyway, I decided to try my hand at mixing some quilling techniques and toilet paper tubes to come up with some faux metal wall art to spice up my Southwestern theme kitchen.
For this project I used:
A large amount of toilet paper tubes
Several Paper Towel Tubes
Aleenes Tacky Glue
Metal look Spray Paint
3/8″ Balsa Wood strips
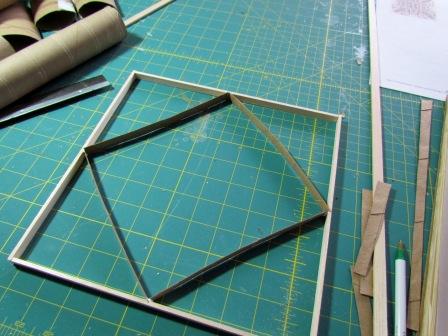
I started by cutting the 3/8″ balsa wood strips into 10″ long pieces to form my squares and then glued them together with tacky glue.
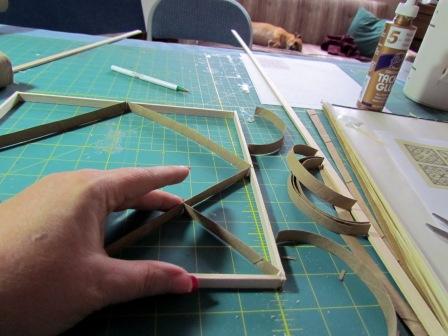
The paper towel tubes were used for the straight pieces. I simply cut along the length of the tube, flattened it out and used a scrap of the balsa strips to measure 3/8″ strips cut lenthwise from the tube.
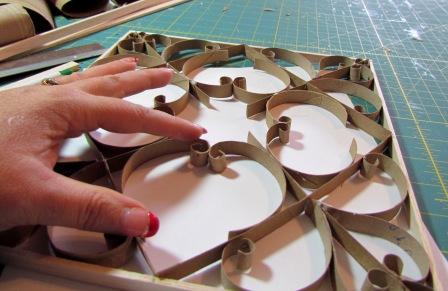
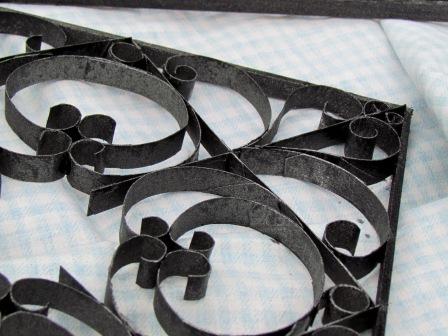
The toilet paper tubes were cut in 3/8″ strips across the width of the tube to keep the curl. Simply cut along the length of the tube, flatten out and mark 3/8″ strips across the width. This will result in 3/8″ curls.
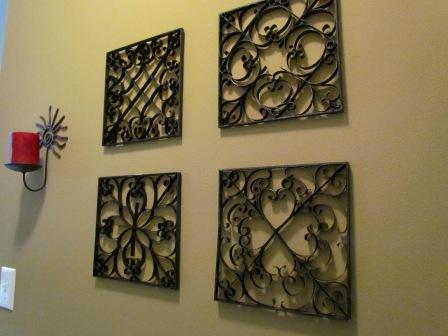
Using some examples that I found on the internet of wrought iron wall art, I created four 10″ squares.
I curled the cardboard with the end of a paintbrush where I wanted curls and used the tacky glue to glue it as I went.


With these squares, I started by dividing it into four equal parts and then creating the same pattern in each part. I simply created as I went and used the end of the paintbrush to make any curls needed.
Once they were completed and dry, I then spray painted them with metal-look paint. Unless you get up close and personal and actually touch them, they look totally like metal. But didn’t cost nearly the price.


I now have fancy looking wall art and spent next to nothing to make it. In fact, my toilet paper loving family actually provided most of the materials. You can’t beat that!
If you like this post and want to share it then click the service!

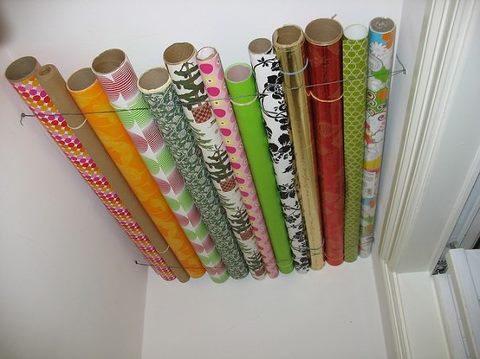 So now the holidays are over and you have that leftover wrapping paper – and the questions comes up of what exactly to do with them. This creative idea was shared by Barbera Lipten and is much appreciated. Use four eye hooks and wire thinned than bailing wire. My wife and I still just take the remnants and carefully fold them down to go into storage with our Christmas decorations. We will even do this with brand new rolls of paper. But this idea is really great for the everyday paper for us. Birthday paper, baby etc. It also makes it so the paper is very handy to get to and put back.