My Cluttered Life – Part 2

I can’t tell you the number of items I find around the house that were purchased and either weren’t what I was looking for, didn’t fit just right, or just decided I really didn’t want anymore. They get put down with the intention to return.

Sometime attempts get made to do the return but where is the receipt? If I can’t find the receipt you get store credit and, well, I really want my money back. So it sits, in a pile, until its too late to return. Now what do I do with it? Sigh….

If it really can’t be used it either needs to go to the trash or in a container to be donated. It can be given to a friend or family member, as long as it goes out of your home. A big rule: No holding or storing items for others who do not live with you.

Lots of money is waited this way. I wonder if you took one popular store and added all the sales of product from that store that were never used and had had intention to be returned but ended up in a death pile in someones home would tally up to. Shivers…

So not much can be done for these items once they have been in your possession for a period of time but to donate, five away or trash. But, what can I do to prevent this from happening again in the future. Here is an approach I have developed to keep this from happening.

Get a zippered pouch and keep it in your car and get in habit of putting receipts in the zippered pouch so returns are easy. If you find you need to return something put the item back in the store bag with the receipt taped to the item so it does not get lost and put it in your car. Next time you go to that store or drive by that store do the return.

Make sure you regularly purge your zippered pouch of receipts after a certain time goes by when you can’t usually return, like 90 days, unless you need the receipt for a warranty.

Since I have got this habit it makers returns easy, it keeps a pile from developing and I have not once had to dig through the trash to find a receipt.

My Cluttered Life – Part 1

It has come to a time in my life that I have had an epiphany to the fact I hate clutter. I hate to move it around, to look for certain items and I certainly hate it to move from one place to another. I have started a quest to rid my life of excess. Don’t get me wrong I do like my stuff, but there has to be a line drawn in the sand.

So I am going to start writing a series of articles about clutter and for some of us hoarding. I will also talk about purging and cleaning and freeing yourself of the burdens ‘stuff’ brings to your life. You can follow these articles under the category ‘My Cluttered Life’ on the side panel of this blog. I will write every now and then. Some will be short and sweet with tips and tricks. Some will be an accounting of my goals and I want you to use them to help make your life a bit more free.

So, I just moved. Not far away but we moved from a temporary townhouse into a house so everything is now in one place. We moved from Rio Rancho, NM to West Jordan, UT (think Albuquerque to Salt Lake City areas). We moved from a house to a townhouse until we got established and figured out exactly where we wanted to live and where work would be. It took us two years. Yes, that temporary housing didn’t end up being so temporary. That caused a problem.

When I moved up here thinking it was a temporary move I packed accordingly. I packed stuff for a storage unit and packed stuff to live with for a few months. I figured I would keep things to a minimum that we were living with and I would handle it. So, most of everything went into storage. But when you live in a home for two years you need stuff (Yes, that temporary thin ended up to be two years). So, instead of digging through a three car garage packed very tight we just bought new. Now everything is in one place we have duplicates and lots of them.

This was the first step to make in my series of articles I am writing. I do not need two of most items. So out went ten good sized boxes that were just literally picked up by Big Brothers Big Sisters. It feels good to pass on items that were perfectly good to someone who could use it while it benefiting a worthwhile charity and in turn freeing up space in my home. I am sure I will find more duplicates as I move through the house but that is alright. I can make another large load to donate or take a box at a time to a local thrift store.

My strategy now is to go to one tote to another. Discard things that are no longer in working condition, broken or just not wanted anymore. I am also using labeled totes to put things that are ‘I don’t knows’. When I am done going through the house I will take one of these totes at a time and everything in the tote will find a home in my home or it will go to the trash or donate. Will write another article on the flip side of doing this. See you all then.

4 Things Every Children’s Bedroom Needs

As we love our kids so much, we often strive to give them the best of everything that we can. After all, your little princess or prince is the most important person in your life. Aside from teaching them responsibility and discipline, they also deserve the royal treatment. Why not start by redesigning their castle i.e. their bedroom? As your child grows you’ll get new opportunities to decorate their room, meaning that now you have the full freedom to experiment with the design. Of course, it can be easy to get carried away when you start having fun decorating, so here is what every child’s bedroom actually needs.

1. A personal touch

Without a personal touch, your kid’s bedroom will end up looking cold and generic. You don’t want all that hard work to be for nothing, so a touch of warmth will go a long way. Personal touches can be introduced to the room in many ways. The more unique you are, the better. One of the best ways to bring warmth and love through touch to your child’s room is to let them help with decorating. This may be a fun project for you, but children have a special way of looking at things.

When painting the room, you can let your child paint their palm in a different colour and press it to the wall. Then, let them sign their name in paint next to the palm print. That can be their unique stamp on the room. Just make sure to use non-toxic paints for this project. As well as that, you can look up some interesting DIY projects and create personalized room décor with your kid.

2. The bed

The bed might be the most important part of your child’s bedroom. You may think that you can just get any frame and mattress and be done with it, but that’s not all there is to it. Picking out the perfect bed will tie the room together better than anything else. As well as that, this is the most functional piece of furniture you’ll buy for their bedroom, so you need to make sure it’s comfortable and high quality. Ideally, you want to invest in a good bed that they won’t outgrow and that won’t succumb to wear and tear any time soon. That’s why it’s always a good idea to read a few bed buying guides before you make your purchase.

As well as the quality of the bed, the position is important too. Where you place the bed will set the tone for the whole bedroom. Placing it next to the wall makes for more playing room and concise design, but centre-placement often makes the room look warmer and more complete.

3. Toys!

No children’s room is complete without the toys. After all, their magical bedroom will mean nothing to them if they don’t have anything to play with. Toy shopping is also a great opportunity to learn something new about your kid. You’ll be up to date with their interests and will get to see exactly how their little brain works. As well as that, you’ll be working on their creativity.

You should look for quality kids toys in all segments. From art to sport, from dolls to toy cars, your kid should have a little bit of everything to play with. This way, you’ll expand their mind and interests and do wonders for their creativity. The quality of the toys will have a lot to say in how much their interest is sparked, so don’t be afraid to splurge a little.

4. Don’t neglect the walls

The walls are your biggest canvas in any room. When it comes to your child’s room the sky is the limit in wall decoration. Depending on your budget, you could go from painting the room together to incorporating lots of fun gizmos. Your goal is to create a room as colourful and cool as you can. You can start this by painting every wall in a different colour.

If your child is artistic, you can create a drawing section on one of the walls where they would be allowed to create their own art. Those who want to go a step further can easily put a blackboard over the wall surface and let their kid’s imagination run free. A wall blackboard may also be useful for making to-do lists and writing important things down.

Conclusion

Some parents think that going all out for a childhood bedroom is unnecessary because children grow, but what they don’t realize is that they’re giving their child memories they will cherish forever. From being involved in the design process to spending innumerable hours playing in their magical room, the experience is bound to stay with them well into adulthood.

How To Prepare Your Belongings For Temporary Storage

Source: unsplash.com (free to use and share, no attribution needded)

An inevitable part of adult life is being in transition at least once at some point of it. It starts with moving away from our parents’ home, and many people experience transition periods numerous times later on – whether it’s accepting a temporary job in another city or country, moving to a new neighbourhood, or even just taking an extended holiday. There’s also another kind of transition – one where you stay in the same place, but your life and habits change completely, like having a baby or starting a business from your home, where all of a sudden you need to make more room.  All these changes result in temporarily storing your things away, and since that may seem like a dreary task, we’re here to break things down for you so you can get organized easily.

1.     Make a List


Source: unsplash.com (free to use and share, no attribution needded)

Of course,  all big, messy ventures are taken on by first making a list. For the ultra-organized type of people, making lists is always the first step, because it takes the chaos away from any process, and sometimes they even turn to Excel spreadsheets for pure enjoyment. If you’re not the super-organized type, you will nevertheless feel the bliss of writing down a simple list of things you need to store away – and then checking each item off one by one as you get them packed. Feels good, right?

2.     Get Packaging Materials

Go down that neat list of everything you need to pack and write down which kind of materials you will need for packing – cardboard boxes and their approximate size, butchers paper and bubble wrap for fragile items, etc. It doesn’t have to be very precise, but jotting down some notes on the amount and kind of packaging you need will make it much easier for you.


Source: unsplash.com (free to use and share, no attribution needded)

For storing items like books, clothing, and documents, it’s best to use plastic storage tubs, because, unlike cardboard, they will protect these items from moisture and mold. You can buy these materials from any self-storage business or ask some local businesses to give you the boxes they intended to recycle. Don’t forget to also buy tape, markers and labels.

3.     Get Packing!

Pack your stuff carefully so that it will not get damaged during transport or storage. Encase the fragile items in many layers of bubblewrap and butchers paper, and make sure to put in some „stuffing“ also, such as newspapers or packing peanuts. Remember that there will be a lot of extra weight once everything is stacked together. Or maybe, to stay on the safe side, you can even get help with that from the storage facility you choose. Here in Wollongong, we have the Wollongong branch of storage services that offer protective padding for free to secure items in place and ensure protection during transportation,  and there are similar options in bigger cities all over the world. Place heavier items in smaller boxes to avoid overloading and potential injury for whoever will be carrying them.

4.     Labeling

Label each box with the exact items that are in it to save yourself a lot of frustration for the time when you’re going to be unpacking again. Since these boxes are going to be placed all together somewhere, a good tip is to use colour-coded labels referencing rooms or types of items that are inside – for example, green labels for dinnerware, red ones for kitchen appliances, etc. Keeping a precise written log of all the labels is a good idea to ensure you know later what you have stored away and where exactly to find it.

5.     Choose a Storage Facility

Thankfully, most storage units are now secure, weatherproof and even monitored, so choose the right one and you won’t have to worry about damage or theft. Look for storage companies that offer advice and assistance with loading, because it doesn’t make a difference in pricing and it will be a huge help to you. Since you are essentially entrusting your possessions to somebody, be careful and make sure you are dealing with absolute professionals – see if they have a website and what it’s like, evaluate their communication with clients, and even go there to see the facility in person before you make your choice.


Source: pixabay.com (free to use and share, no attribution needded)

Once everything is ready and set, get to loading, preferably with the help of professionals. With everything stacked nicely at the storage facility, take notes on where the different types of labels are. Finally, rest easy, knowing that you have accomplished quite a task. Someday further on, you will reunite with your things and give yourself a pat on the back when you realize you can find them all quite easily (yay for that written log).

Messy Home: How to Keep Your Things Organized

Where did I put that appointment card? Have you seen my favorite blue shirt? How on earth did the keys end up in the fridge? If you frequently find yourself asking these (or similar) questions, or you simply want to declutter your life, then this article is for you. It contains simple steps on how to organize a room with too much stuff as well as some useful organization tips for your home, to help you get organized and stay organized!

pexels-photo-245207

PART ONE: Getting Organized

No, organizing is not shunting piles from one room to another, and neither is it shoving shoes under the bed. The easiest, quickest and most painless way of organizing your home is to tackle one room at a time. Each room can be divided into smaller, manageable sections, such as the floor, closet, pantry, draws, and tables – then give yourself a well-deserved pat on the back as you achieve each of your goals.

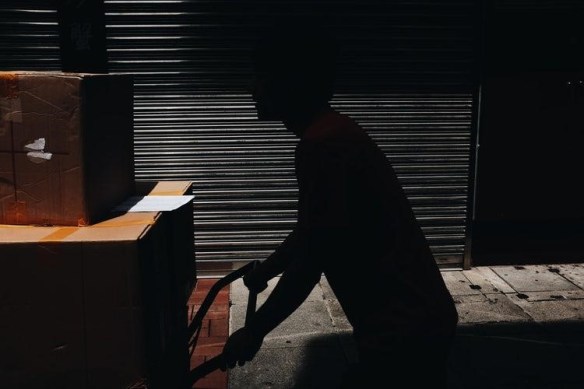
Get rid of everything you no longer need – As you progress from room to room, first make piles of anything that you no longer need, including paperwork, clothes, utensils, and ornaments. These items can be donated, passed on, recycled or thrown out. The creative soul may wish to repurpose or upcycle – extra mugs, pots and empty shoeboxes are ideal for creating a new and improved storage system.

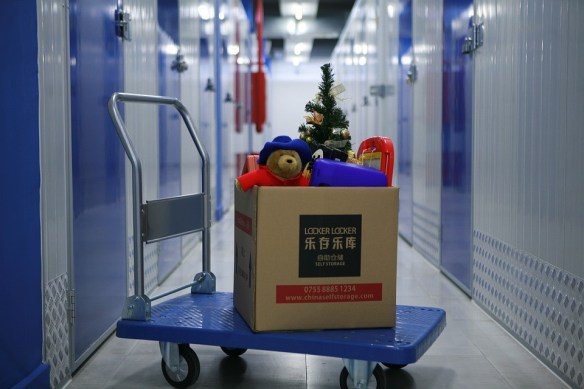
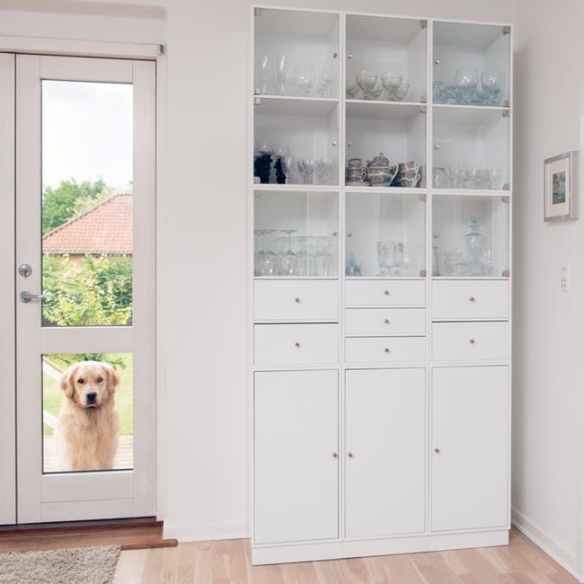
Add extra storage – Corners, high places, and other hard-to-reach places are often wasted space that can be exploited for storage with the simple addition of bookshelves or cupboards. This is a great chance be creative with many ingenious storage solutions available, such as rotating cupboards in corners, nooks under stairs and floor-to-ceiling shelving. Raising the bed onto a plinth with roll-out drawers or adding a loft may also be viable options. If you still feel that your home is bursting at the seams, consider building a garden shed or renting a storage container off-site.

Give every item a home – This important step allows you to tidy quickly and efficiently later on, setting you up for success in PART TWO: Staying organized.

Use labels – If you think you might forget where things live (or know that other people will), labeling draws, boxes and those repurposed mugs is a quick, simple and stylish solution – and is one of the best ways to organize a cluttered bedroom.

pexels-photo-271734

PART TWO: Staying Organized

Identify problem areas and times – Mess is commonly encountered at the dining room table after breakfast, on the living room floor at Christmas and in the closet all year round. Once identified, you can then create a system and routine that works for you.

Create systems – For doing laundry, dishes, rubbish, recycling and any problem areas identified. For example, you could consider using a drying rack, multiple washing baskets or a composting system.

Form habits and routines – As with any skill, keeping your room clean and organized all the time needs to be practiced regularly (yes, it can be classified as a skill). Soon, your systems will become productive habits that will save you time, energy and stress in the long run. This may be always making the bed in the morning, sorting the mail as soon as you come home or clearing the dining room table immediately after dinner before sitting down with a hot cup of cocoa as a reward.

Make a list for errands, shopping, and chores – A chalkboard, whiteboard or tear-off notepad can be a stylish addition to your kitchen décor and ensures you will never again have that awful sinking-stomach feeling when you discover you forgot to buy more cereal. It also allows clear communication between roommates/family members, so you are informed when they do use up the last of the cereal.

23646046104_f642b812a7_o

Image Source: Sacha Chua via Flicker

Create lists of daily and weekly chores – This could include washing dishes, vacuuming and cleaning the bathroom/toilet.

Draw up a job roster – If there are multiple people in the house sharing the workload, try drawing up a “chores wheel” consisting of your daily and weekly chores. This way, everyone knows exactly what is expected – and has a deadline. The same method can be applied to just you if you need some extra motivation.

Stock up on cleaning products – So there are no excuses for a missed rotation on the job roster!

Schedule in down time – You have deserved it! Whether you love reading a book before bed or attending sunrise yoga classes, make time to enjoy the satisfying and liberating feeling of being organized!