Do You Make These Simple Mistakes While Selecting Entrance Mats? – By Jason Phillips

Moisture and debris trapped inside homes or buildings can damage flooring surfaces severely. Basically, this mean you’ll have to mop, sweep and vacuum a lot more often. An entrance mat is the only support you have against harmful debris, dirt, and grit. This is a much cheaper solution than replacing floors. Furthermore, it’s a lot safer too; nobody likes to walk on wet floors. Entrance mats are not that expensive and they don’t even require a lot of attention.

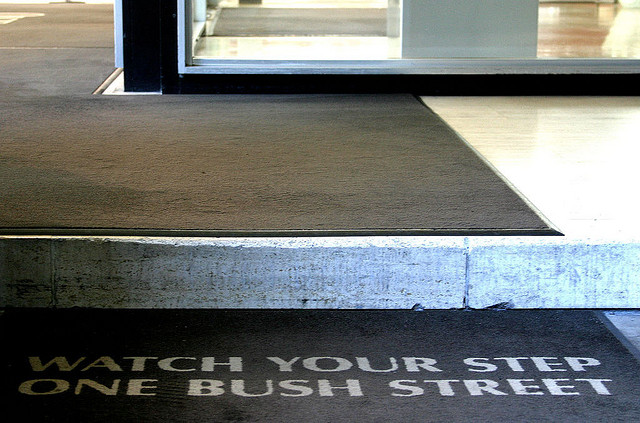
Any type of facility, whether home or office buildings, demands entrance matting. They’re an excellent protective layer from falls and slips. Companies and homes should have such a mat at the entrance because they control the amount of dirt that enters that building; on top of that, they’re trendy and are available in all kinds of interesting models and designs. In special circumstances, entrance mats are also warning signs or advertising billboards. Considering they have such a diversified purpose, they do demand care and maintenance to function correctly and effectively. A lot of people don’t know how to purchase mats. They often make the mistake of buying the wrong size or they don’t think that material is important.

jp1

Invest in Adequate Mats

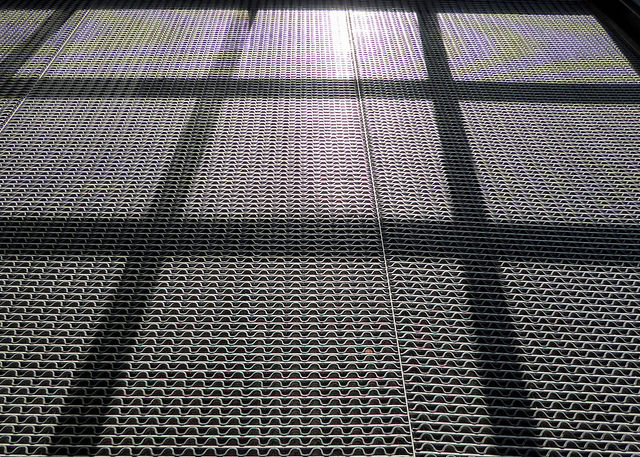
Entrance mats come in a wealth of qualities and types. When it comes to keeping floors protected, there’s no room for compromise. It is important to invest in a powerful entrance matting system. Generally speaking, there are 2 common types of entrance mats used. The first type is a blending mat that removes larger quantities of debris, moisture and dirt from people’s shoes. These have various tufting levels, which basically mean that they scrape the shoe very efficiently, removing dirt and trapping it on the mat.

The 2nd type of commercial matting system has a wiper or finishing at the bottom. It is best during the warm seasons when people’s shoes are mainly filled with dust. As a company, you are advised to opt for a matting system. Placed correctly in areas with intense traffic, these have the capacity to trap as much as 90% of dirt.

jp2

Periodic cleaning of your mats is mandatory

For a space to remain clean the owners must clean their mats periodically. Vacuuming a mat is the easiest way, although if you have anti static mats made of rubber, you can just shake them weekly and wash them every month with warm water. Dirt that gets trapped on a mat doesn’t spread throughout the premises of a home or building. If you make the mistake of buying a cheap mat, you’ll have to mop and vacuum the floor a lot more often to keep the air breathable.

Vacuuming mats properly – how to avoid mistakes

Many people don’t vacuum their entrance mats. They usually change them when they notice they are filled with dirt. This is a huge mistake because by the time you’ll notice the dirt, a large portion has already managed to lie on the floor of that building. Opt for vacuuming using a backpack or canister, or direct suction because the brush on upright vacuum cleaners has the capacity to stir up dust in various levels on mats with different styles and materials. Vacuums with direct suction provide deep cleaning; they use a carpet extractor when it’s impossible to wash them with pressure or hose them out. Avoid using soap during the process, or use in very small quantities. In wintertime, vinegar or a neutralizer are excellent; they remove salt residue thus keeping floors (and mats) protected. After you’ve cleaned them, make sure to leave them to dry. Don’t make the mistake of placing them back on the floor while they’re wet. Leave them on a fence to dry for a few hours.

jp3

Don’t postpone the replacement of a mat

Extending the life or a doormat is a mistake. At some point, you will be compelled to replace a current mat with a new one. Sadly, very few people know when to do that and most of them do it too late. When mats don’t get replaced on time, cleaning a whole building become a nightmare. You risk spending over $1000 in equipment and maintenance, and you certainly don’t want that to happen.


Can I Handle My Own Sink Repairs?

One of the most difficult aspects of taking care of your own home is handling the plumbing services. As one of the most vital features of the home, it is important that they are always up and running at all times, however, it can often be that they are one of the things which can quite often go wrong and can quite often require the most effort in order to fix. When it comes to things such as sink repairs, finding the very best way in which to deal with the situation can be incredibly tough. So when you are looking at the possible options for the best way in which to repair your sink, is it the kind of job which you can take one yourself?
Can I handle my own sink repairs
The first thing to establish when it comes to matters involving your sink is what kind of problem lies ahead. With so many different issues affecting sinks, the ability to repair the problem on your own can be entirely dependent on the nature of the issue. As such, it is important to figure out what is going wrong before you take on the challenge. One of the easiest things which you are able to handle without much help is the possibility of a blocked drain. When the water in your sink is not draining in the manner which is should do (perhaps it is too slow), then it is likely that you are facing a problem with a blocked drain. These kinds of problems can be taken on yourself in the majority of cases by simply purchasing the correct drain unblocker from your local supermarket.
Can I handle my own sink repairs2
These products are designed for home use and are simple poured down the drain in order to shift whatever might be causing an issue. For most other matters, and for those times when the simple unblocking simply will not shift the issue, it might be time to move onto a more in depth approach.
For many people, the ability to take on the challenges of sink repair is entirely dependent on the knowledge which they possess. As well as having a basic understanding of how a drain and a sink works, many people’s first instinct is to look up the issue and see whether they are able to take on the challenge themselves. This can have mixed results. Upon searching for your particular issue, you might well find that the process for resolving the problem is one which takes a huge amount of effort and expertise and this can rule out the solution as a viable option. Similarly, you might well find that the information which you come across is incorrect and will do more harm than good. Or it could even be that you have searched and found the wrong issue and now face a struggle to resolve the problem using this method.
If this is a situation which you have found yourself in, perhaps the best possible solution is professional plumbing services. By hiring in an expert, you can dispense of the long winded processes of having to figure out whether you are able to deal with the situation and then actually dealing with it. When it comes to hiring in the professionals, you can make sure that a good job is done and that future problems of a similar ilk are protected against. This is especially true in emergencies, where any amateur help can often do more harm than good, especially when you might not know what is going on. When it comes to repairing your drains, finding en expert can often be the best solution. You could find some more information on plumbing services Fulham.

Top 5 DIY Home Security Products by Naomi Wheeler

it-security-banner

There are many valuables that we would like to keep protected within our homes including important documents, jewelry, and money. Although burglary and theft can’t always be prevented in your home, there are many ways that you can make it more difficult for them to find your things. Here is a list of the top five DIY home security projects to help prevent theft of your valuables.


Hollowed Book

One of the most common, but most successful and popular ways to protect your valuables, is to hollow out a book. It may take you a couple of days depending on how determined you are to finish it, but it’s a pretty simple process. First, you’ll need a hardback book, some glue, a box cutter, and a brush you don’t mind getting glue in. Mix the glue with a little water (making it about 60% glue), hold the pages together and begin gluing the outside of the book. Once it’s dried, you can begin cutting out your pages from the middle leaving about ½ in. around the edges to make it look like the pages are still in the book. Once you reach the back of the book, you can take glue to the inside of the book to make sure that everything stays together. Now, you have a hollowed out book to hide some of your valuables in!


Safe Pillow

Although this way is a little bit trickier, it is a great way to make sure that your valuables stay safe. You’ll need a throw pillow that you’re willing to cut up, some scissors, thread the same color as the pillow, and some scissors. Cut a horizontal line on the back of the throw pillow that matches the length of the zipper. Take out the stuffing and start stitching the zipper into the pillow. Then, you can put the box or valuables you have set aside into the pillow with the stuffing, making sure the valuables are surrounded by the stuffing so you can’t feel them, and zipping up the pillow. Now you have a secret hiding place, in plain sight, that can help you keep your valuables safe and away from prying eyes.

Painted Jar

A great and simple project that you can finish in a day is to paint a food jar, particularly mayonnaise jars, to make them look like they still have food in them when in fact, it is holding your valuables. Find a paint that looks like mayo and gradually paint the inside of the jar with the color, making sure that it doesn’t get on the outside. A good way to prevent this is to use a plastic bag on the outside to prevent drips. Then, once your paint is completely dry on the inside (could take a couple of days depending on the paint and how thick it is), you can hide your valuables that won’t be harmed by cold temperatures and put it in the fridge!


Potted Plant

Although it may seem simple, using a potted plant to hide your valuables or money is a great way to thwart people who would steal from you. All you need is a plant that you want to hide your items in, and an old medicine bottle or small watertight container. Then, put your valuables or money into the bottle or container and dig a hole big enough for the container in your potted plant. You can then try to remember where your valuables are hidden, or you can put down a small rock or plant decoration to remind you where you hid your valuables.


False Bottom Drawers

Hiding things is drawers is not always the best way to protect important documents and valuables, but hiding things ‘underneath’ your drawers is a great way to prevent valuables from getting stolen. All you need is fabric or wood that looks like the bottom of your drawers cut to the size that you need. Then, you can put your valuables in the drawer, put the false bottom over them, and fill up the drawer with things that you normally would such as clothes, office supplies, or less important paperwork. False bottom drawers are a great way to hid paperwork and other important documents that people might want to steal. This way, even if someone rifles through the drawer, they won’t be able to find anything of value.

A Guide To Cleaning A Gas And Rayburns

An AGA or Rayburn, the traditional range cookers from Britain, often form the heart of a country or farmhouse kitchen. AGA owners are simply passionate about them, while others rave about Rayburns, which also provide hot water and central heating. Reconditioned AGAs now sell for a small fortune in the major cities, where they’ve become very fashionable kitchen accessories.

With oil, gas and the traditional solid fuel versions all available, there’s great flexibility in fuel sources. Of course, solid fuel versions require more cleaning as soot and ash from coal can quickly build up. With potentially harmful fuels used in the first two versions however, it’s absolutely vital to take extreme care when cleaning – especially inside.

A guide to cleaning agas and rayburns
It’s crucial to have both types of range serviced regularly to keep it running in tip-top condition, and safely. Always use a qualified, trained AGA engineer. But a lot of cleaning and prevention of problems can safely be undertaken yourself at home. While the ranges are simple to clean, the best way to keep them looking as if they were new is to prevent dirt and grease building up in the first place.

If anything spills onto vitreous enamel surfaces, it needs to be cleaned away immediately with a damp rather than wet cloth. That includes the doors and front, and sometimes the back plate. If spills are given a chance to bake dry, they can stain and are much harder to remove. Milk and fruit juice is particularly important to get off straight away. If you don’t, the acids will weaken and stain enamel.

Inside the oven, splashes aren’t a concern as they simply burn off. The dust left behind can just be brushed away, and it’s OK to use wire brushes on anything that’s cast iron inside. There are even self cleaning models now. It’s the same with the hot plates: most spillages simply burn away fast. Avoid cleaning them when the range is hot.

So its the delicate enamel that’s the most important to protect. It can be scratched and dented, so make sure the doors and wheel vent are treated with care. Far better to handle them with oven gloves than to kick them shut when they are hot. You can buy branded cleaners and cloths specifically designed for cleaning Aga and Rayburn enamels. A soft rather than abrasive soap pad also works well. Look for products that have the VEA – Vitreous Enamel Association – seal of approval.
A guide to cleaning agas and rayburns2
It’s very important not to use oven cleaners in spray form either inside or out, nor scourers, nor abrasive creams. Also don’t use very wet or cold cloths: damp only and warm is good. A gentle cream south east London cleaner should be fine. You can hoover away dust, but only when the range is not lit. A good polish with a lint-free, soft cloth, will buff up the surface, rails and lids to a shine. For ease, the doors can be removed as can the insulating rings: just don’t mix them up! Each only fits perfectly on its original position. Don’t soak any of the parts in water, however.

Older ranges may be more prone to scratches, stains and scorch marks than modern models. Enamel has come a very long way since the 1950s! A modern Rayburn’s surfaces should be able to withstand sudden temperature changes, and maximum heats of 400 degrees centigrade. Acids in food should not stain them these days. The enamel is hard and wont chip very easily, and it has the advantage of not allowing bacteria or mould to develop on the surface.

Top 5 DIY Home Security Projects By Naomi Broderick

property-protection-trustThere are many valuables that we would like to keep protected within our homes including important documents, jewelry, and money. Although burglary and theft can’t always be prevented in your home, there are many ways that you can make it more difficult for them to find your things. Here is a list of the top five DIY home security projects to help prevent theft of your valuables.

Hollowed Book – One of the most common, but most successful and popular ways to protect your valuables, is to hollow out a book. It may take you a couple of days depending on how determined you are to finish it, but it’s a pretty simple process. First, you’ll need a hardback book, some glue, a box cutter, and a brush you don’t mind getting glue in. Mix the glue with a little water (making it about 60% glue), hold the pages together and begin gluing the outside of the book. Once it’s dried, you can begin cutting out your pages from the middle leaving about ½ in. around the edges to make it look like the pages are still in the book. Once you reach the back of the book, you can take glue to the inside of the book to make sure that everything stays together. Now, you have a hollowed out book to hide some of your valuables in!

Safe Pillow – Although this way is a little bit trickier, it is a great way to make sure that your valuables stay safe. You’ll need a throw pillow that you’re willing to cut up, some scissors, thread the same color as the pillow, and some scissors. Cut a horizontal line on the back of the throw pillow that matches the length of the zipper. Take out the stuffing and start stitching the zipper into the pillow. Then, you can put the box or valuables you have set aside into the pillow with the stuffing, making sure the valuables are surrounded by the stuffing so you can’t feel them, and zipping up the pillow. Now you have a secret hiding place, in plain sight, that can help you keep your valuables safe and away from prying eyes.

Painted Jar – A great and simple project that you can finish in a day is to paint a food jar, particularly mayonnaise jars, to make them look like they still have food in them when in fact, it is holding your valuables. Find a paint that looks like mayo and gradually paint the inside of the jar with the color, making sure that it doesn’t get on the outside. A good way to prevent this is to use a plastic bag on the outside to prevent drips. Then, once your paint is completely dry on the inside (could take a couple of days depending on the paint and how thick it is), you can hide your valuables that won’t be harmed by cold temperatures and put it in the fridge!

Potted Plant – Although it may seem simple, using a potted plant to hide your valuables or money is a great way to thwart people who would steal from you. All you need is a plant that you want to hide your items in, and an old medicine bottle or small watertight container. Then, put your valuables or money into the bottle or container and dig a hole big enough for the container in your potted plant. You can then try to remember where your valuables are hidden, or you can put down a small rock or plant decoration to remind you where you hid your valuables.

False Bottom Drawers – Hiding things is drawers is not always the best way to protect important documents and valuables, but hiding things ‘underneath’ your drawers is a great way to prevent valuables from getting stolen. All you need is fabric or wood that looks like the bottom of your drawers cut to the size that you need. Then, you can put your valuables in the drawer, put the false bottom over them, and fill up the drawer with things that you normally would such as clothes, office supplies, or less important paperwork. False bottom drawers are a great way to hid paperwork and other important documents that people might want to steal. This way, even if someone rifles through the drawer, they won’t be able to find anything of value.