I always love finding new kitchen gadgets but when I find kitchen gadgets that help with storage or ease the process of preparing to cook I get excited. I found these three kitchen items that are really nice and made well – they either help with storage or they help you get things easier so you can spend less time preparing to cook and more time making your delicious meal for your family. BONUS – the manufacturer has a special free drawing for $40.00 made available to my readers – you can find the link at the bottom of the article – FREE FREE FREE!
YouCopia Spice Steps
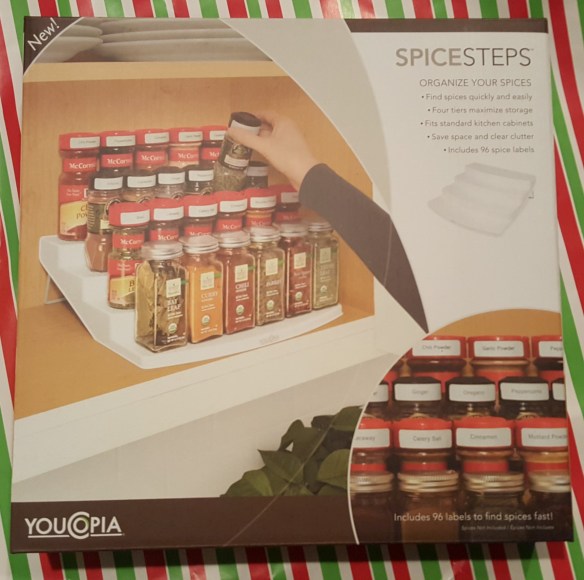

YouCopia’s SpiceSteps was designed to hold grocery-store spices in the kitchen cabinet or pantry so they are easy to find, every time. It features four tiers instead of the standard three so you can store more in the cabinet while saving valuable counter and drawer space. Turn a jumbled mess into organized success.
This clever organizer includes 48 printed and 48 blank labels so you can see all of your spices at once. Just label the top of spice bottles and arrange alphabetically or by frequency of use for convenient cooking.
SpiceSteps holds approximately 24 standard bottles on four tiers. The stair-step design lets you view and retrieve spices in a snap. Stop riffling through your cabinets and purchasing duplicate spices…. with an organized system, you always know what you have on hand!
SpiceSteps fits in standard kitchen cabinets and measures 10-3/4 inches deep by 11-3/8 inches wide by 3-3/4 inches high. Each step fits bottles that measure up to 2-1/4 inches in diameter. No mounting or installation is required so you can set-up in a snap.
Reduce clutter and maximize storage space with four tiers instead of the standard three. SpiceSteps is a perfect small-space solution that makes it easy to find and reach what you need while cooking. Try it with cans, jars and baby food too. You’ll smile every time you open the cabinet.
It’s important to stay organized when kitchen space is at a premium. You’ll be amazed how much more you can store when utilizing the full depth and height of your cabinet. YouCopia creates innovative home organization products to help you simplify and enjoy life.
Purchase this here: AMAZON YouCopia
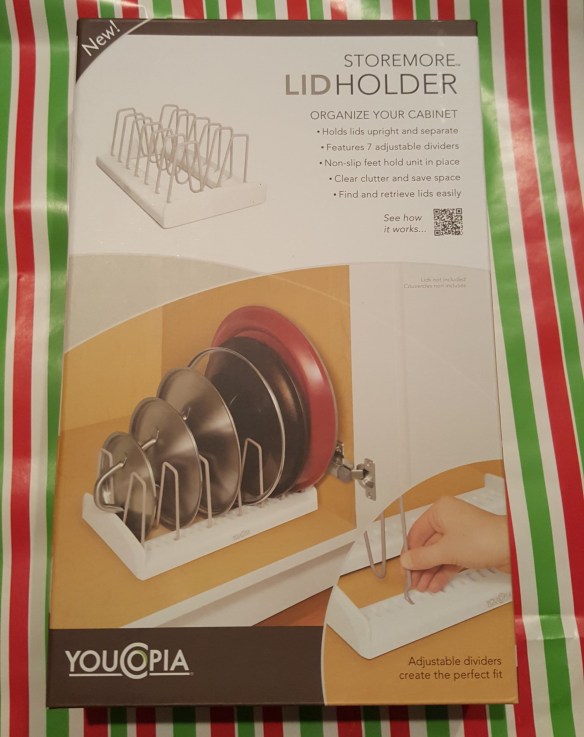

The StoreMore Adjustable Lid Holder makes it easy to store and organize all of your pot and pan lids in the cabinet or pantry. Save space and reduce clutter by storing lids vertically. I love this – and no more pan lids without a real home!
This smart cabinet organizer features seven wire dividers that can be adjusted to perfectly fit lids so they stay upright and separated. A deep U-shaped bend in each divider was designed to accommodate all types of handles. These dividers are really strong – not like the wire used in some that are like wire used in cheap wire coat hangers. It’s easy to find and remove one lid at a time while cooking! Coated steel wires are strong and secure, so they won’t bend, pop out or scratch lids.
A unique base design centers round lids to prevent them from rolling out. Four large soft feet keep the organizer firmly in place inside the cabinet. No mounting or installation required. This too, is a good strong plastic – not flimsy at all.
Purchase this here: TARGET AMAZON YouCopia

 Build a custom spice drawer in a snap with the YouCopia SpiceLiner which is an affordable solution that allows you to lay spice bottles flat in a drawer for easy viewing and accessibility. Soft foam prevents bottles from moving when the drawer is opened and closed.
This cool gadget holds round or square bottles up to 2.5” wide and fits standard kitchen drawers; can be trimmed as needed. Each strip measures 18.0″D x 2.5″W x 0.4″H (45,7 D x 6,4 W x 1,1 H centimeters) and holds 4 full-size bottles.
Sold as 3-pack which holds 12 bottles and 6-pack holds 24 bottles. Non-slip foam keeps bottles in place so the bottles do not roll. There is no mounting or installation required which is great for those of us who don’t do well with tools.
Purchase this here: TARGET AMAZON YouCopia
To enter the really easy to enter drawing for $40.00 worth of YouTopia product click the graphic below. Think about these products for gifts for that special cook or chef or to someone who might need a nudge in the direction of organization – without telling them in person!

Win a YouCopia Product of your choice #26
https://js.gleam.io/e.js
If you like this post and want to share it then click the service!

 Photo courtesy of organizedclutter.com