Breakfast Burritos

Breakfast Burritos

1   can (1 Ib.) refried beans
1   can (4 oz.) diced green chilies
6   large eggs
3/4 cup purchased green salsa, mild to hot
l/3   cup chopped fresh cilantro (coriander), plus cilantro sprigs
6   flour tortillas (7 to 8 in.) %  cup shredded jack cheese 1   cup unflavored nonfat yogurt Lime wedges

In a 10- to 12-inch frying pan over medium heat, stir beans and chilies of­ten until bubbling, 3 to 4 minutes.

Meanwhile, beat eggs to blend with 3
tablespoons salsa and chopped cilan­tro. Push beans to 1 side of the pan; pour egg mixture into cleared area and stir often until set, about 3 minutes.

Concurrently, wrap tortillas in a tow­el and heat in a microwave oven at full power (100 percent) until hot, about 3 minutes. (Or seal tortillas in foil; bake in a 350° oven until hot, about 10 minutes.)

For each burrito, spoon 1A of beans, eggs, and cheese in center of a tortilla; roll to enclose. Serve, seam down, on warm plates with additional salsa, yo­gurt, lime, and cilantro sprigs. Makes 6 servings.

Per serving: 312 cal. (35 percent from fat); 19 g protein; 12 g fat (1.9 g sat); 33 g carbo.; 924 mg sodium; 226 mg chol.
Italian Style Escarole

Escarole Italian-style

1 1/2  pounds (2 large heads) escarole
3   ounces thinly sliced pepperoni, cut into matchstick pieces
2   large cloves garlic, minced or pressed
1   can (about 1 Ib.) cannellini (white kidney beans), rinsed and drained
Lemon wedges Salt and pepper

Trim  and  discard  core  and  tough stems from escarole. Rinse leaves, drain well, and tear into 2-inch pieces.

In a 5- to 6-quart pan over medium-high heat, stir pepperoni until it sizzles and begins to brown, about 4 minutes. Add garlic and stir for 30 seconds. Add escarole, a portion at a time, stirring often until wilted, about 3 minutes total. Gently stir in cannellini.

Pour into a shallow bowl and offer with lemon wedges and salt and pepper to add to taste. Makes 6 servings.

Per serving: 137 cal. (45 percent from fat); 7.8 gprotein; 6.8 g fat (2.3 g sat); 12 g carbo.; 396 mg sodium; 11 mg chol.

Wooden Puzzle

Make your own wooden puzzles
The solutions to these classic brainteasers are bafflingly simple

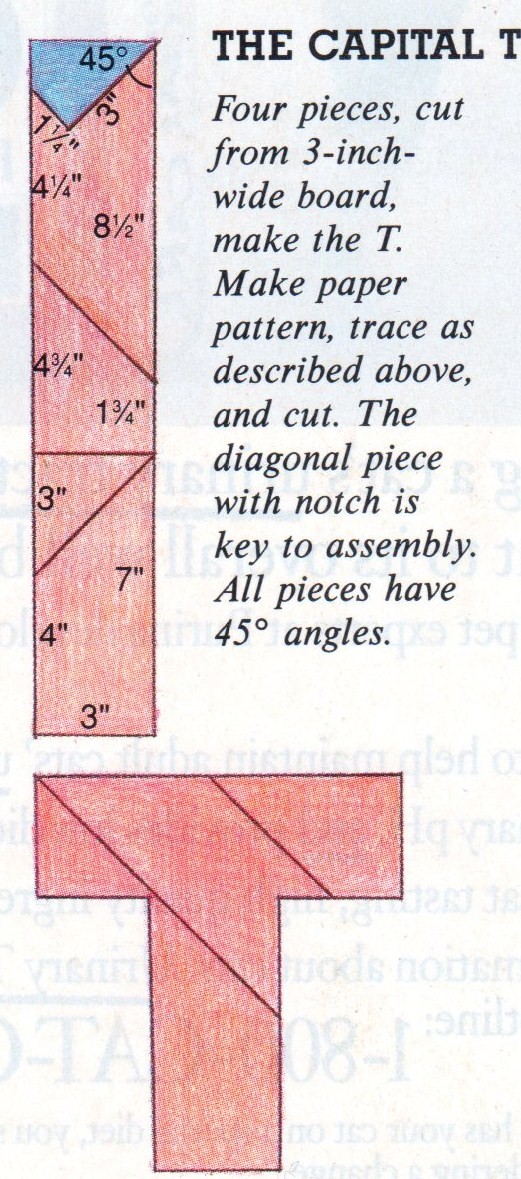
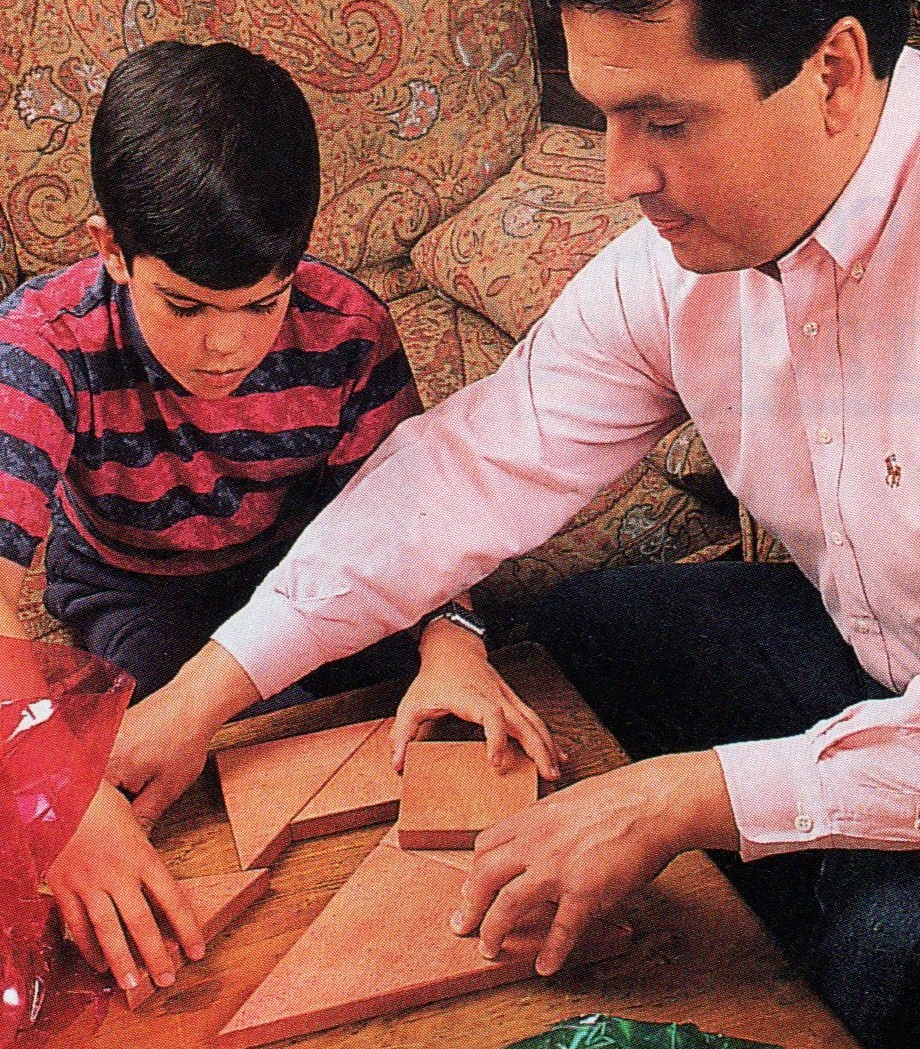
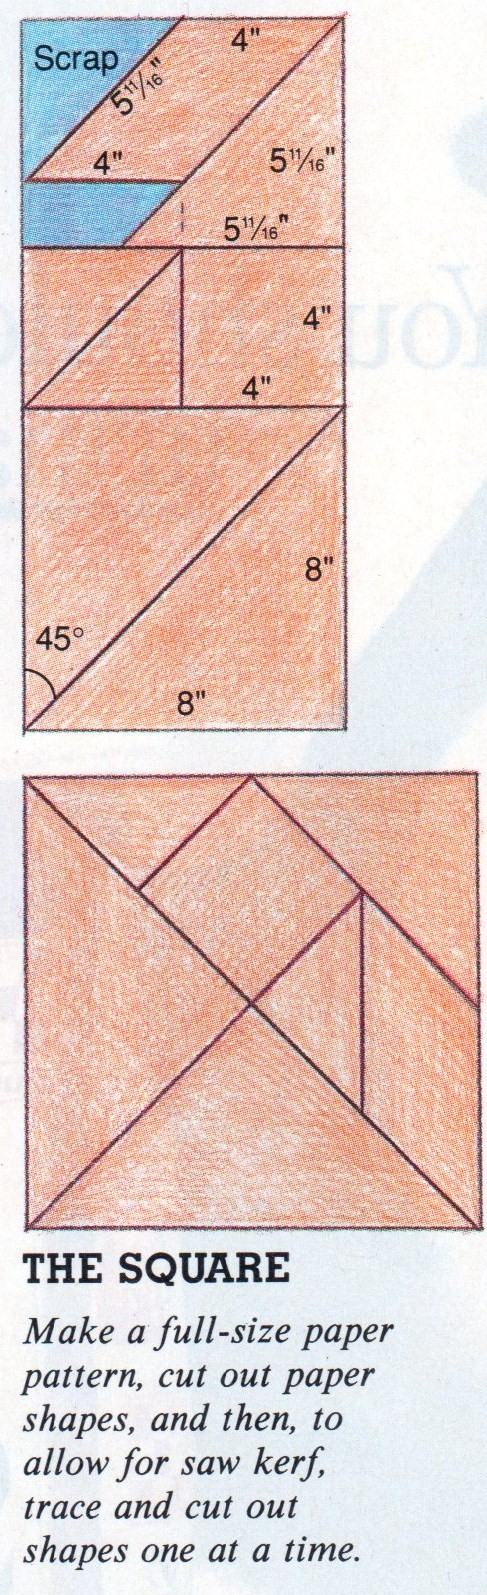
TWO CLASSIC PUZZLES challenge you to ar­range their geometric parts into a square or a capital T. They look easy to make but require careful planning and straight and accurate cuts.

Although similar puzzles are usually smaller, we made these a little oversize: the square has 11 Ma-inch sides, and the T is 10 inches tall. For durability and appear­ance, we made our puzzles from pieces of hardwood (ma­ple and cherry), but you can use any type of wood. You’ll need 2 feet of l-by-4 for the T and the same amount of 1-by-10 stock for the square.

If you don’t have a table saw, ask your lumberyard to rip the l-by-4 to 3 inches in width and the l-by-10 to 8 inches. From these, you can cut the puzzle pieces with a jigsaw or a handsaw. You’ll also need a sanding block, medium- and fine-grade sand­paper, a metal ruler, and a pencil. Sand and seal with paste wax.

Wooden Santa & Reindeer

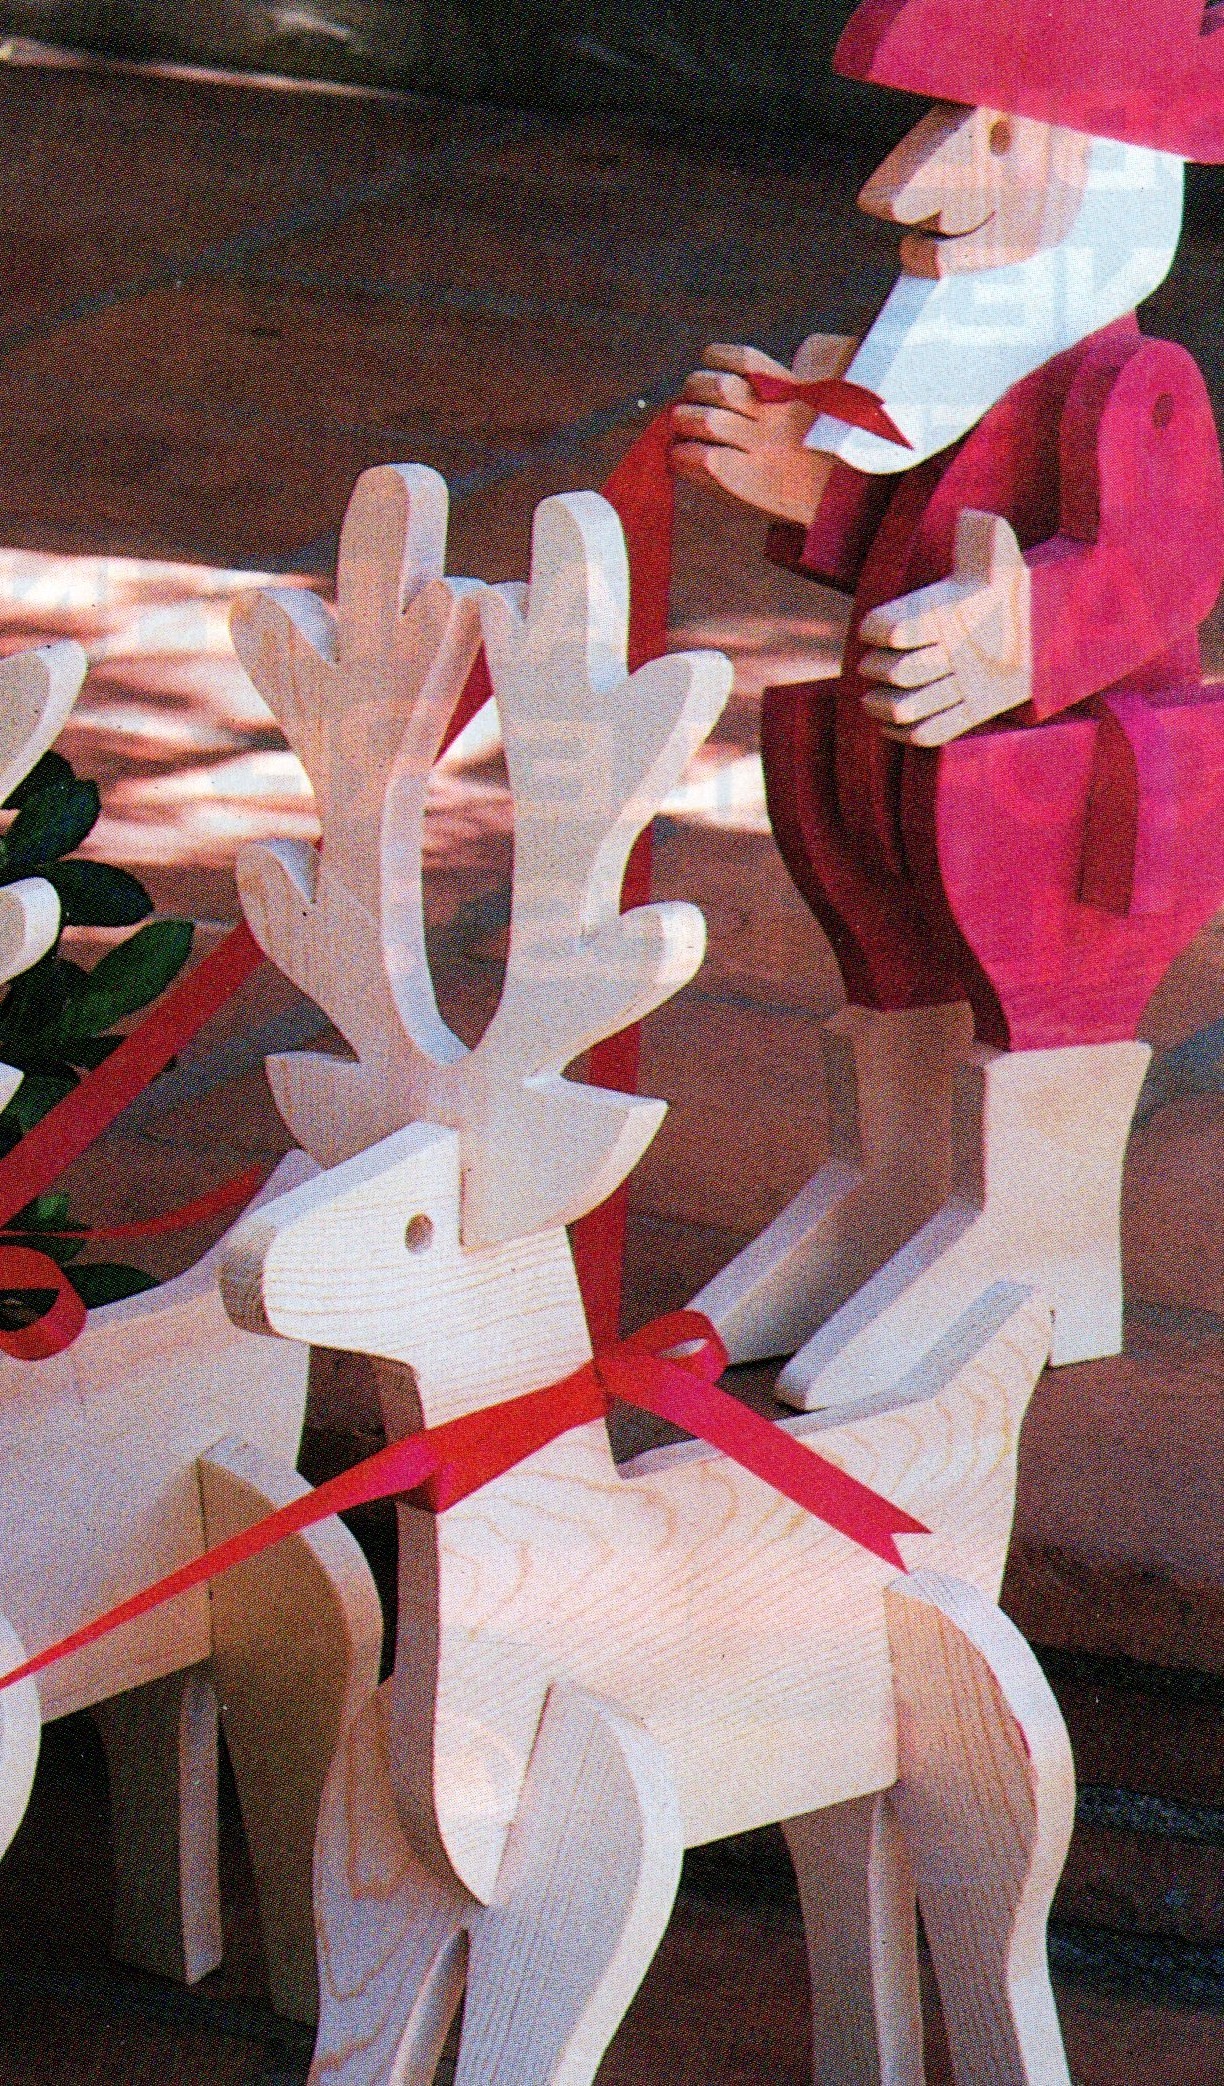
SET THE STAGE FOR SANTA’S arrival with these simple I slot-together wood figures. I Our Western Santa and his reindeer are cut from pine 1-by-12s, with notches that let you slip the fig­ures together for quick display.

To make the figures, you’ll need heavy paper; a saber, jig-, or band saw; a drill with a 1/2-inch bit; sandpa­per; and wood (about 4 feet of 1-by-12 per figure if you cut all pieces so they run with the grain, less if you cut smaller pieces across the grain). Our Santa’s arms pivot on a piece of 1/2-inch dowel, but you can glue them onto the body if you prefer.

Enlarge pattern on paper so each square equals 2 inches, then outline on wood. Make notches no wider than wood’s thickness so figures stand properly. Cut pieces, drill ‘/2-inch holes for eyes and arms, and sand. Sand as needed to widen notches.

Finish the figures with paint or stain, or leave them natural. We painted the white beard on our Santa. For his clothes and cowboy hat, we applied red paste shoe polish to let the grain show through. Use masking tape to keep lines precise.

Christmas Stocking Of Every Style

A shoe-stocking for everyone

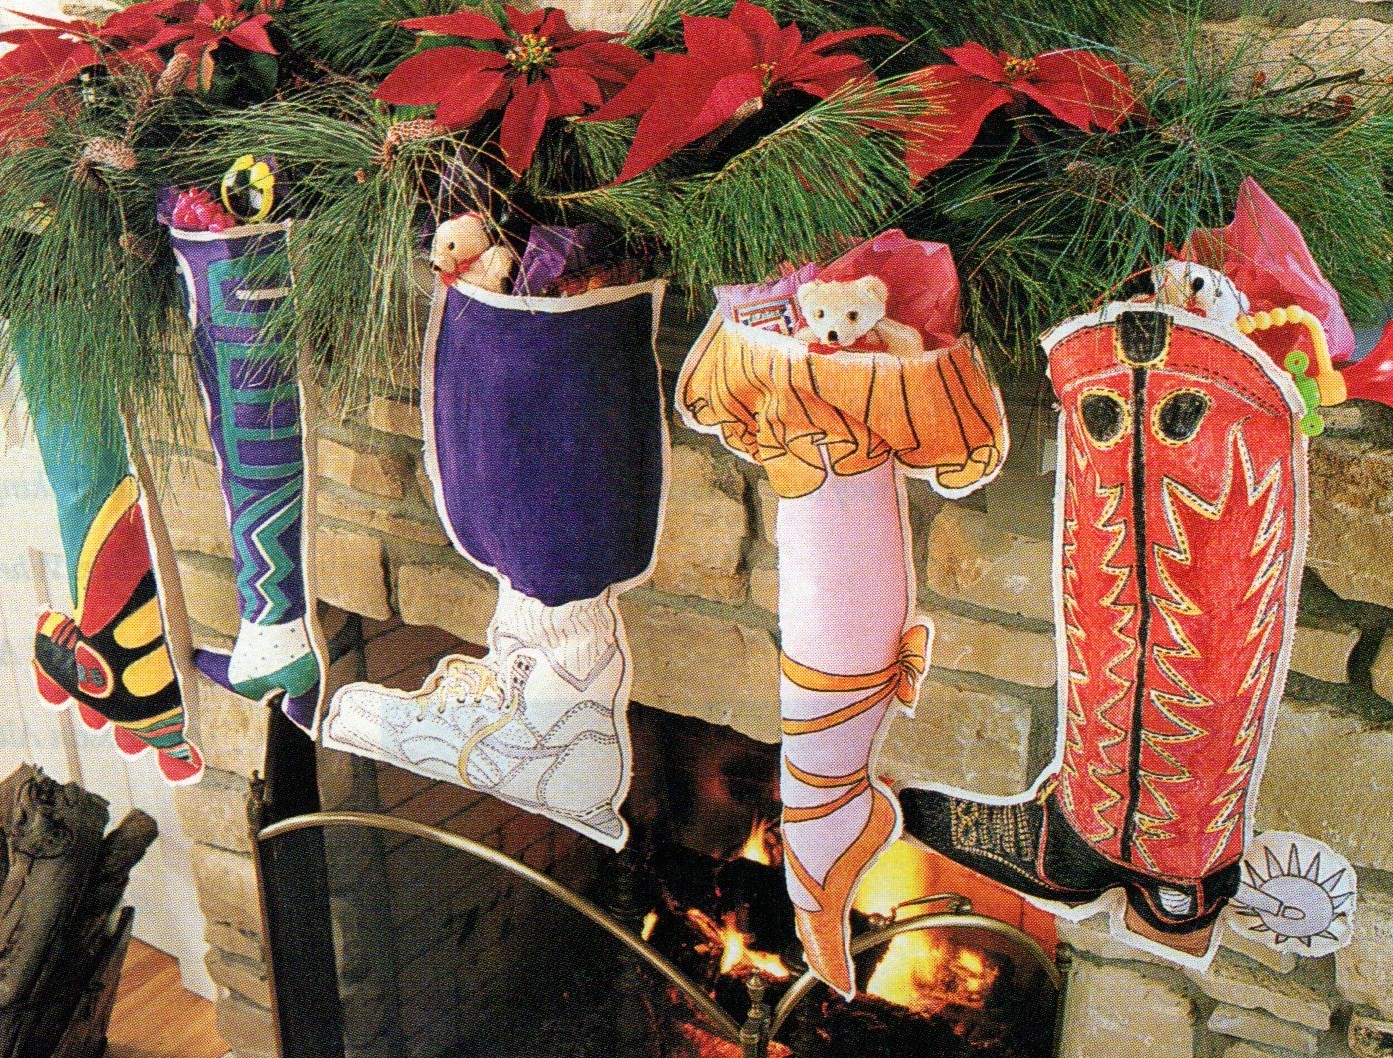
Here’s your chance to cobble Christmas shoe-stockings that play up the interests or per­sonalities of family members. Whether you have a young ballerina, cowboy, basketball star, or other sport or hobby enthusiast, there’s a style that fits. Copy our examples, work from other shoe styles, or invent imaginary footwear. No names need go on these stockings—one look announces for whom they’re intended.

To construct each stocking, start with a piece of off-white artist’s canvas that’s been folded in half. On the top layer, draw the shoe outline and details lightly with pencil, then trace over the lines with permanent markers meant for fabric. Next, paint between the lines with fabric paint.

With the cloth still folded in half, pin through both layers of canvas. Cut around the shoe image, leaving a 1/4  to ‘/2-inch border. Stitch the halves together 1/4 inch from edge, leaving the top open. Zigzag-stitch around the border and along each top edge.

For easy hanging, stitch a loop of sturdy ribbon to the top of the back of each stocking. Finally, stuff the foot with tissue paper or a soft, space-filling gift to give the shoe a three-dimensional look.