Racking Different Kinds Of Shoes At Home

https://www.pexels.com/photo/assorted-colored-shoes-3360545/

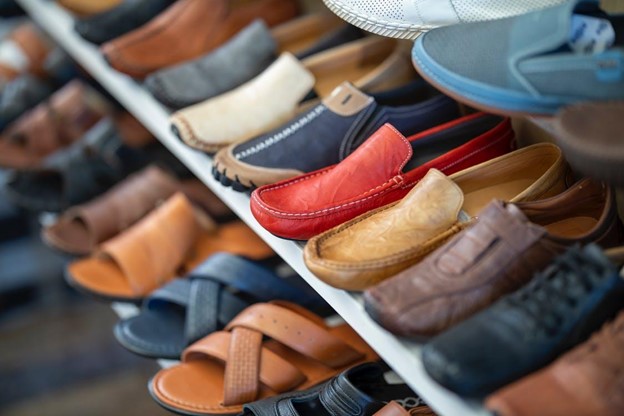
Most people have a few pairs of go-to footwear choices — athletic sneakers, casual sneakers, boots, and something dressy — but there are so many other styles out there! Variety is the spice of life, and adding some new styles to your closet is a great way to add some flavor to your wardrobe. Additionally, there are many types of specialized footwear options that can really improve the overall quality of your life. Here’s a look at 10 types of shoes to add to your rack!

1. Slippers

Every footwear collection deserves at least one pair of cozy slippers for relaxing around the house. Besides keeping your feet warm and comfy, many types of slippers are much more versatile than most people realize. For example, you could certainly get away with wearing moccasins when you check the mail or even take a quick trip to the store. As an added bonus, you’ll never have to worry about cold kitchen floors when you’re grabbing a late-night snack!

2. Orthopedic Shoes

Orthopedic shoes are most well-known for their added arch support, especially for people who have flat feet, but anyone can appreciate their benefits — even those who don’t have foot conditions or injuries. Orthopedic shoes are designed specifically to support the contours and shape of feet, as well as to complement and facilitate their mechanisms and movements, so besides being extremely comfortable, they can actually help to prevent common problems before they occur. For example, did you know that your shoes can cause knee, hip, and back pain?

3. Loafers

Loafers are so versatile and convenient, not to mention stylish. They can run the gamut from casual to fancy, and being able to slip them on and off with ease is a simple pleasure that folks don’t fully appreciate until they have it. The classic penny loafer is an iconic look that works equally well with jeans or slacks. You can also find loafers with tassels, ornaments, and exotic patterns — the possibilities are endless!

4. Hiking Boots

When you’re in the mood to connect with nature, reach for your trusty hiking boots. Rugged yet comfy, hiking boots offer a nice balance between sneakers and boots, so while they’re naturally ideal for your outdoor adventures, they can actually be a fantastic option for any situation that requires you to be on your feet for a long period of time. Plus, with the right outfit, hiking boots can be surprisingly fashionable. Choose a quality pair and they’ll last a lifetime.

5. Fancy Shoes

Maybe you have a go-to pair of snazzy shoes for the office, but do you have a pair of formal dress shoes or heels for those special occasions when you really want to go all out? Even if you’re not attending red carpet events on a regular basis, having a pair of classy kicks might inspire you to seek out the finer experiences in life. Going out to dinner at a local restaurant feels like more of an extravagant event when you’re dressed to the nines!

 5. Sandals

While sandals are often associated with beachwear, you’ll be amazed by how often you’ll reach for them. Traditional sandals can be quite stylish when paired with the right outfit. Slides and flip-flops are incredibly convenient for quick errands or wearing around the house. And, of course, there’s nothing better on those hot summer days and nights.

6. Chelsea Boots

Chelsea boots exude coolness! They work beautifully with a laid-back outfit, but they can also be dressed up very successfully. Maybe you already have some boots, but there’s just something different about Chelsea boots that makes them worthy of their own category. They’re an ideal choice for autumn outfits, but really you can’t go wrong with them all year round.

7. Boat Shoes

You don’t need to be a sailor to enjoy boat shoes! Whether you’re gearing up for a yacht trip or just looking for a new look, learning how to style boat shoes is absolutely worth your time. Boat shoes are a great alternative to sandals on those chillier spring and summer evenings. When sneakers are too casual but dress shoes are too much, boat shoes offer an excellent middle ground.

7. Monk-Straps

Like Chelsea boots, monk-straps offer a distinctive take on the traditional dress shoe/boot style. What makes them unique is — you guessed it — the strap! This style dates as far back as medieval times, so they have a very classic look that’s undeniably elegant and sophisticated. The strap and buckle look so smart — pair your monk straps with a sweater vest and a collared shirt for a put-together aesthetic that’s professional, yet relaxed.

8. Equestrian Boots

Equestrian boots, also known as riding boots, are a great alternative to western boots. While they can be worn with similar outfits with a rootin’-tootin’ vibe, the slimmer profile and tighter silhouette make for a look that’s a bit more refined. Some lace-up equestrian boots are a superb choice for rustic, bucolic outfits inspired by country living.

9. Athletic Sneakers

You don’t need to be an athlete to enjoy athletic footwear. It’s just nice to have some sneakers that are reserved for trips to the gym, jogs around the block, and other physical activities. Not only will you perform your best, but you’ll avoid wear and tear on your everyday sneakers.

10. Platform Shoes

When you want to go big with your look (quite literally), platform shoes will do the job. The look is super trendy, and they can add 1-4 inches (or more) to your height. While many platform shoes feature over-the-top, statement-making designs, there are plenty of subtle options on the market too.

Have Fun Shopping Around

Hopefully, this little guide can inspire you next time you’re shoe shopping. Fashion is fun, so don’t overthink it! If something strikes your fancy, go ahead and treat yourself. As your shoe rack fills up, you’ll love being able to select the perfect pair to match your mood and look. There are so many other unique shoe styles waiting to be discovered, so enjoy the journey!

How To Design Space For Wellness At Home

Chronic stress and negative emotions can strain your mental and physical health. Generating a wellness routine is more important than ever between managing long hours at work, paying bills, and other daily responsibilities.

Research has shown that creating time to practice self-care and healthy habits can elongate your life. In one particular study, researchers found that women and men who adopted healthy habits lived until they were 93.1 and 87.6 years old on average, respectively.

Self-care requires making time for a comprehensive wellness routine comprising positivity, nutrition, exercise, and optimal sleep. That’s why designing a designated space to focus on wellness is a helpful reminder to prioritize yourself every day. Here are five ideas for creating the perfect wellness space at home.

1.   Choose a Location

Decide which area of your house is conducive to creating the perfect wellness zone. Perhaps this is a vacant room, an outdoor area, or even a corner of an occupied space, such as your living room.

If you’re planning to foster a daily yoga practice, somewhere with a solid surface to place your mat is probably best. Otherwise, an empty bedroom may be an excellent place to turn into a meditation or arts and crafts room.

Do you enjoy reading? Turn a corner of your living room or bedroom into a reading nook with a bookshelf, comfy chair, small table, and a reading lamp. This would also provide a wonderful space to journal or listen to relaxing music or your favorite podcasts.

Maybe you like gazing out the window or spending quiet time outdoors, such as on a patio or balcony. Consider the space you have to work with and decide how it can best fit your needs.

2.   Design With Intent

Depending on who you are, slipping into a self-care routine could be difficult for some and easy for others. Therefore, setting an intention for your wellness can assist you in maximizing your design.

When thinking about your ultimate wellness space, how do you intend to improve your health? For example, if you plan to create an at-home gym, a large spare room or a finished basement is ideal for a few pieces of exercise equipment and an oversized wall mirror. Of course, the layout should be functional, with plenty of workout zones.

You might also want to check in with yourself and think about how you want to feel in your wellness space. Are you looking for greater tranquility to ease your anxiety and stress? Consider adding acoustic panels to maintain even more quietude.

Understanding exactly how you want your space to make you feel will help shape your wellness area into the perfect relaxation spot.

3.   Incorporate Natural Elements

You’re probably aware that natural elements, such as wood and plant decor, evoke a sense of calm. Surrounding yourself with plants has several therapeutic benefits, including better memory and cognition, lowering stress and anxiety, and enhancing mood, healing, and a positive outlook.

You might choose to create an outdoor oasis to better care for your physical, mental, and emotional health. Studies show that spending 120 minutes a week in green space is associated with higher well-being.

There are many ways to turn your patio into your ideal wellness space by incorporating an organized layout with comfortable furniture and cushions, potted plants, lighting, and a partition for privacy.

Natural elements may also come from a beautiful window view, a landscape mural, nature photography, or botanical fabrics.

4.   Enhance Lighting

Although natural light is always the best choice for your wellness regimen, direct sunlight may be too intense or distracting.

If your wellness space has a large window, framing it with light sheer curtains or adding mesh blinds can filter some brightness without making the room dark.

Of course, if your space is missing light or you’re designing a cozy nook for nighttime reading, finding lighting that enhances your wellness space is essential. A table lamp with soft illumination has just the right amount of light for you to read without hurting your eyes.

You might also want to consider adding unique lighting – for example, market lights on the ceiling, twinkle lights on furniture or plants, or colored bulbs to change the aesthetic of your space.

5.   Support Sensory Stimulation

When designing an at-home wellness space, you should consider tapping into all five senses. Think of ways to cancel unwanted noise, such as a noise machine or adding a sound system to play meditation music.

A diffuser is another option for providing aromatherapy benefits, such as eucalyptus, tea tree, or lavender essential oil. Several studies have revealed lavender’s relaxing effects on anxiety symptoms.

You might also stimulate your senses for optimal health by bringing a hot cup of tea into your wellness space or including decorative accessories, such as throw blankets and pillows for enhanced comfort.

Temperature is another crucial factor for wellness, especially since you don’t want to be uncomfortably cold or too hot. Installing a smart thermostat can help regulate the room’s temperature and provide better air quality.

Making Room For Self-Care at Home

Designing a space for self-care takes some time, consideration, and patience. You’ll likely continue adding and removing elements until you’ve cultivated a room that works best for you. However, these tips can help get you started improving your well-being at home.

Author

 Evelyn Long is a Baltimore-based writer and the editor-in-chief of Renovated. She publishes home decor advice and product roundups for readers in spaces both big and small.

A DIY Guide To Cleaning Your Chimney

https://unsplash.com/photos/74GjpiGHEGA

Fireplaces bring old charm and cozy warmth to homes. These beautiful additions create a comforting ambiance, but they require a certain level of care—especially the chimney. Cleaning a fireplace is relatively easy, but effectively cleaning your chimney can be a big job.

It’s crucial to stay on top of your chimney’s cleanliness for optimal functioning and to prevent severe fire hazards. To effectively care for your chimney and your home, follow these steps.

Step 1: Determine if You Can DIY

Before you start, you first need to determine if you can clean your chimney without professional help. Chimney cleaning is a tedious task, and it can take professionals anywhere from 45 minutes to two hours to finish the job.

Your goal in chimney cleaning is to rid the chimney shaft of creosote and soot build-up. If the build-up is too large, you need to call a professional to take care of it. However, if you find the build-up is less than 1/8th of an inch deep, you may be able to tackle it on your own. In addition, you’ll need to access your chimney crown, located on your roof, to complete the job. If you’re unable to get to the crown safely, you’ll need to call in a professional to complete the task.

Step 2: Gather the Right Tools

If you determine you can safely access the chimney crown, you’ll need the right tools to get there. These include a ladder, safety harness, safety helmet, and an additional person or persons to supervise. Never attempt to work on your roof without the supervision of another capable individual.

Once on the roof, you’ll need a high-power flashlight, metal bristle brush, and enough rods to handle the height of your chimney. You’ll use these tools to determine the depth of your build-up. Note that each chimney is different, so you’ll need to measure the size of your chimney and its flue to get the right brush size.

https://unsplash.com/photos/k8YvyMzI200

Use your flashlight and a fireplace poker to scratch the smoke chamber and flue to determine the buildup. If the soot has a black matte finish and is 1/8th an inch deep or less, you know you’re okay to clean yourself. If you see a shiny or tar-like appearance or the build-up is more than 1/8th an inch deep, you should call a professional to take on the job.

Step 4: Set Up Your Area

If you are moving ahead with cleaning yourself, your next step is to protect your home’s interior. Lay your canvas tarp over the fireplace and spread it throughout the surrounding room. Secure the tarp over the fireplace opening with tape and insert the shop vac hose through the tarp. Seal everything with duct tape to keep soot from pushing into the room.

After setting up your shop vac outside, connect sections to the hose so it can reach. You’ll run the vacuum while you brush the area, keeping an eye on the filter and replacing or cleaning it when it clogs. Close the windows and doors near your shop vac to prevent any fine soot from reentering your home.

Step 5: Begin Cleaning

Start at your fireplace and ram your cleaning brush up and down several times around the flue section to remove any hardened soot. Use your flashlight to check your work before moving to the next section, ensuring you clean as much soot as possible from the flue area. Once cleared, start your shop vac and move to the roof.

Before cleaning, make sure you are safely equipped with your harness and have supervision from an individual on the ground. Again, you should only clean out your chimney with proper supervision, on a stable rooftop, and with a safety harness and a hard hat. Those without experience working on rooftops should strongly consider hiring a professional.

Once you are secured on the rooftop, add rods to your cleaning brush, moving it down the fireplace till you no longer feel resistance. At this point, you pushed down the soot to the smoke chamber. Climb down from the roof and start to work inside at the firebox. Use a long-handled brush to clean the smoke chamber and a flue brush to remove soot from the smoke shelf. Switch back to the long-handled brush to clean the sides of the firebox.

Vacuum out the firebox and fold up the canvas when you have cleared as much soot and debris as possible. Take the canvas outside and shake out any residue. Fold up the sheets to use again for your next cleaning.

Step 6: Schedule an Inspection

Your fireplace isn’t safe until you’ve scheduled your annual chimney inspection. Even the best DIY job can’t handle creosote build-up, and you need to be sure you didn’t miss any build-up during your cleaning. Have a chimney repair and cleaning professional inspect your chimney once a year to assure you don’t have additional build-up and or repair needs.

How To Move To A New House Like A Pro

When you’re moving into a new house, there’s a lot to think about. While we generally think of moving processes like packing and unpacking as the only main roadblocks to properly settling in, the things you do after you move into a new house are what make the largest impact.

Of course, you already have a lot on your plate. So, to help you organize your to-do list, we’ve compiled a fast list of the ten most important things to accomplish when moving into a new house. The majority of these tasks aren’t time consuming, but they do demand you to make a conscious effort to complete them. Read on to learn what you need to know, then make a strategy. Soon, you’ll be able to relax, crack open a bottle of champagne, and toast your new home.

1. Perform a walkthrough

When your new house is absolutely vacant, there is no better opportunity to undertake a comprehensive walkthrough. Take a look around before setting up your furniture and getting unpacked. You’ll want to double-check that: 

  • The previous owner has completed all required and agreed-upon repairs 
  • Everything that was supposed to be included in the transaction is present in the house 
  • All outlets, switches, and fixtures are in good working condition.

If you discover something that violates the sale contract (for example, the previous owner took the washer and dryer with them when they were supposed to leave them behind), contact your agent right away to see what options you have. Issues that you discover that were not covered by your contract are now your problem, but knowing what they are can assist.

2. Figure out where everything is going

When moving into a new house, establishing a plan of attack for putting everything up rather than winging it will save you a lot of time and headache. 

This is especially true for goods that are large and heavy, such as furniture. 

While you undoubtedly already have a general sense of what belongs in whatever room, take a minute to consider how you’d like the setup to appear. 

Of course, you may make adjustments afterwards, but approaching this activity with a basic strategy will always make the process easier.

3. Confirm that your utilities are operational

Hopefully, you took care of getting your utilities set up before moving into your new house, in which case, now is the time to double-check that everything is in working order. 

Check your electric, gas, water, heating and cooling, phone, and internet connections on moving day. Then contact your local waste management facility to make sure your new house is also set up for rubbish collection. 

If you’re having troubles moving try hiring Pinnacle Removalists to avoid stress and have experts do the whole moving process for you.

4. Find the water valve and fuse box

The fuse box and the water valve are two items you don’t want to be hunting for when you need them the most. It’s far better to locate them now, so that if your electricity goes out or you need to cut off the water for whatever reason, you’ll be able to get there quickly. 

Your fuse box will most likely be in your basement, garage, or storage area, whereas your home’s water valve will most likely be positioned someplace around the perimeter of your property.

5. Perform a thorough cleaning

Cleaning your new house from top to bottom may be the last thing on your mind after going through the moving process, but it is the greatest time to do it. 

Fortunately, we’ve put up a new house thorough cleaning guide to assist you. Consider hiring professional cleaners instead if you don’t have the time or interest to put on your cleaning gloves and grab a mop right now (we don’t blame you). Starting life in your new house in a clean condition is more than worth it, whether you invest in time or money.

6. Replace your locks

Changing the locks on your new house is always a smart idea. Even if the former owner isn’t a worry, you never know who could have a key.

 It’s best to be safe than sorry in this case, so call a locksmith or change the locks yourself if you’re comfortable doing so. Rekey the locks on all doors going from the inside to the outside of your house, as well as the windows. It’s a tiny price to pay for a lot of assurance.

7. Modify Your Address

You may have already notified the post office of your change of address prior to moving day, but if you haven’t, now is the time.

 Friends and relatives, subscription services, your bank, any loan providers, and anybody else who sends you regular communication or invoices should all be informed of your relocation. 

A comprehensive list of who should be notified may be seen here. If you’ve relocated to a new state, you’ll need to contact your state’s department of motor vehicles to get a new driver’s license and updated car registration.

Moving into a new house is naturally stressful, but following the 10 steps outlined above can make the process go more smoothly. However, there is a lot to do, so don’t be hesitant to ask for assistance, whether from a friend or family member or from a professional service provider. The sooner you can deal with the major issues, the sooner your new house will begin to feel like a home.

9 Tips For Sustainable Living

What do you picture when you think of sustainable living? Maybe it’s dramatic changes like ocean conservation work or switching to wind power. While big efforts are important, sustainable living is an aspect of daily life that can be implemented in small ways. You may be surprised at how small of a change you can make for a real improvement in sustainability, especially when that effort is sustained over time. Here are our nine tips for sustainable living.

https://unsplash.com/photos/0w-uTa0Xz7w

Alt text: A sun setting behind windmills and a grass field

File name: sun-setting-behind-windmills-grass-field

Tip #1: Turn Off the Light

The average annual electricity consumption for a US household in 2018 averaged over 28 kilowatt-hours per day. A kilowatt-hour is equal to one 100-watt light bulb left on for 10 hours. And we’re averaging more than 28 of those a day in our households! Most of this energy usage comes from lights being left on all day.

Turn off your lights when you leave the room. Conserving the light might mean opening the curtains and letting natural light in. Maybe all you need is a small lamp. We tend to overuse electrical lights unnecessarily.

There are also ways to cultivate sustainability in home decor with your lighting options. What are the materials of your light fixtures made from? Take into consideration how your lights are shipped or provided to you. Sustainable packaging can make all the difference. Sources that prioritize sustainability will help you be sustainable too.

Tip #2: Invest in the Reusable Options

A big part of living sustainably is reusing what you can. We have a lot of daily-use items in our lives that are disposable. But, there are also reusable options available like straws, plates, water bottles, towels, and grocery bags. Don’t be afraid to get creative with your reusable materials, and explore all the new items that are being created every week.

https://unsplash.com/photos/EU1R18L1Kb4

Alt text: A marble kitchen counter with reusable straws and fresh fruit

File name: marble-counter-reusable-straws-fresh-fruit

Tip #3: Conserve Your Water

Watching your water usage is an oft-repeated eco-friendly measure, but there might be some specific tips you haven’t considered. We’ve all heard about the importance of taking shorter showers, but have you thought about getting a water-saving showerhead or a shower timer? You may not be aware of how much water you’re using or saving until you start to keep track of it.

Tip #4: Rethink Your Commute

Commuting is a necessity for many people, but you can make your commute a part of your sustainability commitment. If you work close to your home, try walking or biking to work. Taking public transportation is better than taking your vehicle. If you have to drive a car, consider getting an electric one, and carpool as much as possible. If you fly on planes frequently, make sure you find an airline that utilizes zero-waste practices.

Your sustainable commuting routine can also be more basic: take the stairs instead of the elevator. It’s the little things like this that add up.

Tip #5: Dress with the Environment in Mind

A sustainable lifestyle includes supporting sustainable fashion. Sustainable shopping isn’t to be confused with thrift shopping — although getting secondhand clothes is more sustainable than buying new ones. When you decide to buy new clothes, it is better to buy “slow” fashion rather than fast fashion — meaning you choose higher quality items that last longer.

Better quality also often means brands are more environmentally conscious. Plus, in addition to choosing the styles that last longer, you can also make your clothes last longer by doing simple repairs yourself.

Tip #6: Take a Closer Look at Your Bedding

A sustainable life looks at the little details, especially for items you use every day. There are plenty of ways to be more sustainable with your bedding.

You want to choose products from a company that utilizes sustainable practices and uses good materials. Bamboo fabric is beneficial for the environment. Sourcing sustainable fabrics is a great way to institute an eco-friendly lifestyle all across your household.

Tip #7: Ditch the Printer

Today’s world is digital. You don’t need a home printer. If you have to print something, you can seek one out. But not having a printer on hand will save you from printing items you don’t need to print. Practice storing files and information digitally to promote a more sustainable lifestyle.

Tell your bank you want electronic statements. Get receipts emailed instead of printed. Take notes on an electronic device instead of on a pad of paper. Go paperless and then encourage your peers to do the same.

Tip #8: Donate Your Belongings

Just because you’re done with something doesn’t mean no one else can use it. When you donate items you don’t use anymore, you help the environment by keeping them out of the landfill. Donate what doesn’t bring you joy and give it to someone who can reuse those items for a win-win!

Tip #9: Save Gift Bags and Wrappings

This is a small tip, but it can have a big impact. Whenever you get gift bags, save them instead of throwing them away. You can do the same with tissue paper or other wrappings that don’t get ripped or damaged when you open the present. This will not only save you some money but it will help the environment.

Encourage Working Together

Sustainable living works best when everyone makes the same commitments. It doesn’t do much good if you take short 4-minute showers and everyone else still takes long 30-minute showers.

And it won’t matter as much if you are the only one taking public transport to work. If everyone else in the office drives their car separately try to address the opportunity to increase sustainability. Encourage your coworkers to brainstorm together and try to coordinate carpooling times. Together you can make a much larger positive impact by organizing carpool groups.

The possibilities for sustainability are endless. And when you work together to achieve your sustainable living dreams you can make the world a lot better. All it takes are small meaningful changes to make a world of difference.