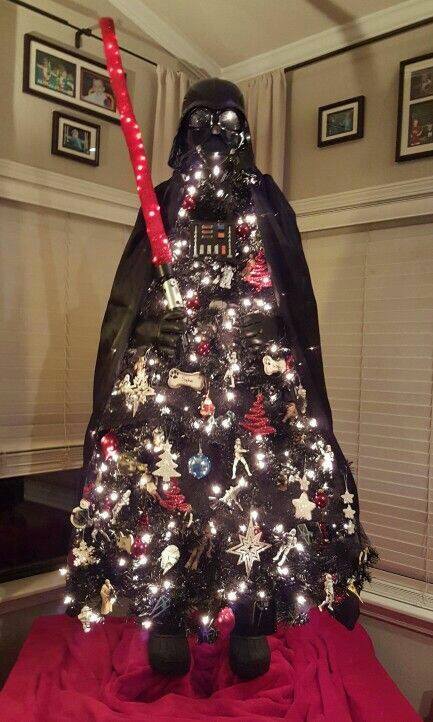
Star Wars Darth Vader Christmas Tree Idea
Image
Reply

 Got to be one of the simplest ways to create a really cool Halloween decoration. Add water to a jar half way. Submerge an old Halloween mask and arrange to make it look as real as possible. Here we used an old lady mask but don’t be afraid to use those demon and monster faces as well. Then fill with water carefully all the way to the ridge. Let sit undisturbed for about an hour to release and air. You can add a tea bag to get a dirty water effect – just don’t make it too dark. Several of these placed on a shelf or table with candles would be really neat.
 Print out using a picture manipulation program or a desktop publishing program and adjust the size to fit you or your childs face. Cut out and glue fabric to one side and trim – then repeat for the opposite side. Tie a ribbon that goes well with your fabric to both sides that can be tied around head. Trim with ribbons around edges, or dangling, sequins, or any other findings you want. Think feathers, boas, plastic spiders (for Halloween), tiny ornaments (for Christmas), bows, paper cutouts, and beads.
Also consider these a childs activity at a party… then can be painted or drawn on in marker or crayon. Print out a size appropriate for children and trace onto poster board and cut out. If they are going to paint, color or draw directly onto the paper it will need to be stiff because they wont have the extra strength from the fabric on both sides.
This could also make a great invitation: make with one side covered in fabric that goes with your parties theme and print the information for your party on the back. It would fit in a legal sized envelope so no special purchase would be required.
A stunning wall decoration created by molding and layering simple template
shapes combined with surface texturing techniques. The earthy yellow, red
and greens blend do well together to produce a strikingly authentic effect
YOU WILL NEED
1 batch salt dough
Roiling pin
Flour
Pastry board
Tracing paper
Pencil
Plain paper
Scissors
Small knife
5-inch diameter saucer to use as a mold
Plastic food wrap
Modeling tools
Wooden skewer
Fine srade sandpaper
Paintbrushes
Acrylic paints
synthetic sponge (optional)
Satin polyurethane varnish
~ Roll out the dough to a thickness of 1/4 inch on a lightly floured pastry board. Trace off the basic template, and then trace off the other template details following the solid lines (the dotted lines represent surface details). Cut out the templates in plain paper and place on the rolled-out dough. Cut around each shape, using a small knife, removing the eye and mouth sections. Remove the excess dough.
 ~ Cover the convex side of the saucer with plastic food wrap and lay it on the pastry board. Carefully lift the main mask template and place it over the mold. The saucer should fit under the face part of the mask and the head-dress should lie flat on the board. Moisten the entire surface of the dough with water and carefully lay the other cutout shapes in position.
~ Use modeling tools or a wooden skewer to make the surface decorations, referring to the dotted lines on the template and to the photograph as a guide. Use a moistened modeling tool to smooth out the joins. The raised details on the forehead and earrings are made from small balls of dough squashed to make a flatter shape and then pierced with the blunt end of a skewer. For the nose, model a small ball of dough into a pyramid shape and press it carefully into position, smoothing out the joins with a moistened modeling tool. Form the nostrils, using a pointed modeling tool.
~ Transfer the mask to the microwave turntable plate and bake on low for 20 minutes + 20 minutes, medium low for 20 minutes, and medium for 10 minutes + 10 minutes. Remove it from the microwave oven and leave to cool. Do not attempt to remove the mold while the dough is still warm as this may cause warping and damage. Gently prize the dough mask away from the mold and, using sandpaper, smooth off any rough edges.
~ Apply two coats of beige acrylic paint to both sides of the mask to act as a sealant and bottom coat. Apply the other decorative colors, using the photograph as a guide. Use a dry brush or a sponge to achieve the subtle effects.
~ When the decorative paintwork is dry. apply three coats of varnish, Leaving each coat to dry before applying the next.
