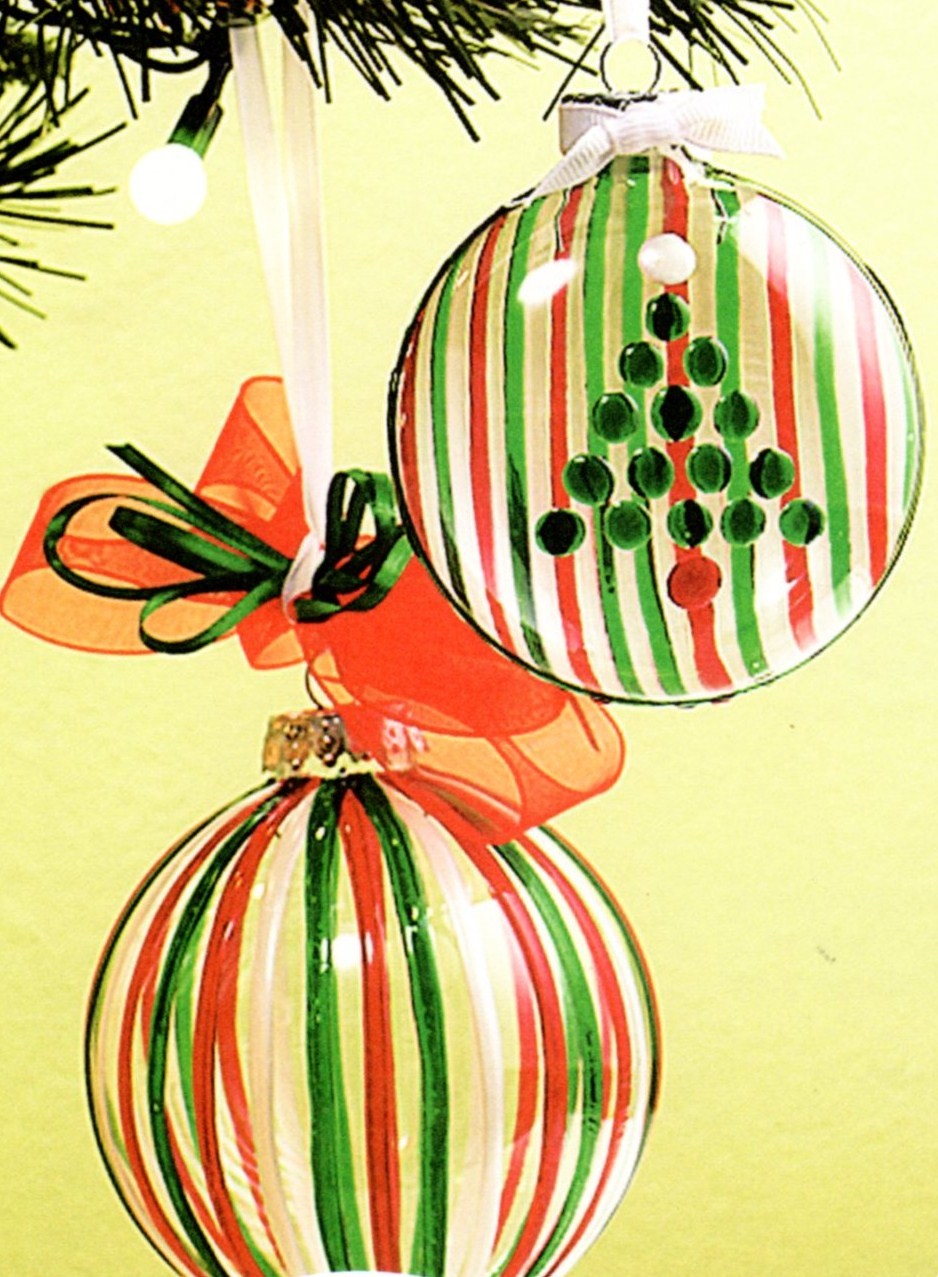
Christmas Tree Glass Ornament

Supplies
Gallery Glass Window Color – Snow White, Kelly Green, Ruby Red
Gallery Glass 10″ x 18″ Leading Blanks
Large Round Glass Ornaments
Notebook Paper
Craft Knife
Cellophane Tape
Ribbon

Instructions
Step 1 Place leading blank over lined paper; tape securely.
Step 2 Working one color at a time, trace multiple lines with Window Color. To keep the lines of paint from getting too wide, lightly squeeze the bottles of Window Color as you move it along the lines.
Step 3 Let dry overnight.
Step 4 Clean and dry ornaments.
Step 5 Remove the ornament hanger. Carefully peel the dry lines of Window Color from the leading blanks as you use them and apply them to the ornaments.
Step 6 Replace hangers and tie with coordinating ribbons.

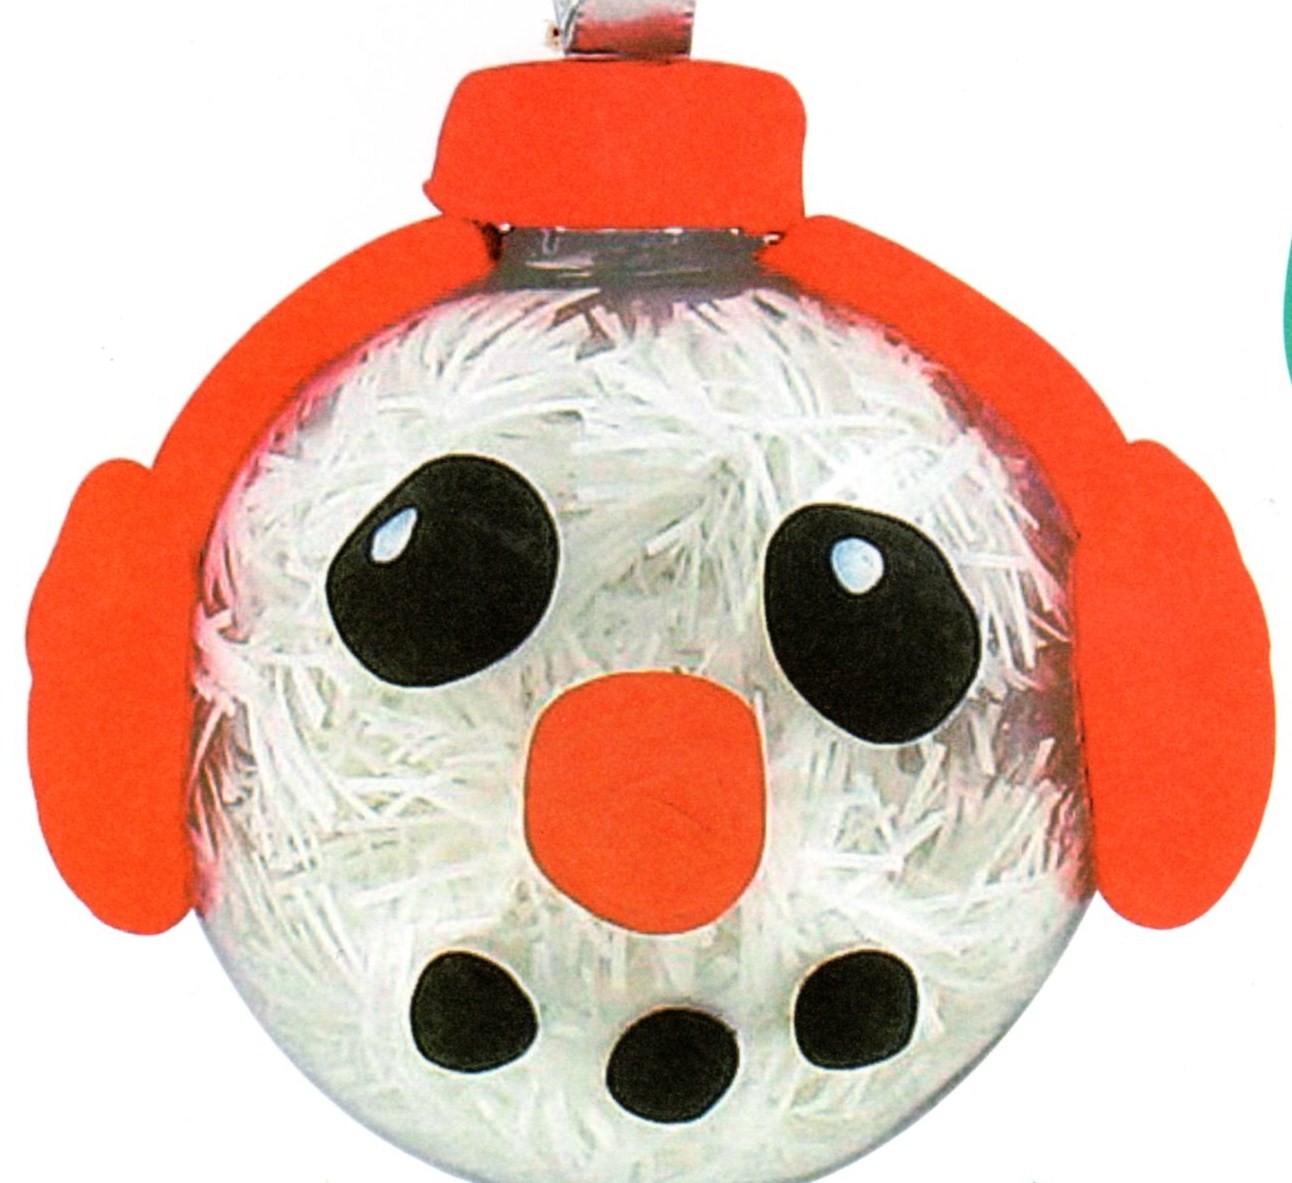
Christmas Snowman Ornament

Supplies
Fluffy-Red, Black, Orange and White
Sculpey* Clay Tool Starter Set
Glass Ornament – make sure you only
use a glass ornament; plastic ornaments
will melt in the oven D Ribbon D Acrylic Roller D Quick Drying Glue D Disposable Foil or Wax Paper D 12″ Piece of White Tree Garland

Instructions
Getting Started: Do not use unbaked clay on unprotected furniture or finished surfaces. Good working surfaces include a glass or metal surface, disposable foil or wax paper. Knead clay for 2 minutes. Bake on oven-proof glass or metal surface at 130 °C (275 °F for US customers) for 15 minutes per 6 mm CA”) of thickness. Do not use in microwave oven. Do not exceed the above temperatures or recommended baking time. All baking should be completed by an adult. Wash hands after use.

Step 1 Remove metal cap/hanger from ornament. Remove wire hanger from the cap and set aside. Make a red clay disk slightly larger than the diameter of the ornament cap.

Step 2 Wrap the red clay disk around the edges of the ornament cap. Using the 2 mm pointer tool from the Clay Tool Starter Set, poke holes through the red clay so the holes in the cap remain open to replace the hanger later.

Step 3 Make 2 wide red strips for the headband and 2 large red domes for the ear muffs. Then make 2 medium black disks for eyes and 3 little disks for mouth. Make 2 tiny white eye highlights and an orange cone shape for the nose.

Step 4 Place the face pieces firmly onto ornament, making sure each piece follows the curve of the glass. With the blunt point tool from Clay Tool Starter Set, texture the ear muffs. With the flat knife tool, texture the nose. Make sure the clay covered cap will go back on and that the ear muff headband does not interfere with the fitting of the cap. Bake as directed.

Step 5 Allow to cool then gently remove all the clay pieces. Glue them back on permanently and allow to dry. The clay cap covering will not need to be glued on. Replace the wire hanger into the holes in the cap. Fill ornament with white free garland. Replace the cap and add ribbon.

Christmas Jingle Bell Projects

Bell Wreath Supplies
Heavy gauge floral wire
Christmas theme colored bells
Chenille stems-gold, green, red
Broad width ribbon – red

Bell Wreath Instructions
Step 1 Make a circular loop with heavy gauge floral wire.
Step 2 String bells along wire and fit them closely together around the length of the loop.
Step 3 Use a pipe cleaner to wind around the bells at either end of the loop to hold the wreath shape together in a circle.
Step 4 Tie a bow around a pipe cleaner and then tie that pipe cleaner around the part of the loop that was joined together.

Bell Tree Supplies
12″ Floral cone, Styrofoam*
Christmas theme colored bells
Wrapping paper
Chenille stems – hot pink, turquoise, lime green
Craft feather boa – white
Glitter foam sheet, sticky back – hot pink
Glue
Gemstone-turquoise
Toothpick
Pattern printed from http://www.michaels.com
Pencil
Scissors

Bell Tree Instructions
Step 1 With hobby knife, cut a Styrofoam* floral cone down to desired size for tree.
Step 2 Cover cone with wrapping paper that matches the bells you will be using to decorate. Glue paper into place.
Step 3 String bells on lengths of chenille stems, keeping in mind how big your cone is.
Step 4 Join the strings of bells by twisting them together, end to end. Push one end of the joined chenille stems into the top of the cone.
Step 5 Begin circling the cone with the chenille stems and bells starting from the top and working down to the bottom in a spiral. Push in the other end of the pipe cleaner into the bottom edge of the cone.
Step 6 Wrap and glue craft boa to the base and top of the cone.
Step 7 Trace two stars and one base onto sticky foam sheet and cut out.
Step 8 Stick two stars together, sticky side to sticky side and insert a toothpick in between the stars half way in from the bottom.  Insert into the top of the tree. Glue gemstone onto front of star.
Step 9 Glue the tree onto center of base and glue craft boa around the bottom of the tree.

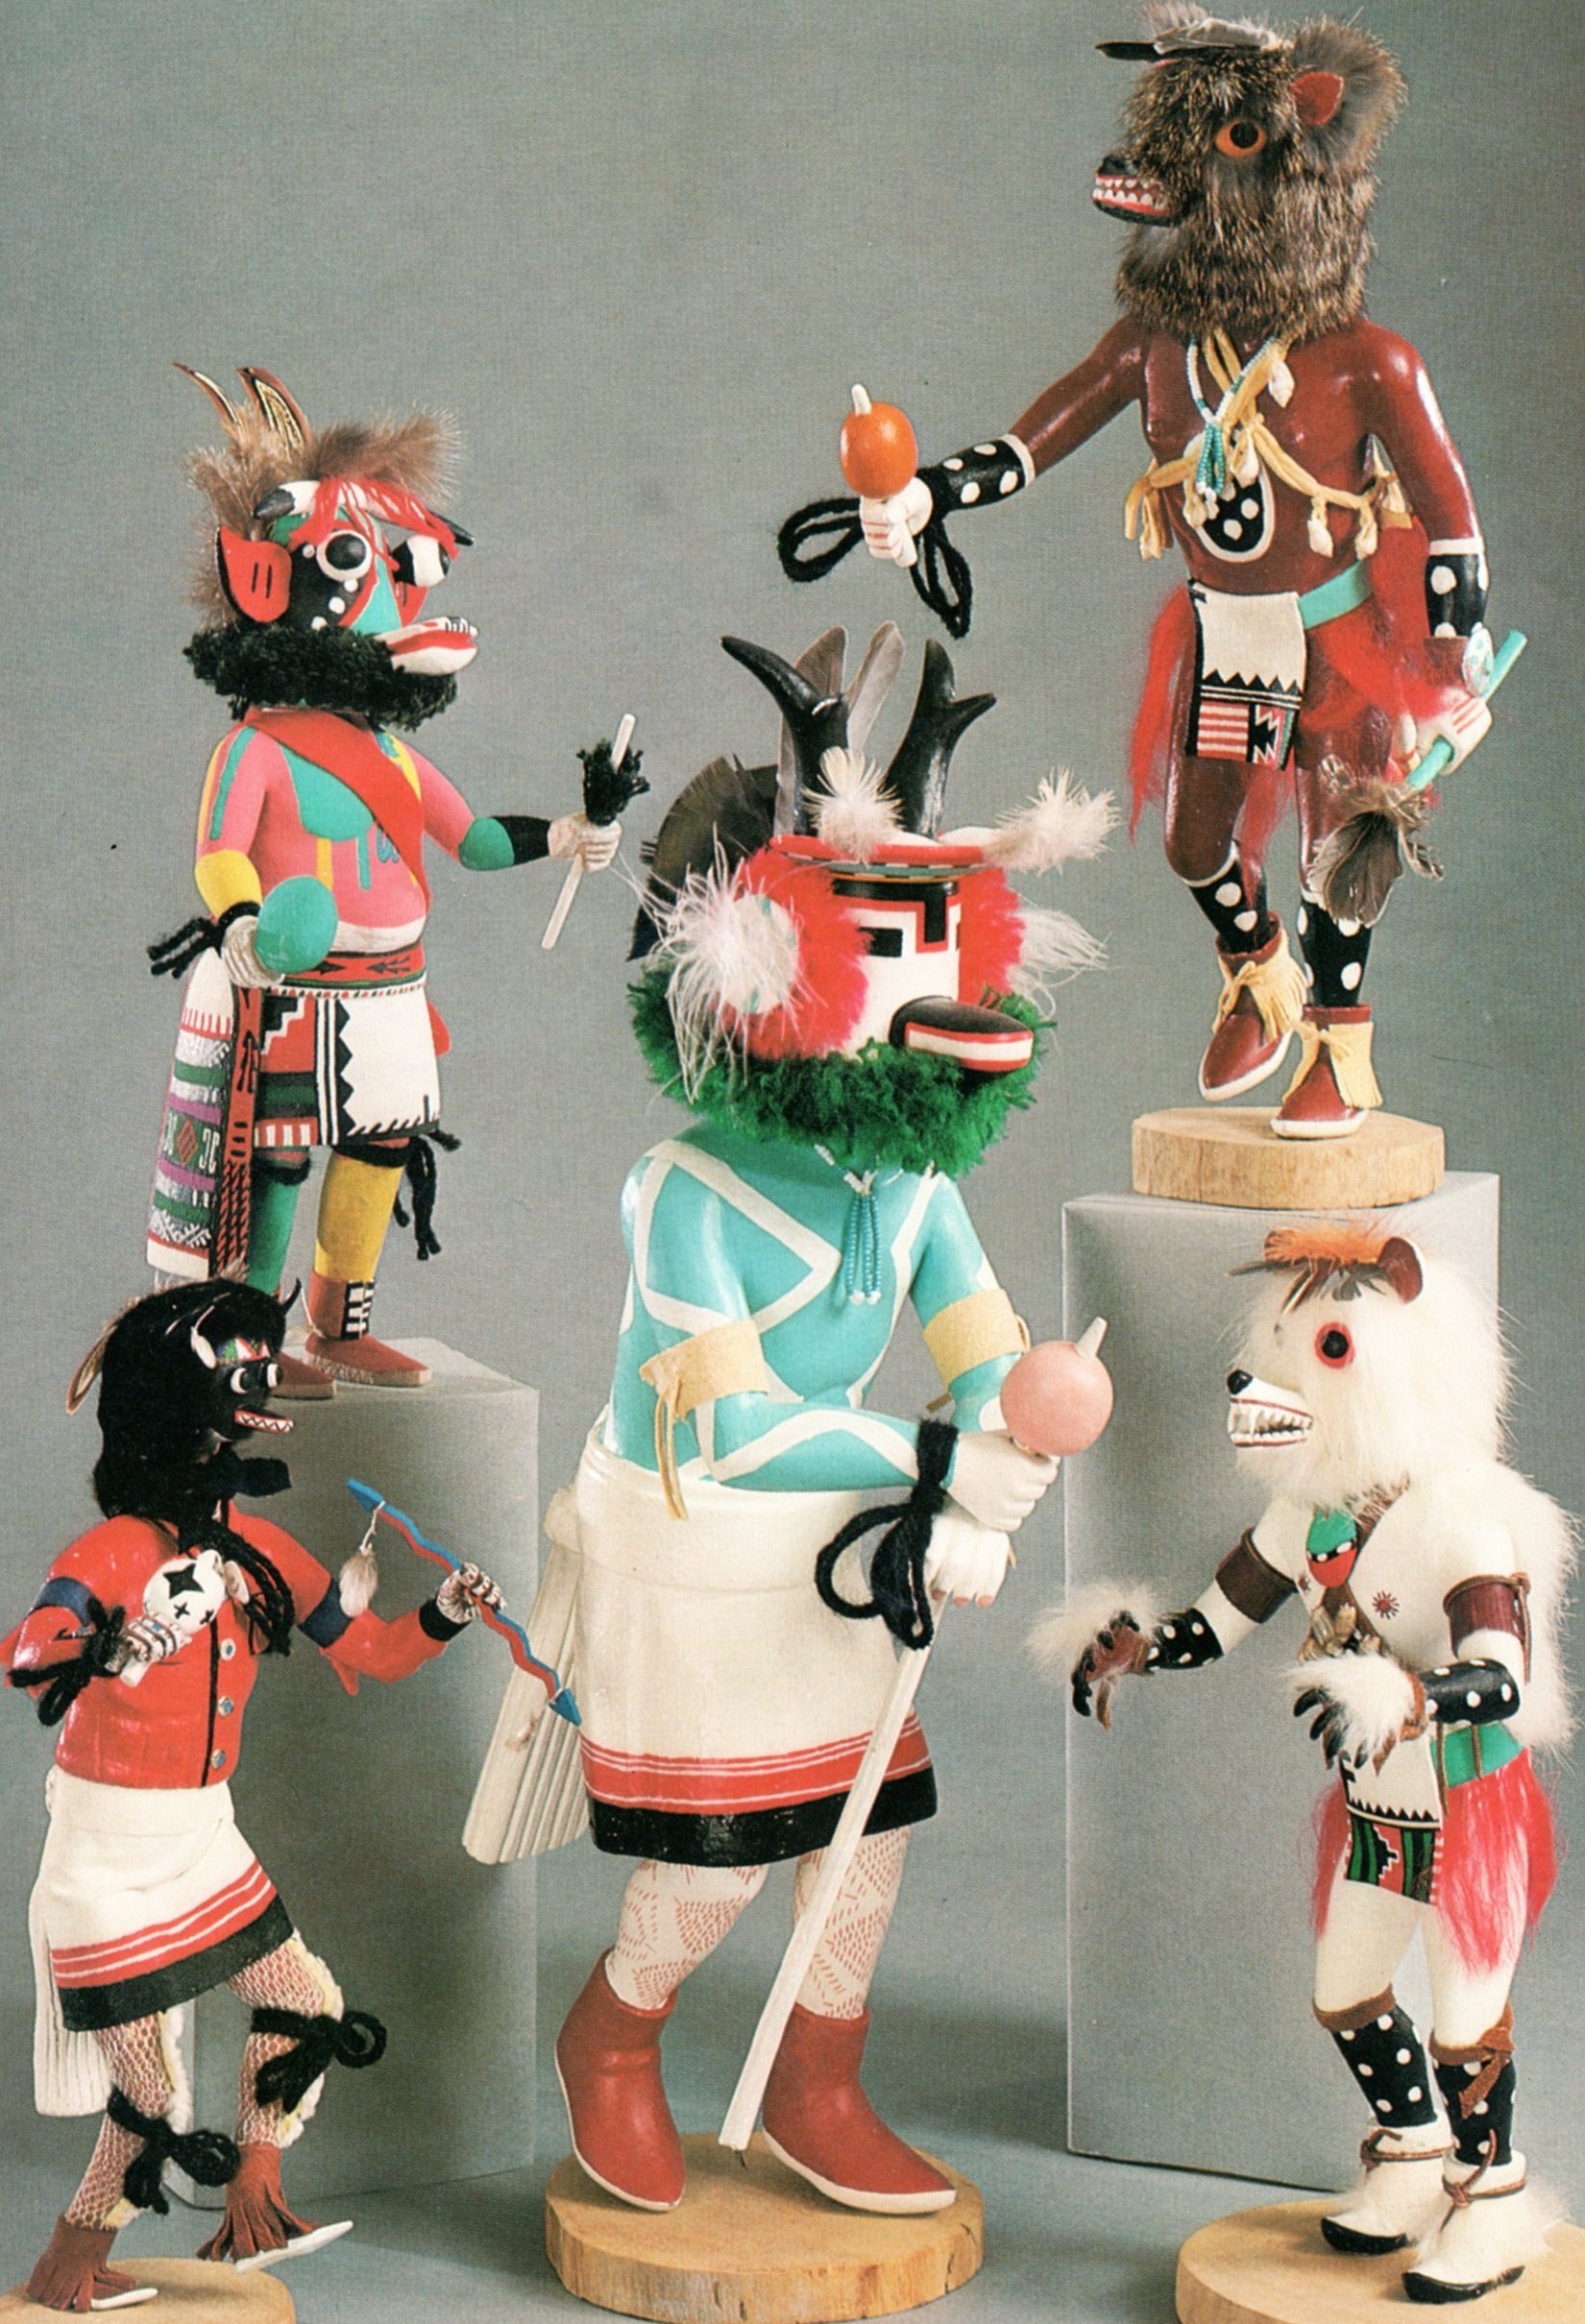
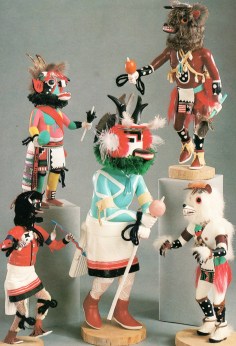
Kachina Dolls: The Animals

The animal Kachinas are the advisors, doctors and assistants of the Hopi. It is through the assistance of the animals that the Hopi have overcome monsters and cured strange diseases. In fact, the greatest doctor of them all is the Badger for it is he who knows all of the roots and herbs and how to administer them. The Bear shares in this ability. Other animals are warriors and know the ways of danger and can aid the men in be­coming like them.

All animals, however, share one attribute which is that they can remove their skins at will and hang them up like clothes. When they do they appear exactly as men, sitting about in their kivas. smoking and discussing serious matters. They are the Hopi’s closest neighbors and are always willing to assist if approached in a proper manner and asked for help. When prayer feathers and meal are not given they often withdraw until proper behavior is forthcoming.

The Animal Kachinas thus represent the relationship present be­tween the Hopi and the kacbina spirits which some may compare to a true friendship on the human level. It involves an exchange of special favors in their interaction, accompanied by an exchange of respectful gestures.

KWEO KACHINA Wolf Kachina
The Wolf Kachina appears as a side dancer who accompanies the herbivorous animals such as the Deer Kachina and the Mountain Sheep Kachina in the Soyohim Dances. He often clasps a stick in his hands which represents the bushes and trees that he hides behind as he stalks his prey. At the end of one of these dances the Hopi cast meal upon him and offer prayer feathers that they might also secure game using his prowess as a hunter. Dolls of this kachina arc, in contemporary times, elaborated with great teeth, lolling tongues and real fur that did not adorn the older dolls. There is almost always a Wolf Kachina on the shelf for purchase.

WAKAS KACHINA Cow Kachina
The Cow or Wakas Kachina is a comparatively late kachina. It was reputedly conceived and introduced by a Harm man around the turn of the century. The kachina enjoyed a long run of popularity right after its introduction and then again in recent years. The name is derived from the Spanish word vacas for cows. The kachina is danced to bring an increase in cattle.

MOSAIRU KACHINA Buffalo Kachina
The Buffalo Kachina is not the same figure as that seen in the social dance (see White Buffalo, p. 82) that has been carved in recent years. It is a kachina and is masked. Formerly these were made with a green face as well as one in black but in recent years the former has all but disappeared. It appears in the Plaza Dance usually with the mixed kachinas.

HON KACHINA Bear Kachma
There are a number of Bear Kachinas. Some are distinguished only by color such as the Blue, White, Yellow or Black Bear Kachinas. There are others such as Ursisimu, who have become extinct, and Ketowa Bisena, who is the person­age that belongs to the Bear Clan at Tewa. There are Bears fancifully dressed and Bears that are not. All Bear Kachinas are believed to be very powerful and capable of curing bad illnesses. They are also great warriors. Bear Kachinas appear most often in the Soyohim or Mixed Dances of springtime or occasion­ally as side dancers for the Chakwaina Kachinas.

CH6P-SOWI-ING KACHINA Antelope-Deer Kachma
This kachina points up the similarity of the Deer and Antelope Kachinas be­cause by exchanging the antelope horns for deer antlers the doll would become a Deer Kachina. Both Antelope and Deer may wear shirts, usually in cold weather, and either may have a white or blue face. Formerly the attributes of each were more rigidly separated than today.

CHOP KACHINA Antelope Kachina
The Antelope Kachina appears in the Plaza Dances either as a group in the Line Dance or as an individual in the Mixed Dance. He, as well as all other herbivorous animals, makes the rains come and the grass grow. He usually dances with a cane held in both hands and accompanied by the Wolf Kachina as a side dancer.

PONG KACHINA Mountain Sheep Kachina
The Mountain Sheep Kachina appears in Line Dances or as an occasional figure in the Mixed Dance. It dances holding a cane in both hands to represent the forelegs as it bends over and moves through the steps. The kachina has power over the rain as do the other herbivorous animals and is able to cure spasms as well.

KAWAI-I KACHINA Horse Kachina
The Horse Kachina derives its name from the Spanish word for horse, caballo. The kachina is of recent introduction as the Hopi did not adopt the horse until quite late, preferring the burro as a beast of burden, and their own two feet if speed was desired. Early travelers through Hopi country had difficulty with Hopi guides on foot setting a pace that soon exhausted their horses. The kachina is usually seen in Mixed Dances.

HONAN KACHINA Badger Kachina
The Hopi have two distinct forms of the Badger Kachina. This form is charac­teristic of Second Mesa and is a Chief Kachina who appears during the Powamu and the Pachavu ceremonies. It is a curing kachina. The costume and gear are not a fancier version of the other kachina but are instead of a form which probably arrived at a different time. There is some confusion on Third Mesa with the Sio Hemis Hu. However, that kachina does not have Badger tracks on its cheeks.

HONAN KACHINA Badger Kachina
This doll, characteristic of the smaller and more rapidly manufactured effigies, is also a Honan or Badger Kachina. It is more often seen during the Mixed Dances on Third Mesa or the Water Serpent Ceremony on First Mesa than during the Powamu. It bears a superficial resemblance to the Squirrel Kachina.
 

Rubber Stamping Terms & Techniques

Angel Company Is a term common in the rubber stamp industry.  This term identifies a company that allows the consumer to use their stamps to create products for resale.  Each company has a different policy so it is wise to contact each stamp manufacturer for information on their respective copyright policies.  Common restrictions may include: limiting the amount of hand stamped sample for resale, making sure that products are had stamped and not electronically reproduced, and restriction from using licensed properties such as Warner Bros.™, Suzy Zoo™ and Cynthia Hart™.

Dye Based Ink A quick drying water based ink.  Colors are most vibrant on white, glossy coated papers and card stock.  Not recommended for use with embossing powder.  Ink fades with time and when exposed to light.

Pigment Ink Thick, slow-drying ink.  Colors are rich and vibrant even on colored papers and cards.  The ink will not dry on glossy coated papers unless embossed.

Crafters Ink Multi-purpose, permanent ink with a longer drying time than acrylic paint.  It is highly pigmented and the colors are mixable.  It works on a variety of surfaces and is great for numerous craft applications such as fabric, wood, paper and painted surfaces.  It must be heat set on fabric.

Embossing (or Thermal Embossing) A technique using stamps with embossing or pigment ink, embossing powder and a heat source to create raised images.  Stamp image with ink and immediately sprinkle with embossing powder over stamped image.  Tap excess powder and reserve for future use.  Heat image with embossing tool until powder melts.

Embossing Ink Slow drying ink used for Thermal Embossing.  See Embossing above.

Inking a Stamp There are several ways to ink a stamp:

1.Using Felt Ink Pads – Tap stamp firmly onto ink pad until stamp is evenly inked.  Raised felt ink pads can also be picked up and patted on stamp to apply color.

2.Using Foam Ink Pads – tap stamp gently onto ink pad until stamp is evenly inked.  Raised foam ink pads can also be picked up and patted onto stamp to apply color.

3.Using Brush Markers – Use only water based brush tip markers as solvent or alcohol type inks will stain and dry rubber out.  Brush markers are used by applying the brush tip marker directly onto the stamp.  Multicolor impressions are achieved by using additional colors on various areas of the stamp.  Remoisten inks prior to stamping by breathing on the inked stamp or huffing.

4.Using Wedge Sponges – Use the flat edge of this sponge to apply inks or paints to the stamp in a patting motion.

5.Using Stamp Cleaner – Used to clean ink from stamps.  Use applicator top to apply cleaner to stamp, them pat stamp dry on paper towels.

6.Using A Stamping Mat – A durable foam mat used as a work surface for stamping.  The mat gives slightly allowing the best ink impressions.  Particularly useful for oversized stamps.

7.Using A Stamping Paint – A highly pigmented, acrylic paint specially formulated to be permanent on a variety of surfaces.  This paint has a slower drying time than acrylic paint to allow the user to apply different colors to a stamp for multi-color impressions.  Fabric must be heat set on reverse side to make permanent.

8.Using A Wedge Sponge – Used to apply paint to stamps.  Load paint or ink on flat edge of sponge.  Pat paint or ink onto surface of stamp.  Also used as a tool to sponge color onto a variety of surfaces such as paper, fabric and wood.

Masking A technique of covering a stamped image to protect it from subsequent applications of color.  A method used to create foregrounds and backgrounds.

Instructions:

1.Stamp foreground image onto surface first.
2.Re-stamp image on a second piece of paper or Post it Note™.
3.Cut the second image out.
4.Align cut out image (or mask it) over the first image or foreground image.
5.Stamp second image overlapping the mask
6.Remove the mask.
7.The second stamped image appears to be in the background.

Mirror Image Stamp A flat rubber stamp used as a tool to create a reverse or mirror image of a rubber stamp.

Instructions:

1.Ink a rubber stamp design.
2.Stamp on Mirror Image Stamp
3.The use the Mirror Image to stamp the image onto paper.
4.Image will be reversed.
5.This imprint will be light because it is a second generation print.  Image can be touched up with markers if desired.