My Share: Cake Decorating Nozzle Set By Kestilos


20161214_080009I was so excited to learn I was going to have the opportunity to review Russian Cake Decorating Tips. When they came in the mail – let me tell you – I was very surprised. I thought they would be similar to the size of American tips but that was not the case. They are much bigger in size and require special couplings to attach the tip to the bag. When I was unpacking them my daughter Aurora thought they were big shiny plaything she was going to get —NNOOOOOO!

The picture above is the nice little storage box these 23 tips came in. It is especially nice because the box will withstand a lot of wear and tear over the years and keep the tips from getting out of shape with a crushed box which measures 6.3 by 3.1 by 3.5 inches

20161214_080039

The Kestilos Cake Decorating Nozzle set is the ultimate when creating beautiful icing designs on cakes, cupcakes, cookies, or pastries; made of durable stainless steel, the set of 23 Russian Piping Tips includes a Regular 3 Color Coupler, 2 Large Sphere Ball Tips with a 3 Color Coupler, and 5 Disposable Bags plus a downloadable Ebook of instructions and recipes for cake decorating.

20161214_080115

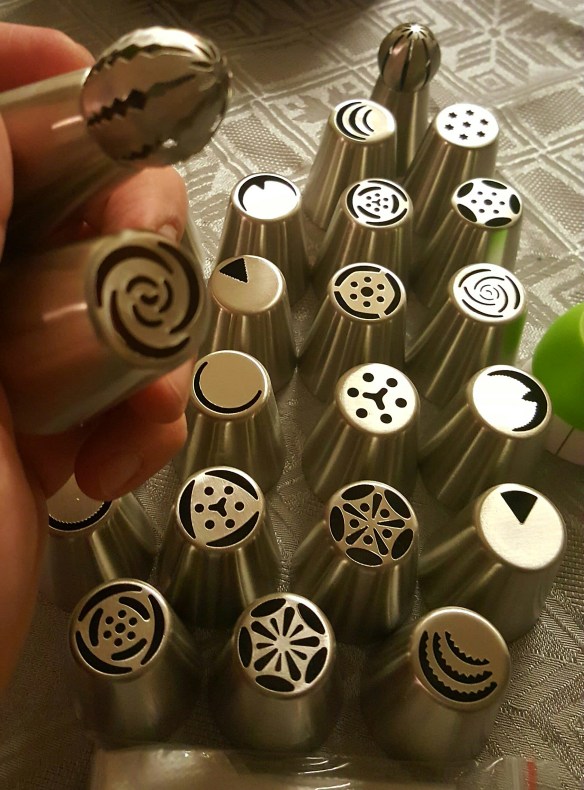
Russian Nozzle Tips allow you to create different designs to create one-of-a-kind icing creations Use the 23 tips to make unique flowers, petals, drops, round or oval shapes, thin and thick lines, or wedges with eye-catching, colorful patterns on cakes, biscuits, cookies, and more; plus the 2 Large Balls offer more icing extravaganzas as accent pieces; with the regular and large 3 color couplers, making unique icing designs is easy.

This set is made of high-quality food-grade 18/8 stainless steel so they are safe to use for adults and children. The two 3 color couplers are made of ABS plastic and are BPA free and non-toxic as are the 5 included disposable pastry bags. All metal and plastic pieces are dishwasher safe and easy to keep clean.

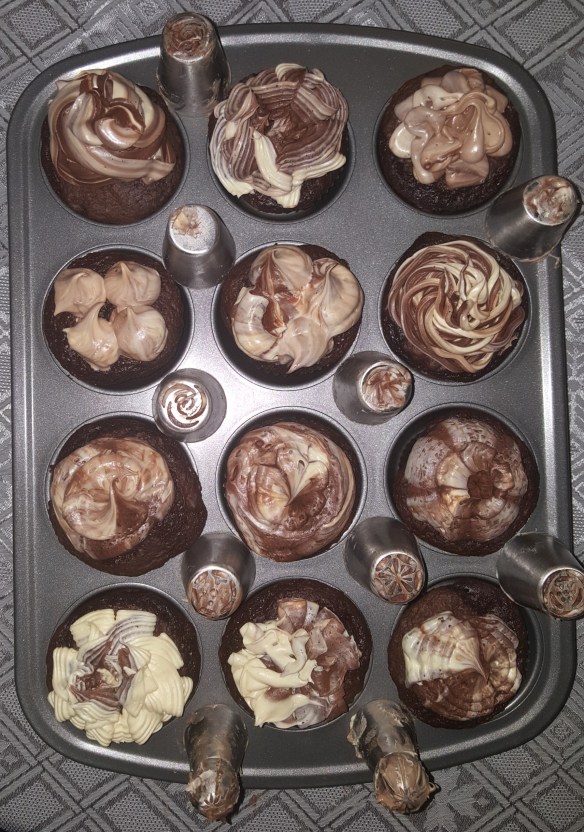
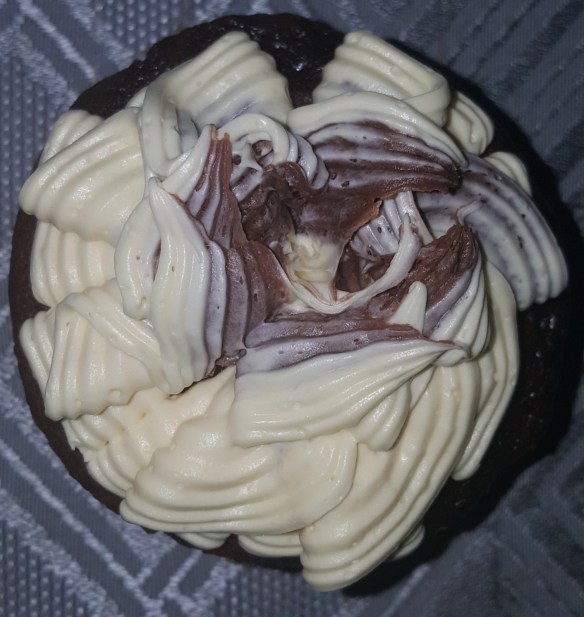
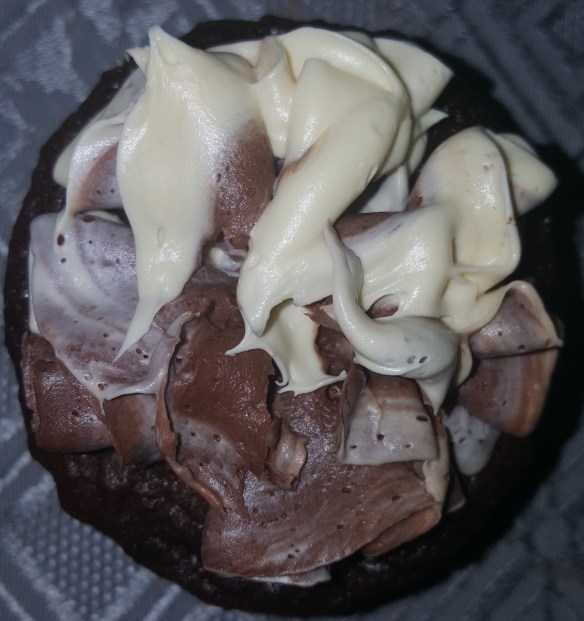
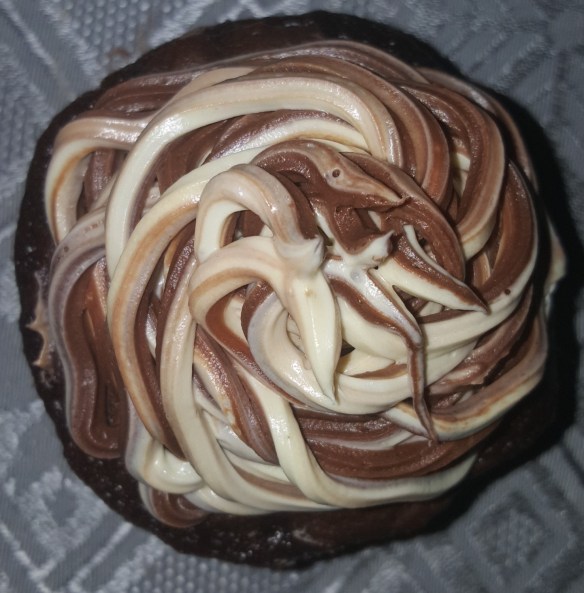
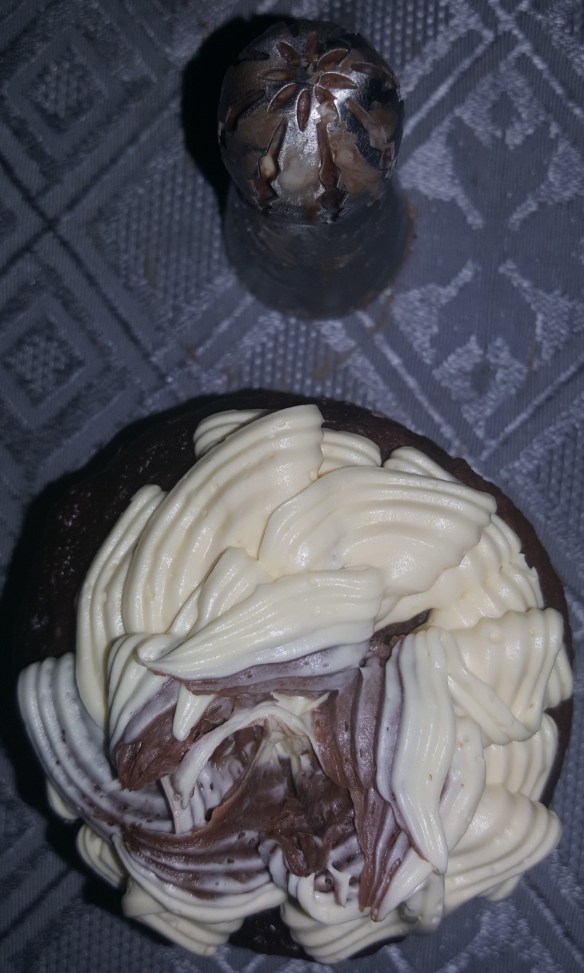
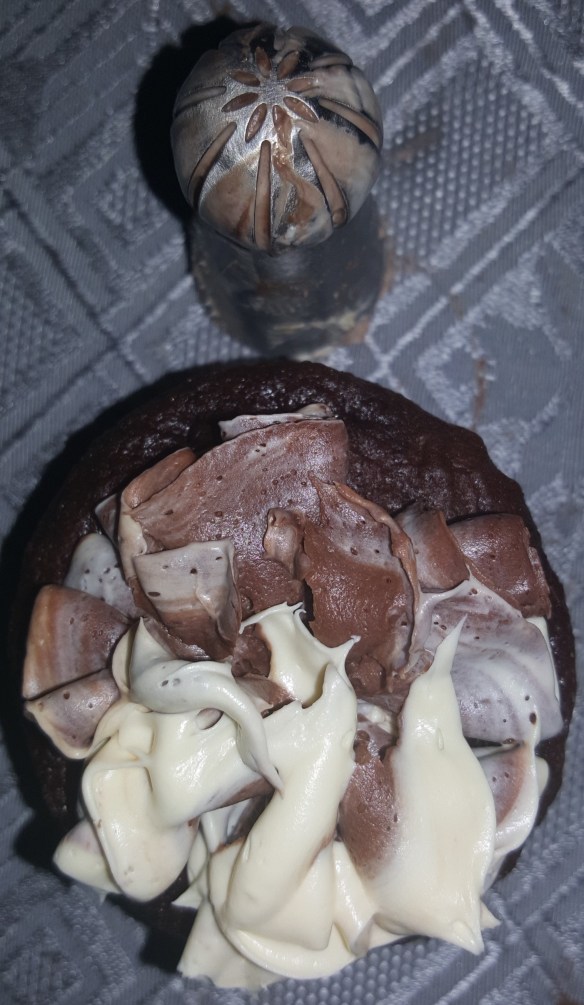
I made cupcakes and made buttercream and fudge frosting to give a marbled look to the project which hopefully you can see well in the pictures. The results were not good. I will need a lot of practice to use these well. I have decorated cakes for almost two decades but was left with a hot mess – all my fault of course. I learned that the icing needed must be much more stiff then a regular buttercream icing. Next time I will thicken it up with powdered sugar so it comes out the way they are supposed to. Here are some pictures of the mess I made – I hope they help you learn about what not to do before you make the same mistake I did. After the holidays I will try this again and see how a better thicker icing comes out and will update this post.

20161216_104517 20161216_104532 20161216_104544 20161216_104555 20161216_104628 20161216_104651


Tricks On How To Make Your Small Living Space Look Bigger By Amelia Atkins

When you are decorating your space, it is easy to get focused only on what you like, but lose sight of what actually works for your home. If you live in an urban environment, it’s very likely that space is the one thing your apartment lacks. Luckily, there are tricks that will make your home look roomier.

Let Colors Do the Work for You!

When it comes to using colors to make your living space look bigger, the rule is simple: the lighter, the better. Dark and bright colors generally tend to absorb more light, thus making a room look smaller. Go for a traditional white, an elegant off-white or beige, a neutral light gray, or a soothing pastel. In smaller homes, it is smart to avoid accent walls although they may work: painting everything in one color visually blends the corners and different planes, and opens up the room.

1

Lighten Up!

As we’ve said, it’s all about making your space visually open. Light is the best way to do that. Don’t close up your windows with heavy curtains or shades. Carefully pick out your lighting. It’s important to illuminate any dark or shady corners. Your preferred lighting should be bright and warm. Avoid huge, extravagant fixtures – they will probably be too overpowering for your room. Choose smaller pendant lights or wall lamps.

Declutter!

The quickest way to suffocate your space is to have too much stuff. Sure, you want your little nest to be cozy and comfortable, but try to rein yourself in. That doesn’t mean you need to throw away half your belongings, natch! In a small home, organization is key! Built-in shelves and closets are ideal for this purpose. Custom built furniture will help you use what you’ve got in an optimal way. To get all those trinkets and bits and pieces out of eyesight, build drawers or get cute decorative boxes. That way, all of that stuff will be packed away, but still within your hand’s reach.

2

Use Those Nooks and Crannies!

Make sure you use any seemingly useless nooks and crannies to build extra storage space. You are probably thinking you don’t have any, but you do. The space under the stairs often goes unused, but is actually perfect for storage units. Make sure your closets and cupboards reach the ceiling. Don’t waste the space under your bed. When choosing a couch, buy one with storage space underneath.

Mirror, Mirror on the Wall!

A great illusion which will make your home look roomier than it actually is would be to use mirrors. Instead of cluttering your walls with paintings, which would only close up your space, use mirrors. Glass, in general, is a great choice for furniture as well – especially for tables. Not to mention that interesting frames can make gorgeous room decorations.

Lose the Doors!

Doors, walls, whatever can go, should go! Open floor plans have been extremely popular over the last few years for this exact reason. Getting rid of unnecessary walls and doors is an essential step to making your home look open and spacious. If, for some reason, you absolutely need doors, opt for glass pane ones, since they do not eat up the space and look great.

Play with Patterns

Using a pattern in a small space might sound counterintuitive, but is actually not a bad idea at all. Don’t cut up the space with too many pieces and a lot of different patterns. Stripes are an optimal choice to give the illusion of width. Use the same pattern on a few choice pieces to add some flare to your home design.

As you can see, just because your home is on the small side, that doesn’t mean it has to feel cramped or claustrophobic. With just a bit of effort and imagination, you can turn your tiny abode into a comfortable, modern looking apartment.

3

PhotoShop Tips & Tricks

38392-photoshop-cs5-photoshop-cs5-logo

  1. Press Tab to hide the toolbar and palettes. Shift + Tab will hide palettes only.
  2. Use Shift + left click on the blue stripe of the toolbar or on the palettes to move them to the side of the window.
  3. Double click on the upper blue stripe in any palette window to minimize it.
  4. Double click on the gray background to open an existing document, while Shift + double click will open Adobe Bridge.
  5. Tired of the dull gray background? Click the Paint Bucket Tool, then Shift + click on the background, and it will change to the color you chose for your foreground.
  6. To select all layers press Alt + Ctrl + A.
  7. Caps Lock will change your cursor to a sharper cross.
  8. Press F to choose from three different display options, which will allow you to make the workbench larger.
  9. To draw a straight line with a brush or pencil, click once at the beginning of your line, and then Shift + click at the endpoint.
  10. Press and hold Ctrl to change any tool to Move Tool; release to change it back.
  11. Use Ctrl + Alt + click to create a copy of an image and move it with your cursor.
  12. Press and hold Space to change any instrument to Hand Tool; release to change it back.
  13. Use Ctrl + Space + click to zoom in; Alt + Space + click to zoom out.
  14. Press Ctrl and + or  to zoom in or out by percentage points.
  15. Hold Alt with the Eyedropper Tool, and you can take a sample for your background color.
  16. Draw a line with the Measure Tool, then press and hold Alt and draw a second line out from the endpoint of the first one to measure the angle between them.
  17. Press Ctrl + Alt + Z or Ctrl + Shift + Z to undo or redo a number of actions.
  18. Use Alt + Backspace and Ctrl + Backspace to paint the image in the foreground or background color, respectively. Shift + Backspace brings up the Paint Bucket window. Alt + Shift + Backspace or Ctrl + Shift + Backspace will paint your image in the foreground or background color, respectively, while leaving transparent patches as they are.
  19. Holding Alt and Free Transforming with Ctrl + T will transform a copy of the object, while Ctrl + Shift + T will repeat the most recent transformations.
  20. The size of the canvas can be easily increased with the help of Crop Tool — expand it over the canvas borders and press OK.
  21. Pressing Ctrl + J creates a copy of the current layer.
  22. Ctrl + Shift + E collates all visible layers, while Ctrl + Shift + Alt + E collates a copy of all visible layers into one new layer.
  23. Select Marquee Tool and hold Alt to make the starting point the center of a selection.
  24. Use Ctrl + D to undo selection and Ctrl + Shift + D to redo it.
  25. When you create a selection with the Marquee Tool, hold Space to move the field and release to continue selecting.
  26. Pressing Shift and + or  changes the layer blend mode to Normal, Dissolve, Multiply, Screen, or Overlay.
  27. With Brush or any other tool chosen, you can change the layer transparency by pressing a number on the keyboard — press one key, e.g. 4, to change transparency to 40%. To make it more precise, press and hold 7 and then press 2 to get 72% transparency.
  28. To hide all layers except the current one, hold Alt and click the eye icon near the Layer icon on the Layer palette.
  29. A color sample can be taken not only in Photoshop, but outside it as well. Resize the Photoshop window so that you see the image to take a sample from, select the Eyedropper Tool, click inside the Photoshop window, and drag the cursor outside.
  30. Choose a layer, hold Alt, and click on the border between the upper layer and the current one to create Clipping Mask, thus the upper layer will be visible within the lower one, and the lower one will replace the mask.
  31. Click Create new layer on the Layer palette while holding Alt to open the window with new layer settings.
  32. Choose a layer, hold Alt, and click on the Trash Can icon on the Layer palette to delete the selected layer without asking.
  33. File > Automate > Contact Sheet II — this command will create a short preview for each file that is currently opened in Photoshop in a separate document, and sign them.
  34. The settings of Move Tool have the Auto Select Layer option, depending on the place you click.
  35. While working with Move Tool, press Alt + Shift + right click on different image objects on different layers, and you will be able to select all those layers.
  36. Select Grid, drag the upper left corner with the Grid Scales, and the count will start from the place where you released the mouse button. Double click in the upper left corner to reset the starting point to its default position.
  37. Create a path with Pen Tool, and hide/show it with Ctrl + Shift + H.
  38. These are the hotkeys for RGB, CMYK, Indexed color Channels:
    Ctrl+”~” = RGB
    Ctrl+1 = red
    Ctrl+2 = green
    Ctrl+3 = blue
    Ctrl+4 = other path
    Ctrl+9 = other path
    Ctrl+”~” = CMYK
    Ctrl+1 = light green
    Ctrl+2 = pink red
    Ctrl+3 = yellow
    Ctrl+4 = black
    Ctrl+5 = other path
    Ctrl+9 = other path
    Ctrl+1 = Indexed
    Ctrl+2 = other path
    Ctrl+9 = other path
  39. Hold Ctrl and expand the red rectangle in the Navigator palette, thus zooming in on the image.
  40. Hold Alt and click on any step in the History to copy that step.
  41. Press Alt and drag a step from one Action to another to make a copy of this Action.
  42. The Lens Flare filter (Filter > Render > Lens Flare) allows you to set exact coordinates by holding Alt and clicking the Preview window.
  43. Hold Shift + Alt to transform an object proportionally, i.e. from the center outwards.
  44. If you select Move Tool and then want to copy something, press and hold Alt and drag the image. Holding Shift + Alt allows you to easily move along the Gridlines.
  45. If you want to level the horizon or uneven outline after scanning, select Measure Tool, draw a line along your curve of choice, then go to Image> Rotate Canvas> Arbitrary. Photoshop will set the angle by itself, and you just need to press OK to correct the image.
  46. When drawing in Illustrator, copy and paste your image in Photoshop, and it will ask you whether you want to save it in pixel or Shape format.
  47. Press Ctrl + R to show the Rules panel.
  48. To center the image precisely, press Ctrl + A, Ctrl + X, Ctrl + V.
  49. Pressing Ctrl + E blends the current layer with the one below it.
  50. Select Brush Tool and change the brush diameter by pressing [ and ].
  51. Double click on the Zoom Tool to return the level of zoom to 100%, while double clicking Hand Tool will expand the image to fit the screen.
  52. When working with a text, press Ctrl + H to hide the selection of symbols that are already selected.
  53. If you have some symbols selected, click in the Choose Font Type window and use keyboard arrows to choose your font type.
  54. Using Alt + left or right arrow changes the symbol spacing by 10, while Ctrl + Alt + left or right arrow changes it by 100.
  55. Using Ctrl + Alt + T creates a copy of the object you want to transform.
  56. Using Ctrl + Alt + up, down, left, or right arrow copies the current layer and moves it by 1 px.
  57. Change your active layer by pressing Alt + [ or ].
  58. Move the active layer up or down using Ctrl + [ or ].
  59. Press Ctrl + to hide Gridlines.
  60. Ctrl + [+] zooms the image in, while Ctrl + [] zooms it out.
  61. Ctrl + Alt + [+] increases the size of the window and zooms it in, and Ctrl + Alt + [] reduces and zooms out.
  62. When using the Polygonal Lasso Tool, press Backspace to undo the most recent step.
  63. Press X to exchange the background and the foreground colors.
  64. Press D to reset the foreground and the background colors to the default values of black and white.
  65. Press F5 to show the Brushes settings palette.
  66. Press F7 to show the Layers palette.
  67. Use Ctrl + left click on the Layer icon in the Layer palette to select the layer contents.
  68. To see the contents of the layer mask, hold Alt and left click on it.
  69. Alt + left click on the Create Layer Mask icon creates a black mask.
  70. When using Polygonal Lasso Tool, hold Shift to draw straight lines with a 45 degree angle tick.
  71. Press Ctrl + G to group the selected layers and organize your work neatly.
  72. Press Ctrl + Shift + N and create a new file with a dialog window pop-up, while pressing Ctrl + Shift + Alt + N will create a new layer in the file you are working with.
  73. The [ and ] keys reduce or increase the Brush size, respectively; Shift + [ or ] change its hardness.
  74. Press Alt to transform Burning Tool into Dodge Tool, and vice versa.
  75. Stamp Tool clones patches of an image (Alt+click to define the patch to clone). This also works even when you have several images opened in Photoshop, or you can clone any selections from any other images — just place them where you can see them on the screen.
  76. Use Ctrl+click on the Layer icon to create object selection in this layer. If you need to select more than one object in several layers, hold down Shift as well.
  77. To blend all the palettes into one, drag the tag of any tab to other palettes and tags, and it will move where you show it.
  78. Pressing Enter while working with the text will create a new line, and Ctrl + Enter or Enter on the digital keyboard will end writing.
  79. You can place a layer on any other open image in Photoshop — this is how a layer copy is created. Hold Shift while dragging to center the layer contents.
  80. Create a new 500×500 px Photoshop file, create a new layer, select Brush Tool with a standard round brush of any diameter, and put a dot in the upper middle part of the image (like the 12 position on a clock). Press Ctrl + Alt + T to create a copy of the dot, which will allow you to transform it. Drag the Pivot Point, the dot in the center of the transformed object, and put it right into the center of the image, then write an angle of 30 degrees and press OK. And now for the magic! Press Ctrl + Shift + Alt + T ten times, and you’ll see it!
  81. You can choose any layer with Move Tool by clicking the necessary part of an object while holding down Ctrl.
  82. Add yet another layer to a layer group by holding Ctrl + Shift and clicking a part of the object located on another layer.
  83. You can delete several layers at once by simply dragging a group of layers to the Trash Can icon in the Layer palette.
  84. Delete the current layer by holding Alt and pressing L three times.
  85. Having applied a filter, you can lighten it up with Fade by pressing Shift + Ctrl + F.
  86. Hold Alt and drag a layer mask to another layer to copy the mask.
  87. A vertical Gridline can be easily transformed into a horizontal one, and vice versa, by selecting Move Tool, holding Alt, and left clicking the Gridline.
  88. When you use Save for Web, your document information is lost. To preserve it, use Save As.
Please read more from the original source: https://brightside.me/inspiration-tips-and-tricks/88-brilliant-little-tips-for-photoshop-youll-wish-youd-known-earlier-48005/

Moving: Packing The Bathroom

How to Pack Up Your Bed and Bath

  • Move dressers with the contents still in drawers to avoid packing and unpacking again. Pack linens and towels from the closet in boxes.
  • Keep valuable or sentimental jewelry with you as you travel to your new home. For everyday pieces or extra baubles, try these jewelry packing methods.
  • Makeup can be fragile, so follow our makeup packing tutorial for tips and tricks to protect palettes and delicate bottles from damage.
  • Stow shoes in the bottom of your wardrobe boxes or follow the ‘burrito method’ for another way to pack shoes.
  • Group most-played-with toys together to make unpacking easier. Pack toys in boxes and use plenty of crushed packing paper to keep them from shifting around inside the box during transit.
  • Baby gear should be wrapped in padded paper or moving blankets if it’s bulky and won’t fit in a box. Check out our best tips for moving baby items like strollers, bouncers, and more.
  • Keep daily medications and toiletries with you as you travel to your new home. Bring enough for a few extra days as a precaution, then carefully pack medicines and toiletries that you use less often in a small box.


SOURCE: http://www.upack.com/moving-resources/packing-tips.asp

MOVING: How To Pack – Tips

How to Pack for a Move

Let’s look at a few general packing tips to get started, then break it down by room or specific item.

  • Start packing early. To make the job manageable, begin boxing up the items you use less frequently—like books, knickknacks, or seasonal items—a few weeks before your move date. Save everyday use items until the end.
  • Prepare your boxes for moving. Reinforce the bottom of every box with packing tape, then line the box with crushed packing paper for extra cushion. Use more paper as ‘filler’ to eliminate empty spaces.
  • Make the most of each box. The less space your items have to move around in the box, the lower the chance of damage, so pack as much as you can into each box. This will also make loading easier—uniform boxes stack much better than odd-shaped items that aren’t boxed up.
  • Label boxes well. Pack each room in separate boxes and clearly mark the box with the contents and what room it’s destined for.
  • Pack heavy items in small boxes. Overweight boxes are difficult to lift, and could cause injury. Keep the weight of the boxes at a manageable level with this technique (especially helpful when you’re packing books).
  • Leave light-weight linens and clothing in their drawers. This is a big time (and space) saver!
  • Pack extra linens or pillows in large kitchen trash bags. Then use the bags as cushions or fillers as you load.
  • Disassemble as many items as you can. Remove feet or legs from furniture, take lampshades off of the base, etc. This makes it much easier to load your items into the moving container.
  • Pack valuables and essentials separately. Jewelry, medications, daily toiletries and important documents are items we recommend that you keep with you during the move.


SOURCE: http://www.upack.com/moving-resources/packing-tips.asp